Willow and Hazel Craft from the garden

I’m becoming interested in creating craft from materials grown and found in my garden. Not only is it hugely satisfying, it adds another dimension to the garden and costs next to nothing.

Willow hanging heart
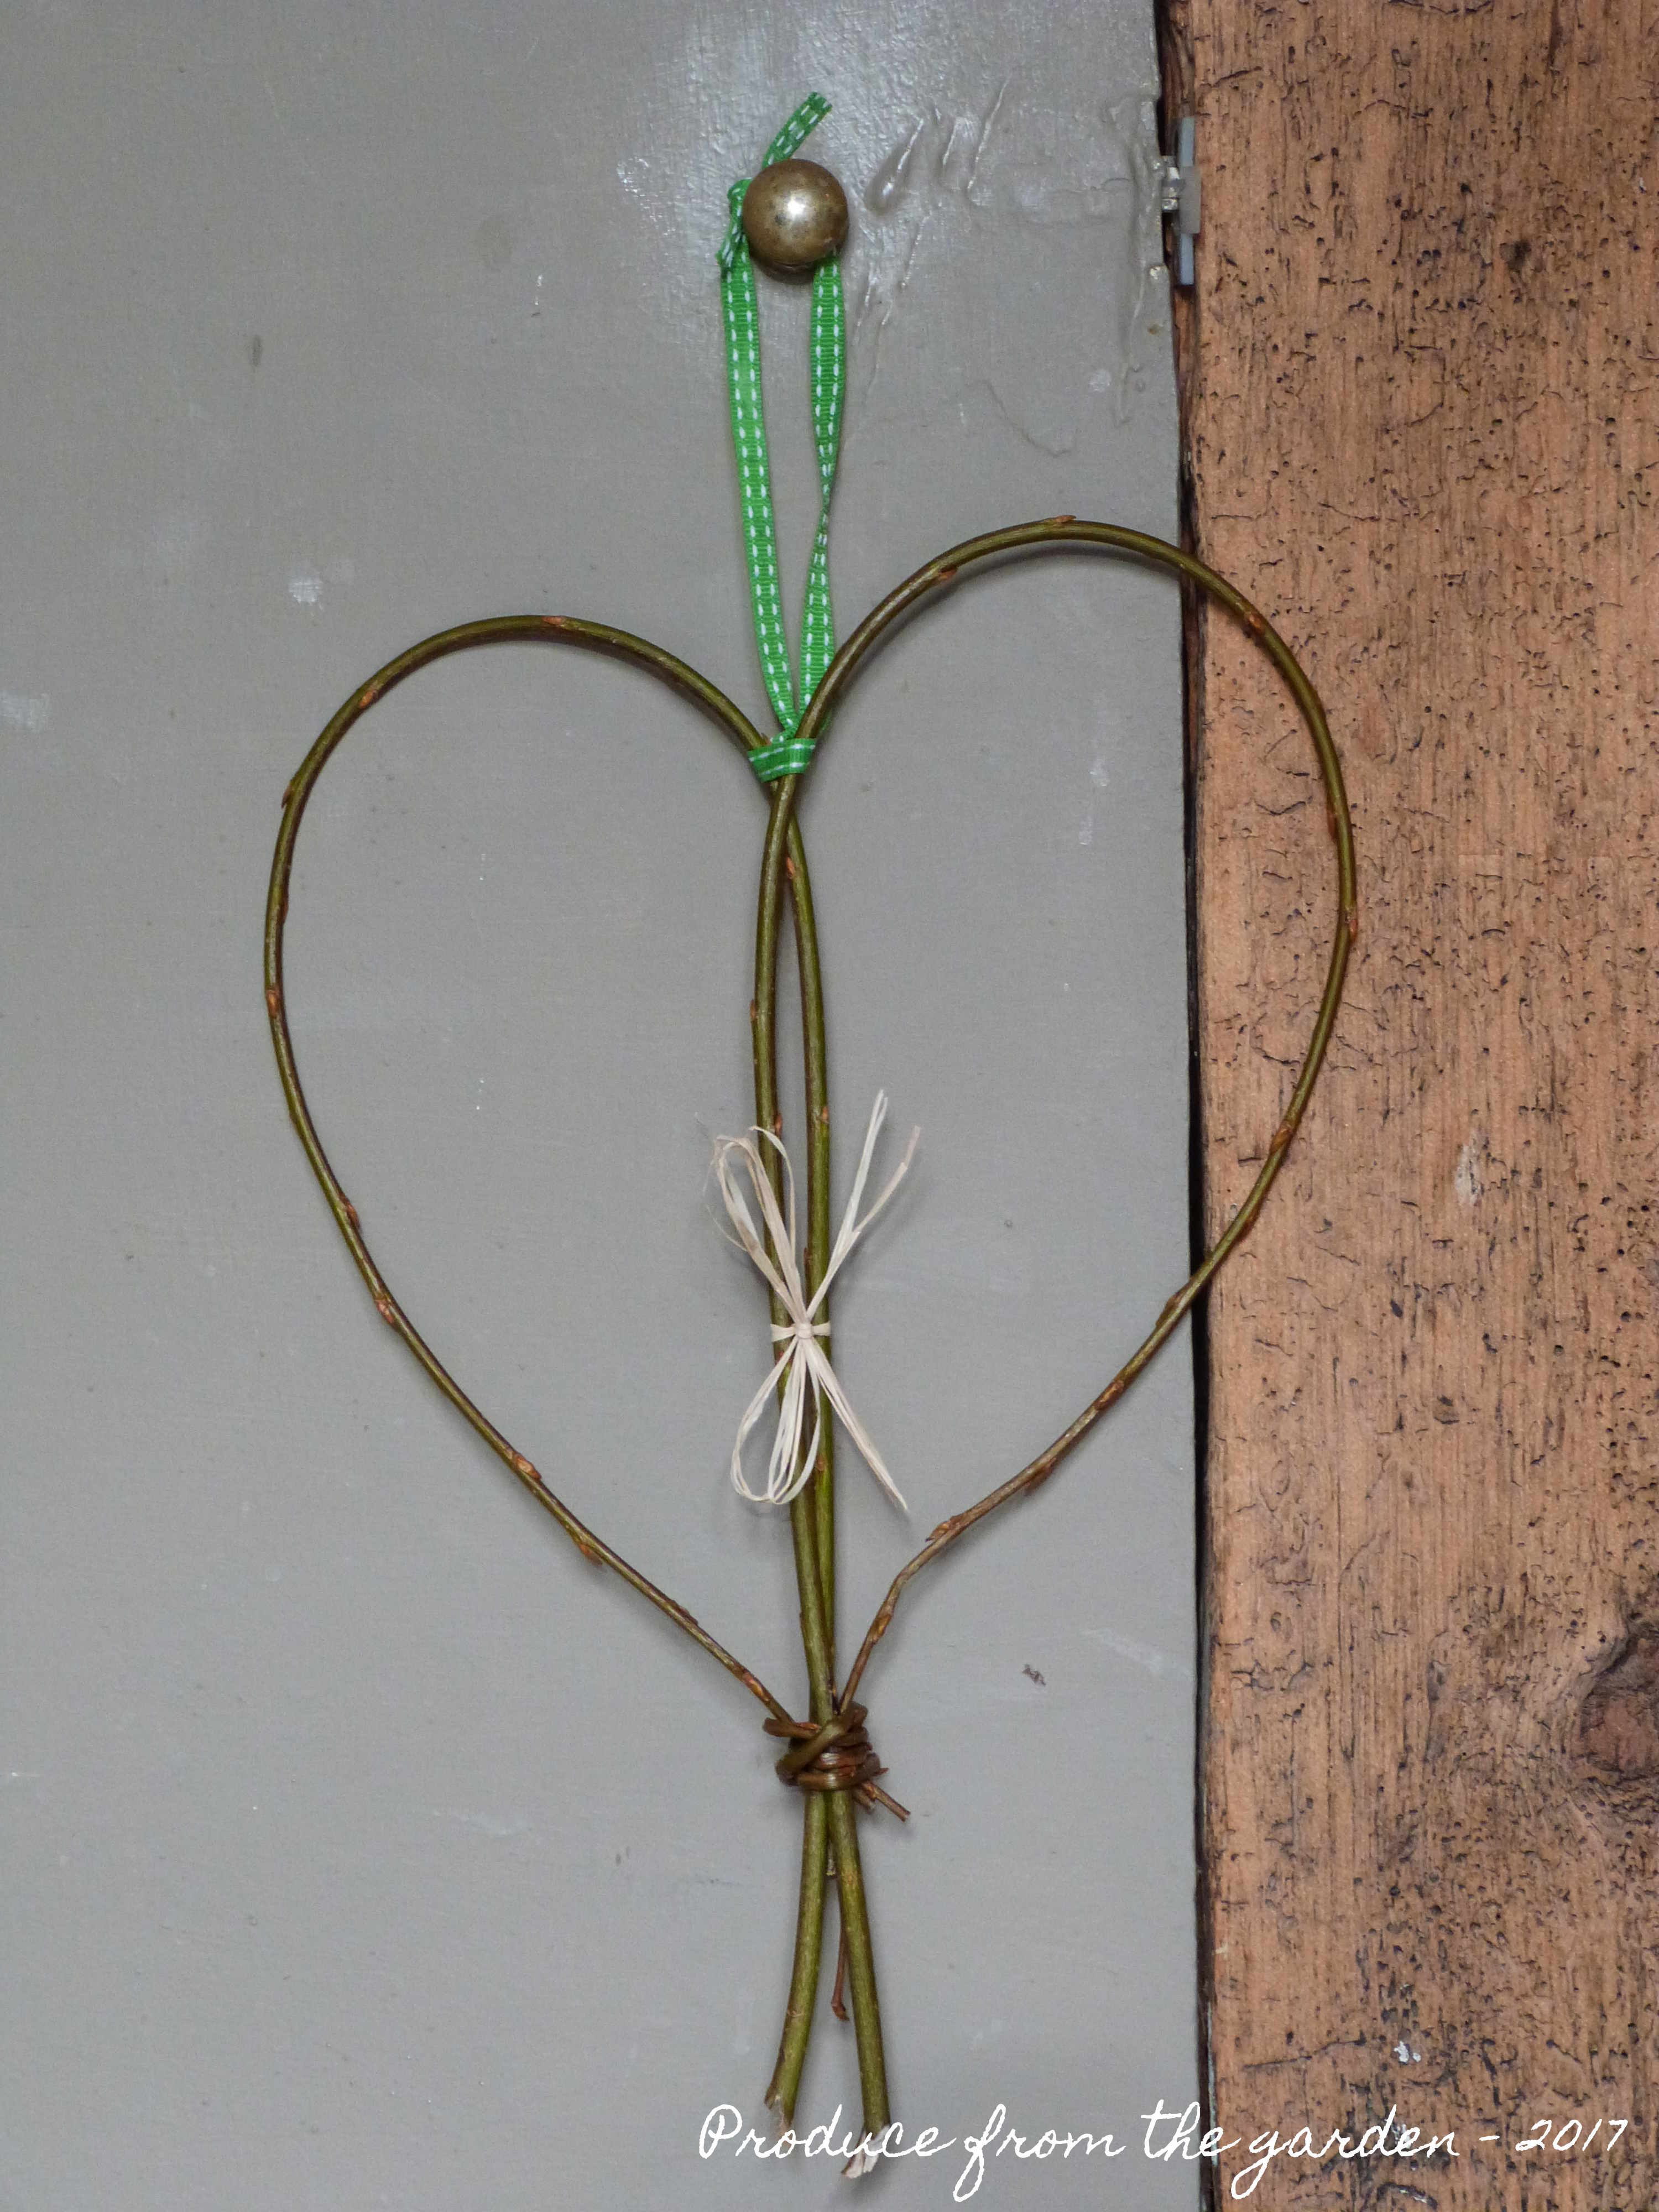
This willow heart I made hangs from a cupboard door

Hazel gateA homemade gate from garden hazel, a new entrance to my kitchen garden.

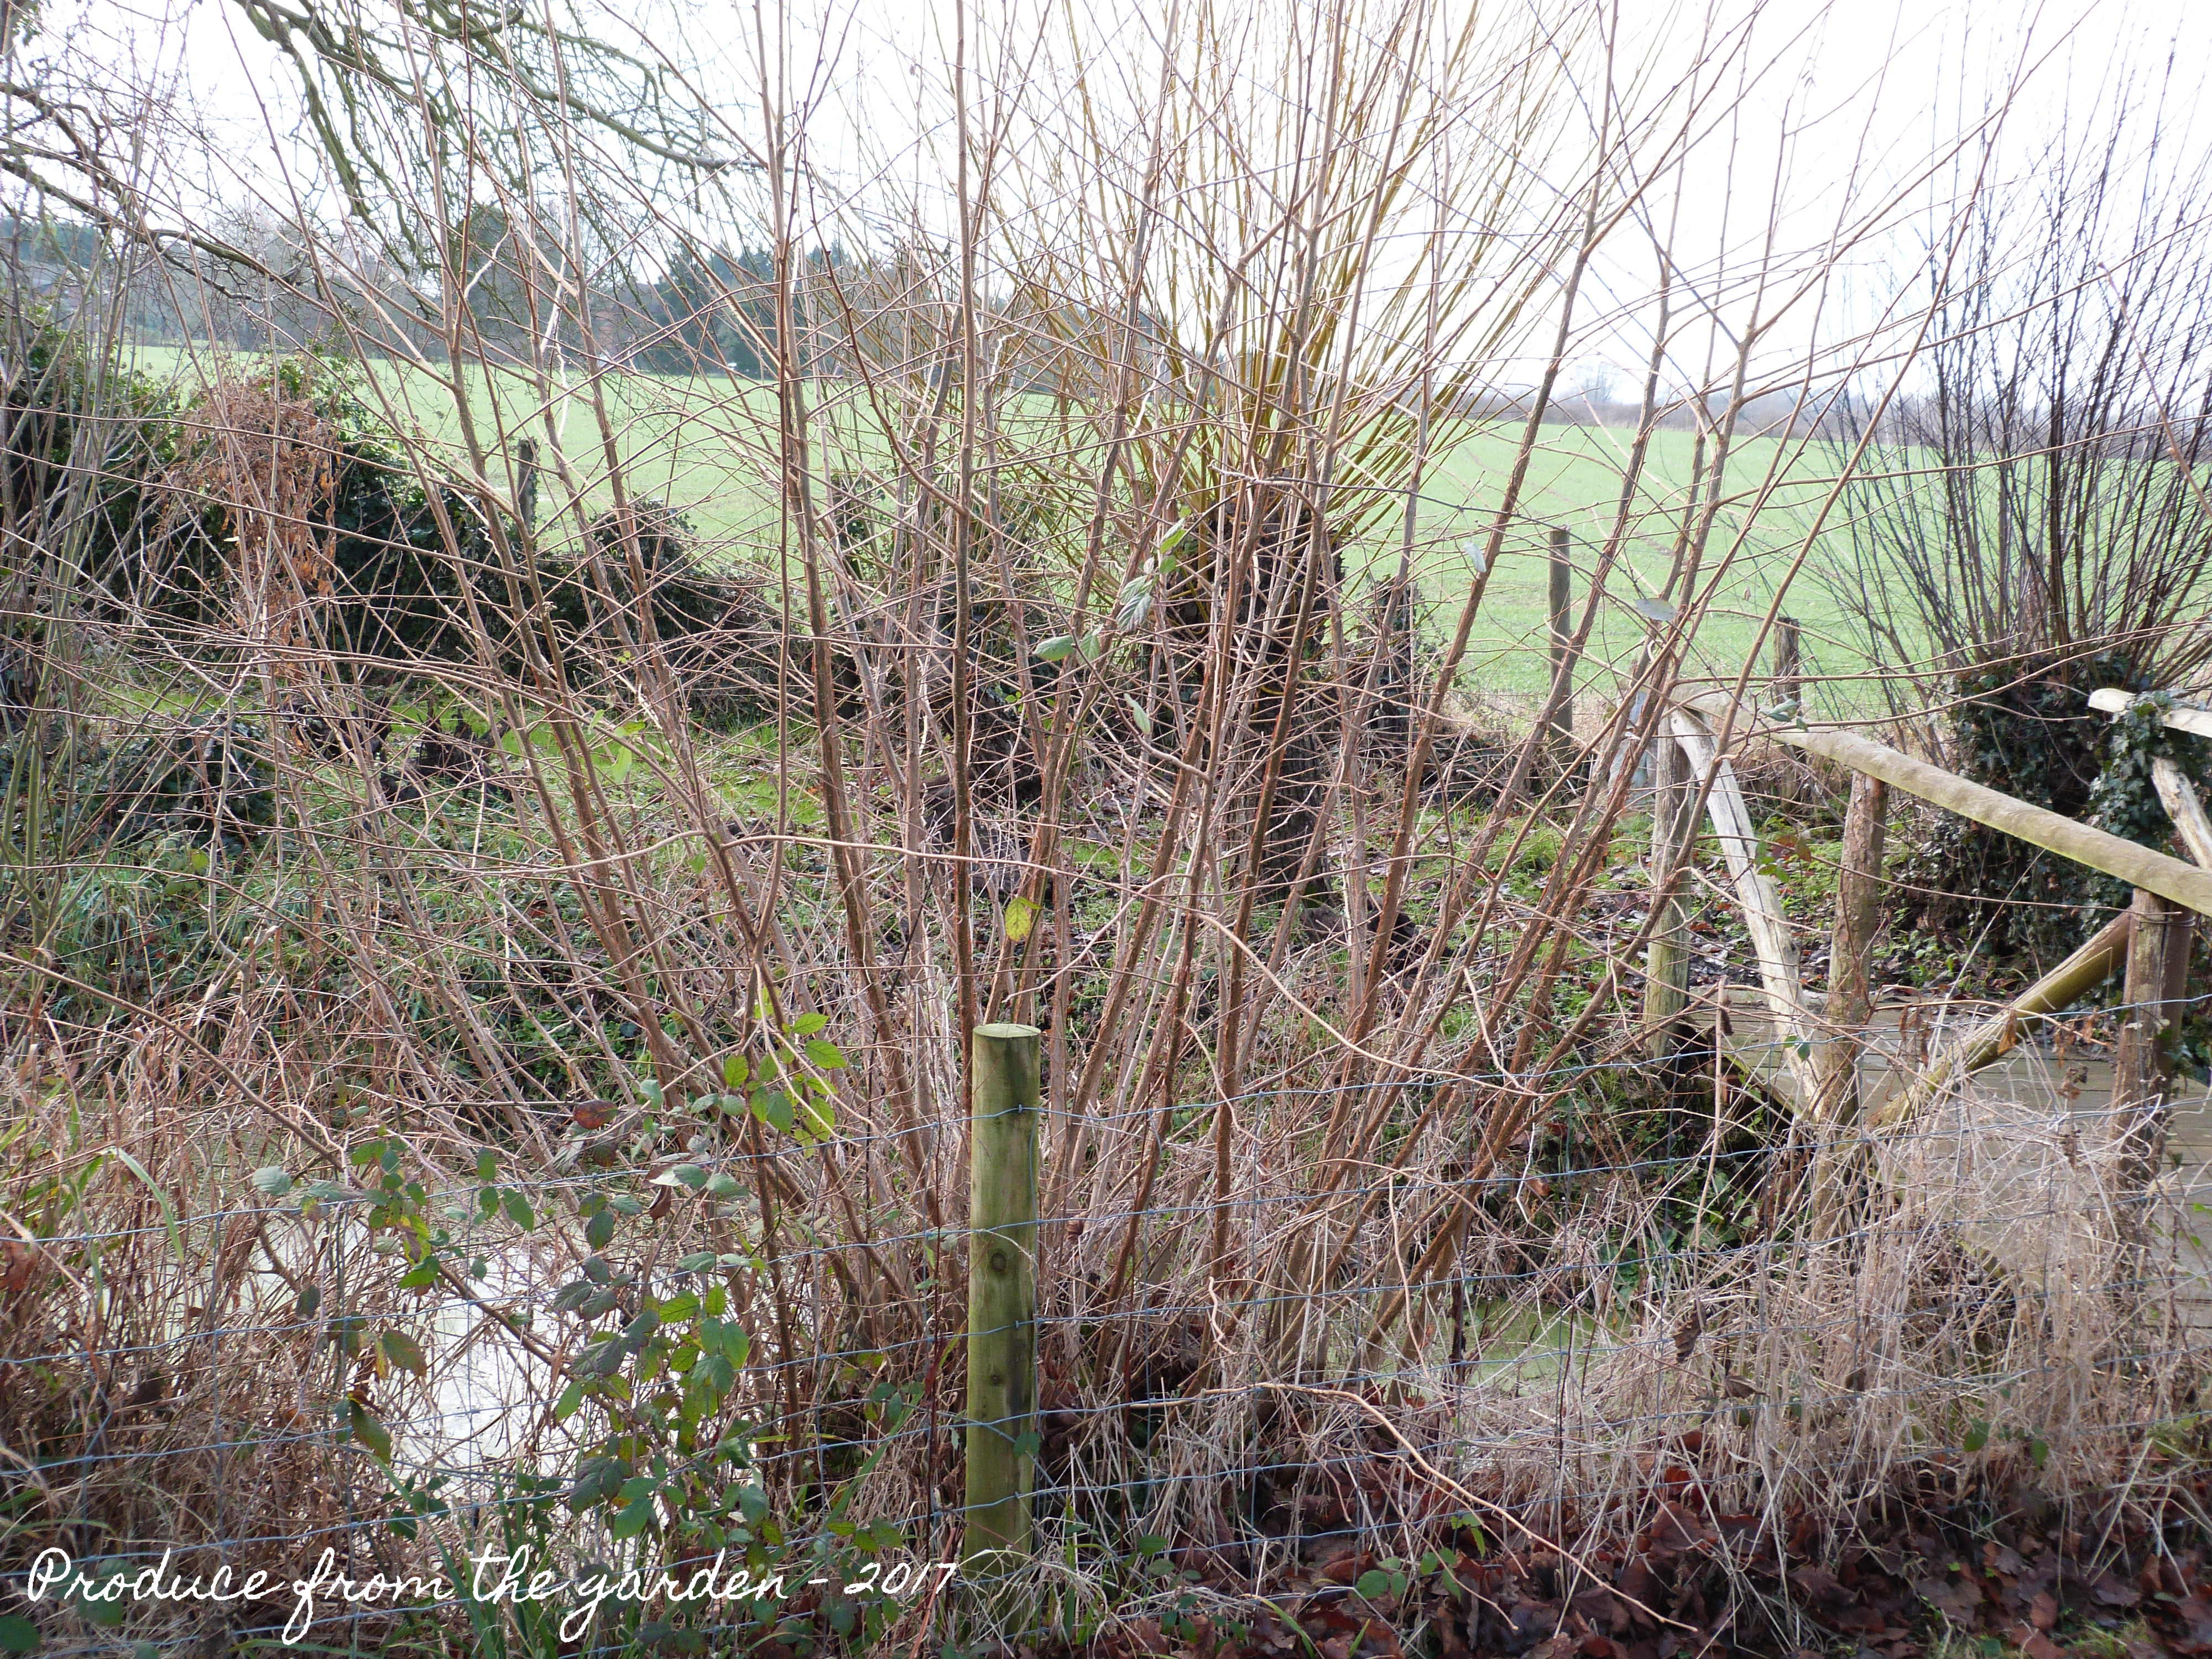
Coppicing (cutting back a tree to ground level periodically to stimulate growth) is a great way to keep certain garden trees to a manageable size, whilst also providing you with a crop of crafting material from your garden.  I’ve just been coppicing my Hazel and Willow, it needs to be cut in winter when the tree is dormant, before it bursts into leaf. I have six Hazel trees, the idea is that I coppice one or two a year, I then leave them to grow for 4-5 years, before coppicing again.

Hazel before coppicing
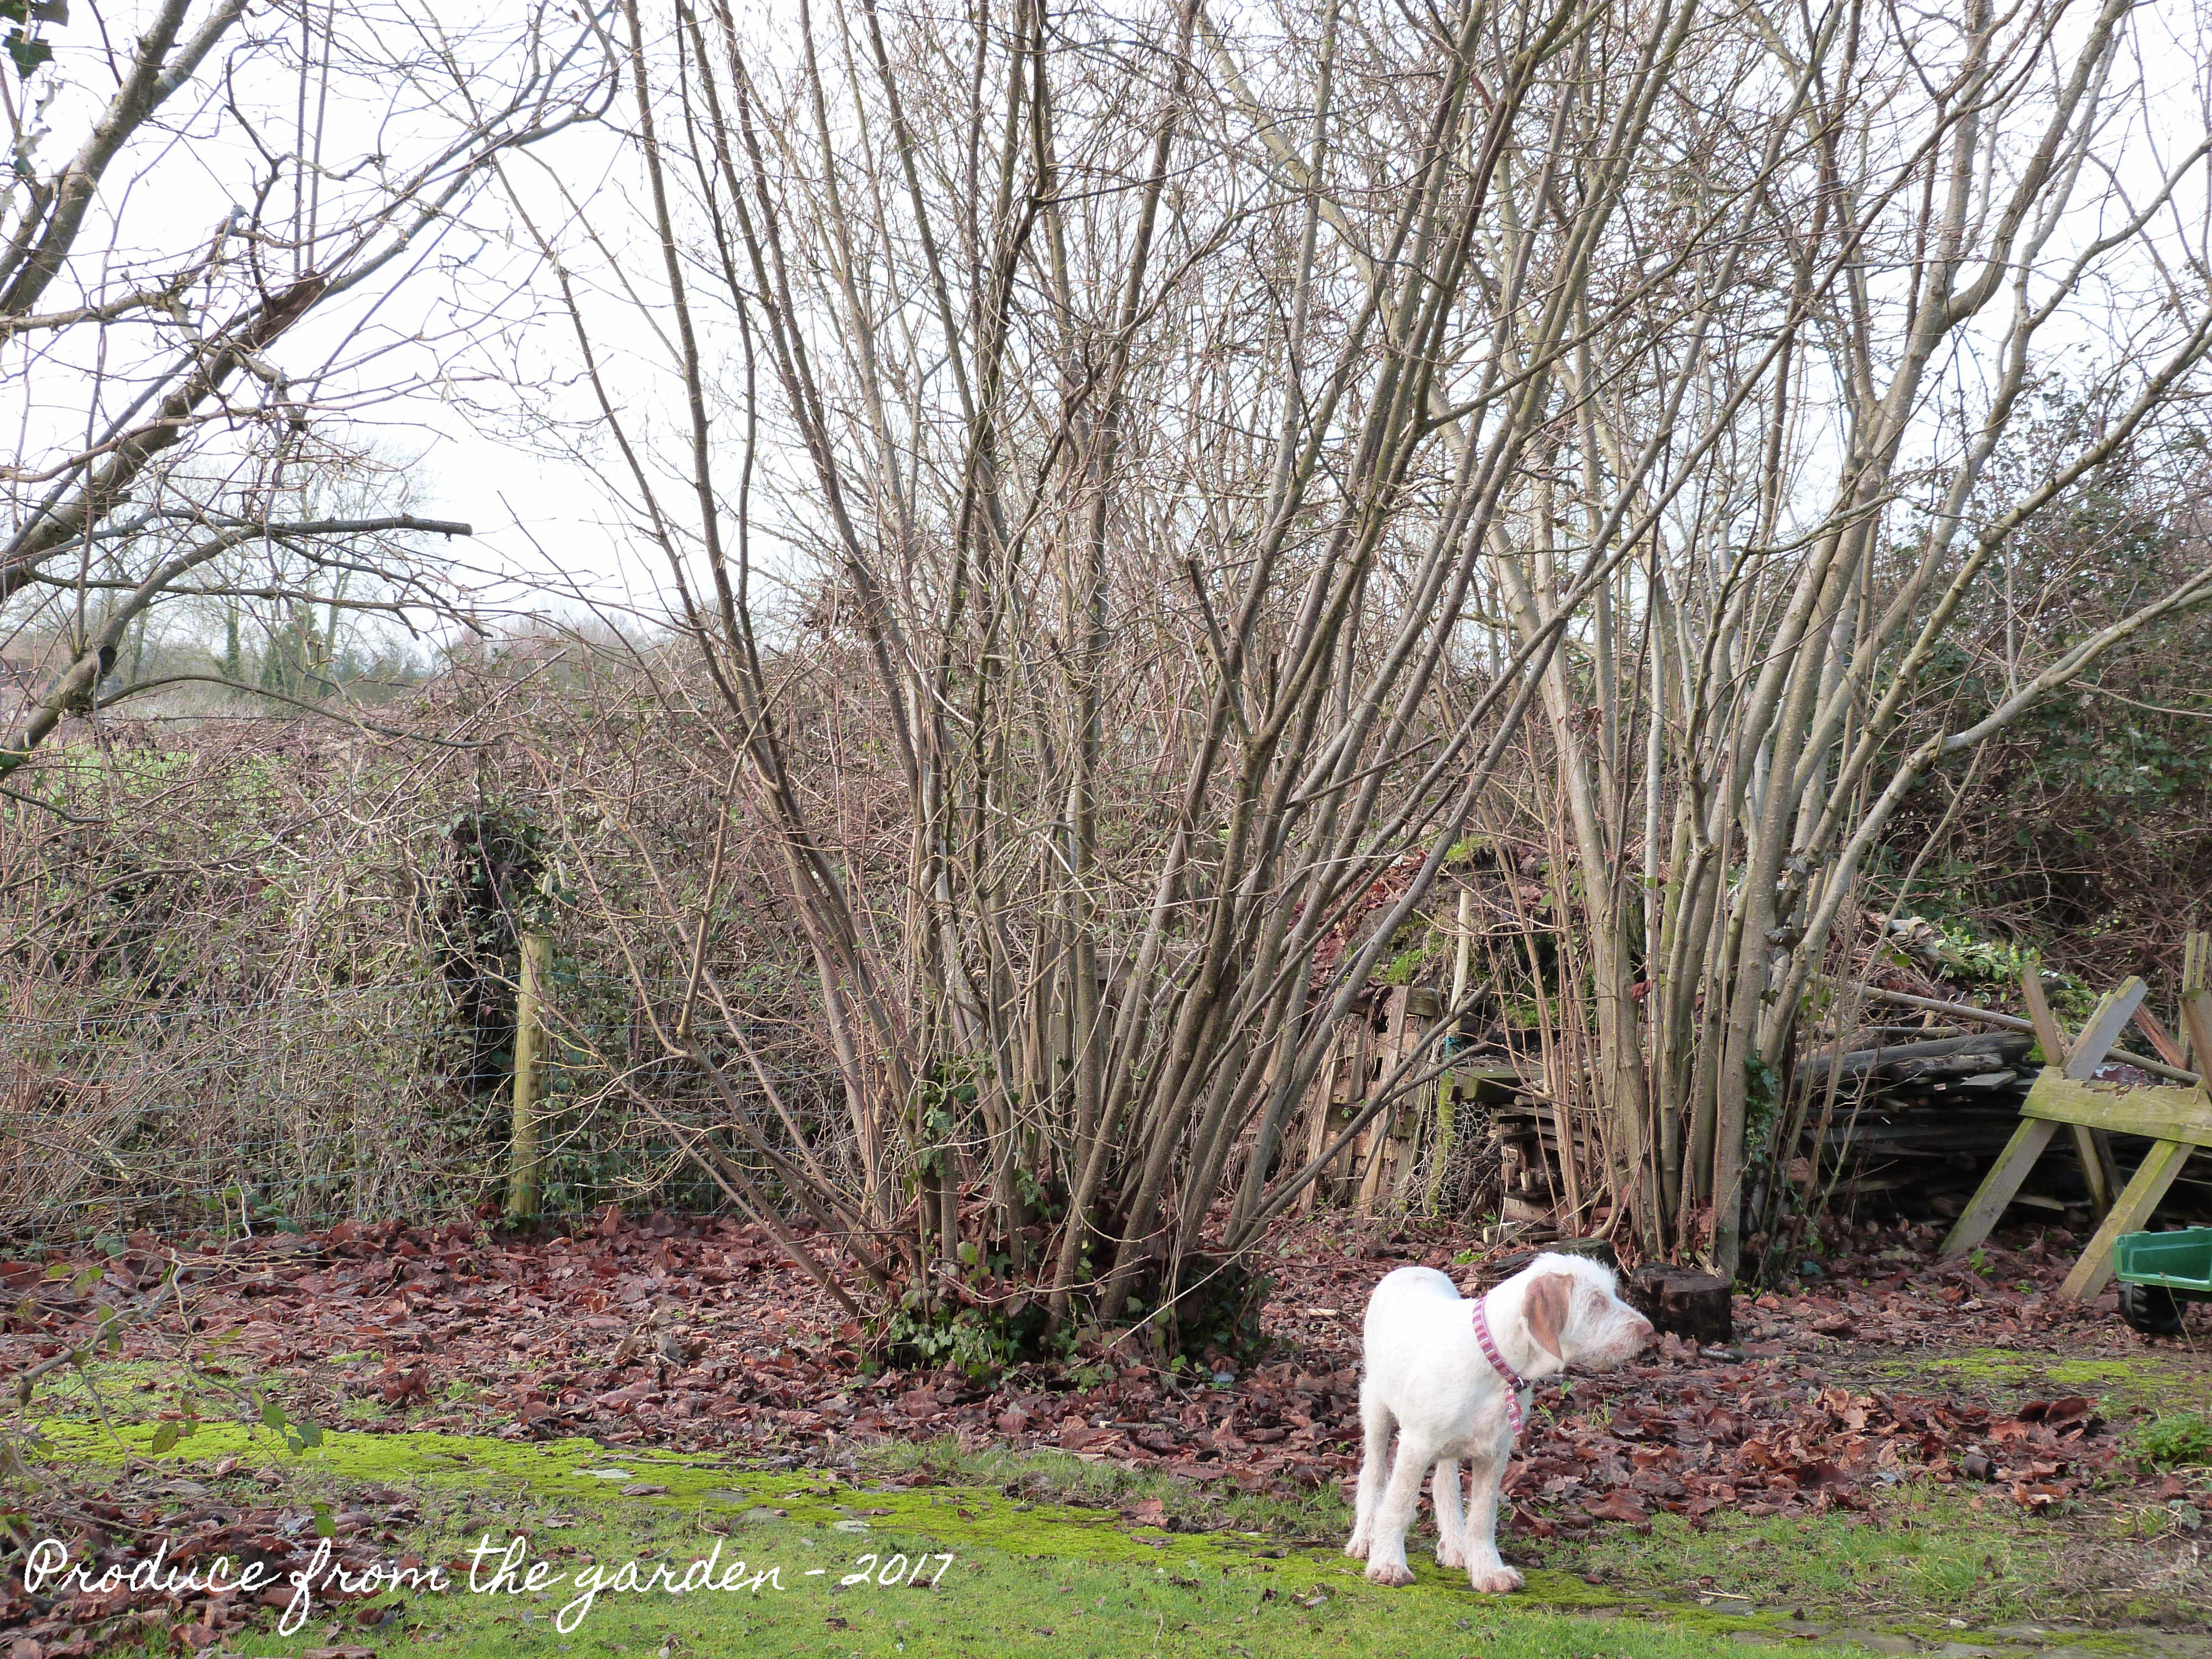
The hazel before coppicing

Coppiced Hazel stumps
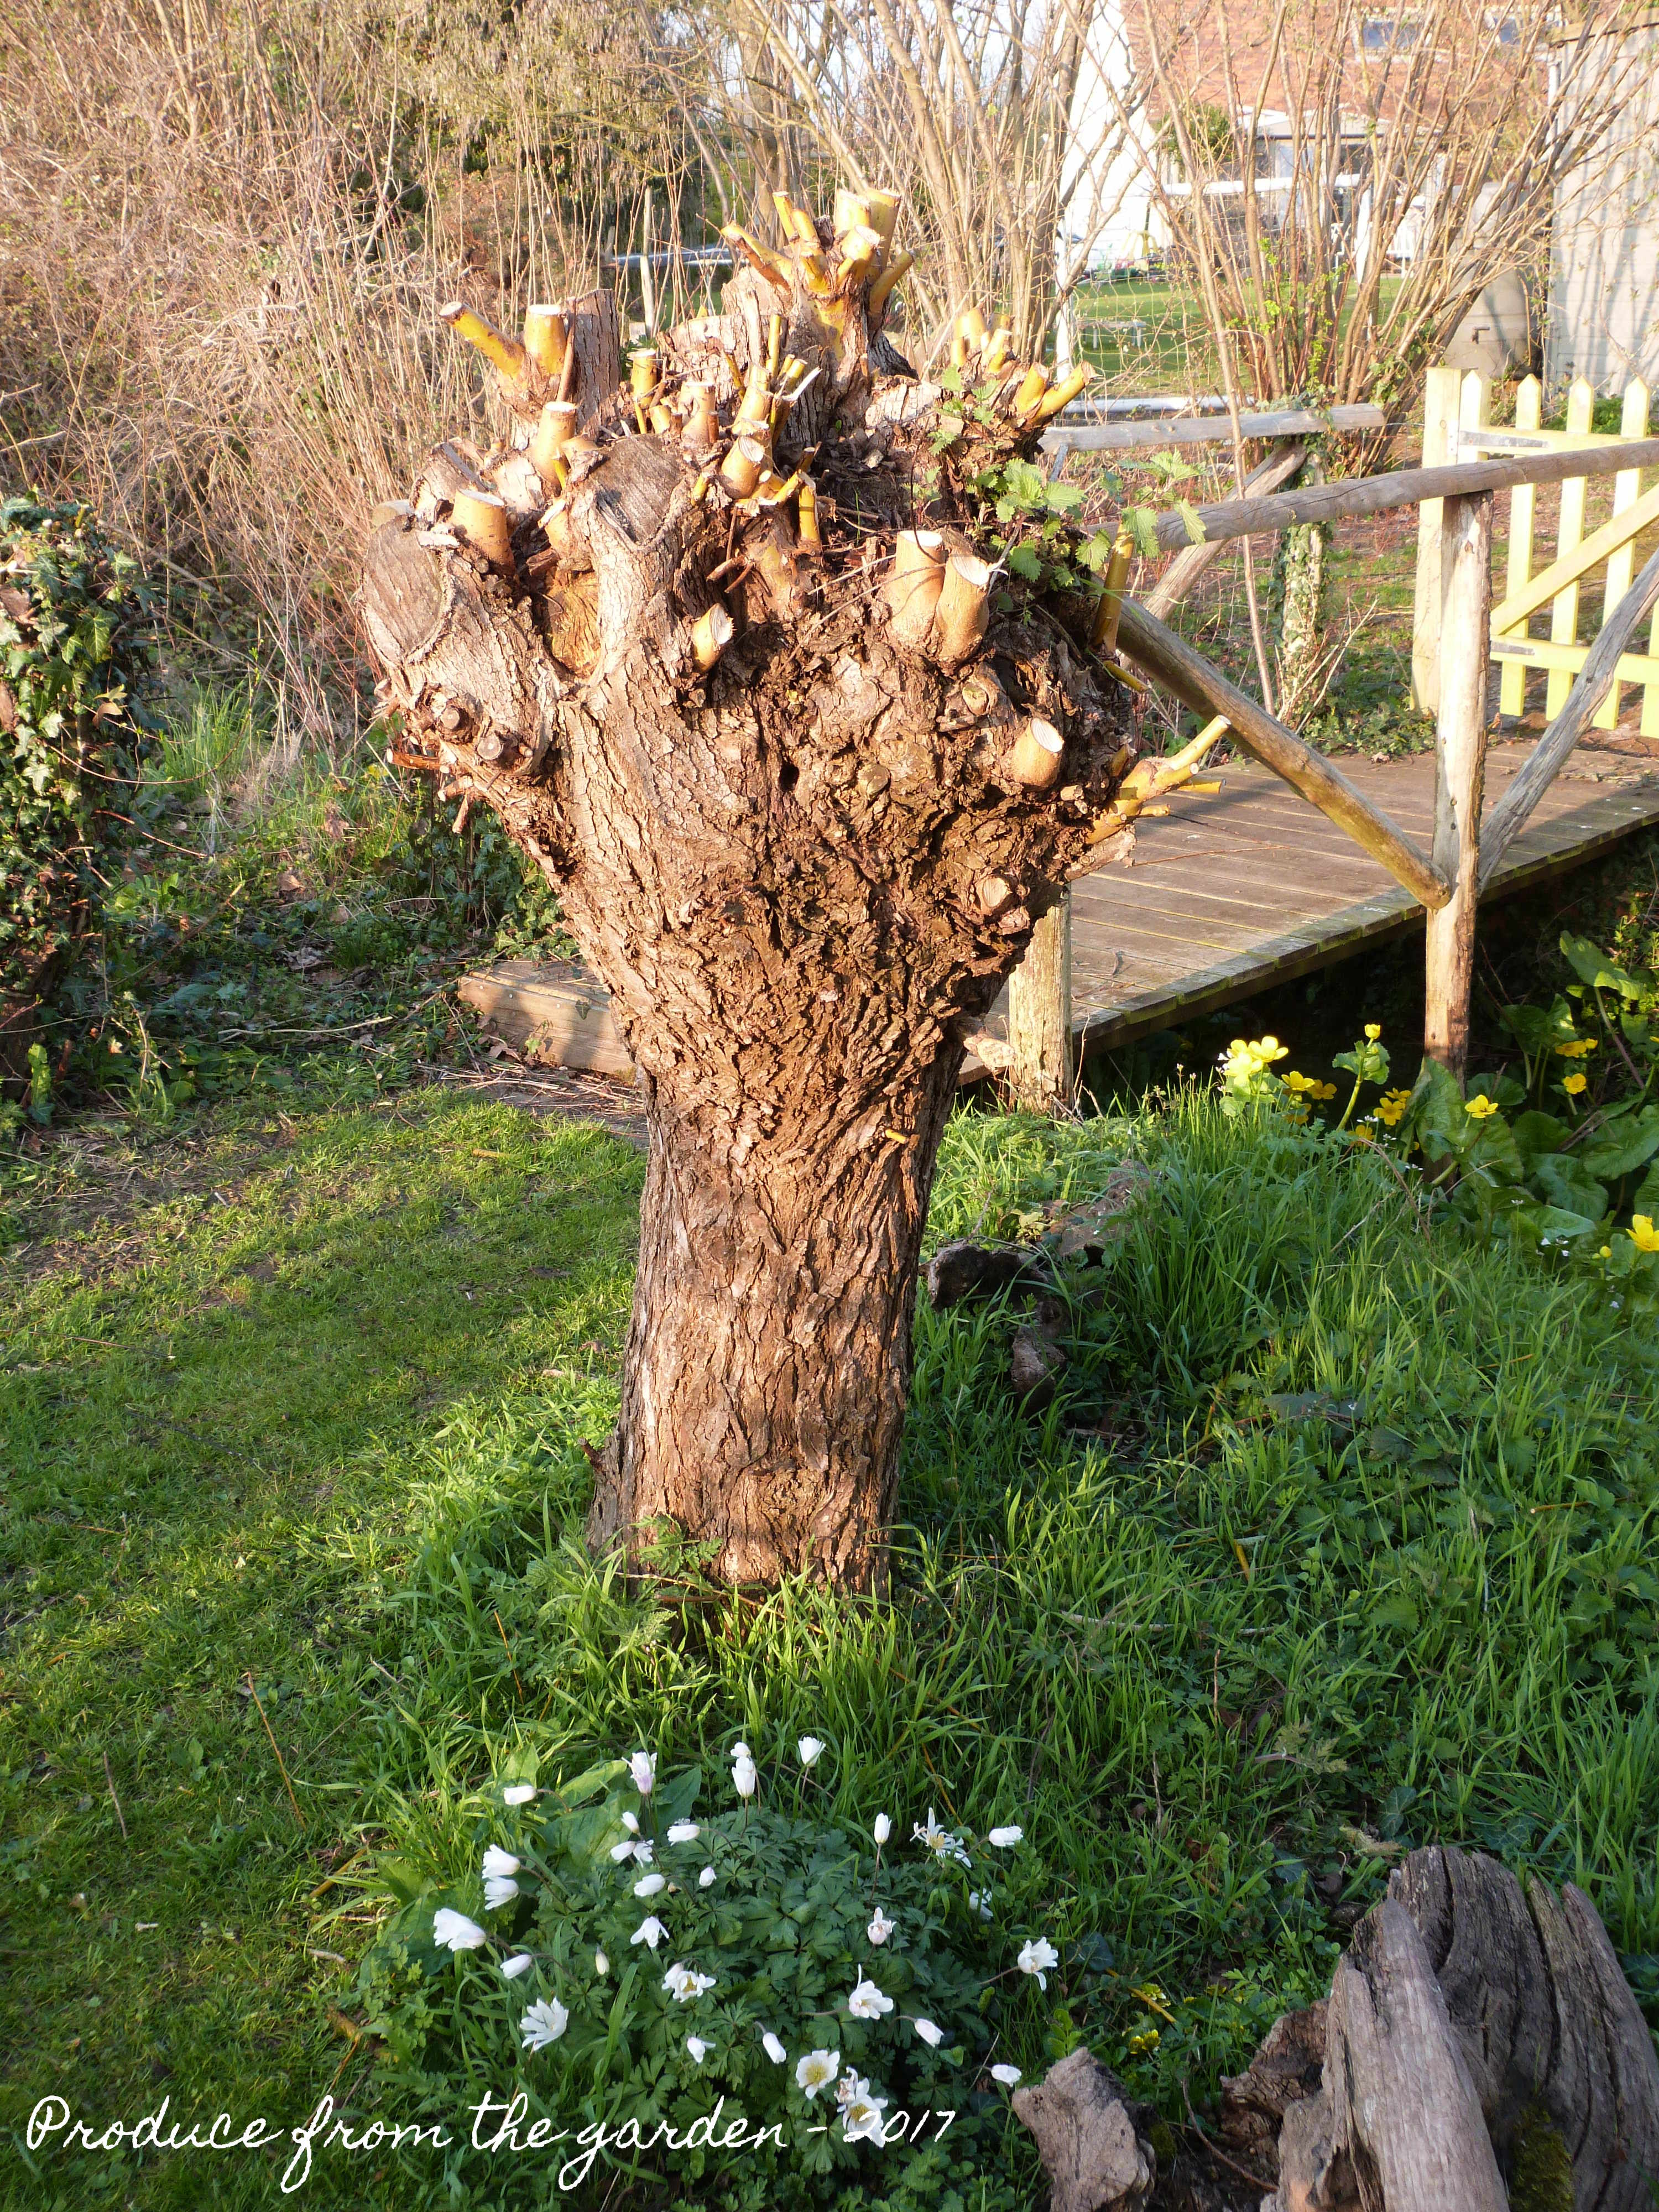
The coppiced stumps of hazel

1 year old hazelHazel with one years growth after coppicing

2 year old hazelHazel with two years growth after coppicing

The Willow, a speedier crop than Hazel, is coppiced one a year. I have three willow trees, all different varieties providing me with yellow, green and nearly black willow whips. This year I thought I’d increase my willow crop, planting a couple of the coppiced willow whips into the ground. It couldn’t be simpler, you just push the end into damp ground and it will root very quickly. This should be kept in mind, don’t use the willow whips as stakes in the ground for projects unless you want a tree there!

Willow ready to be cut
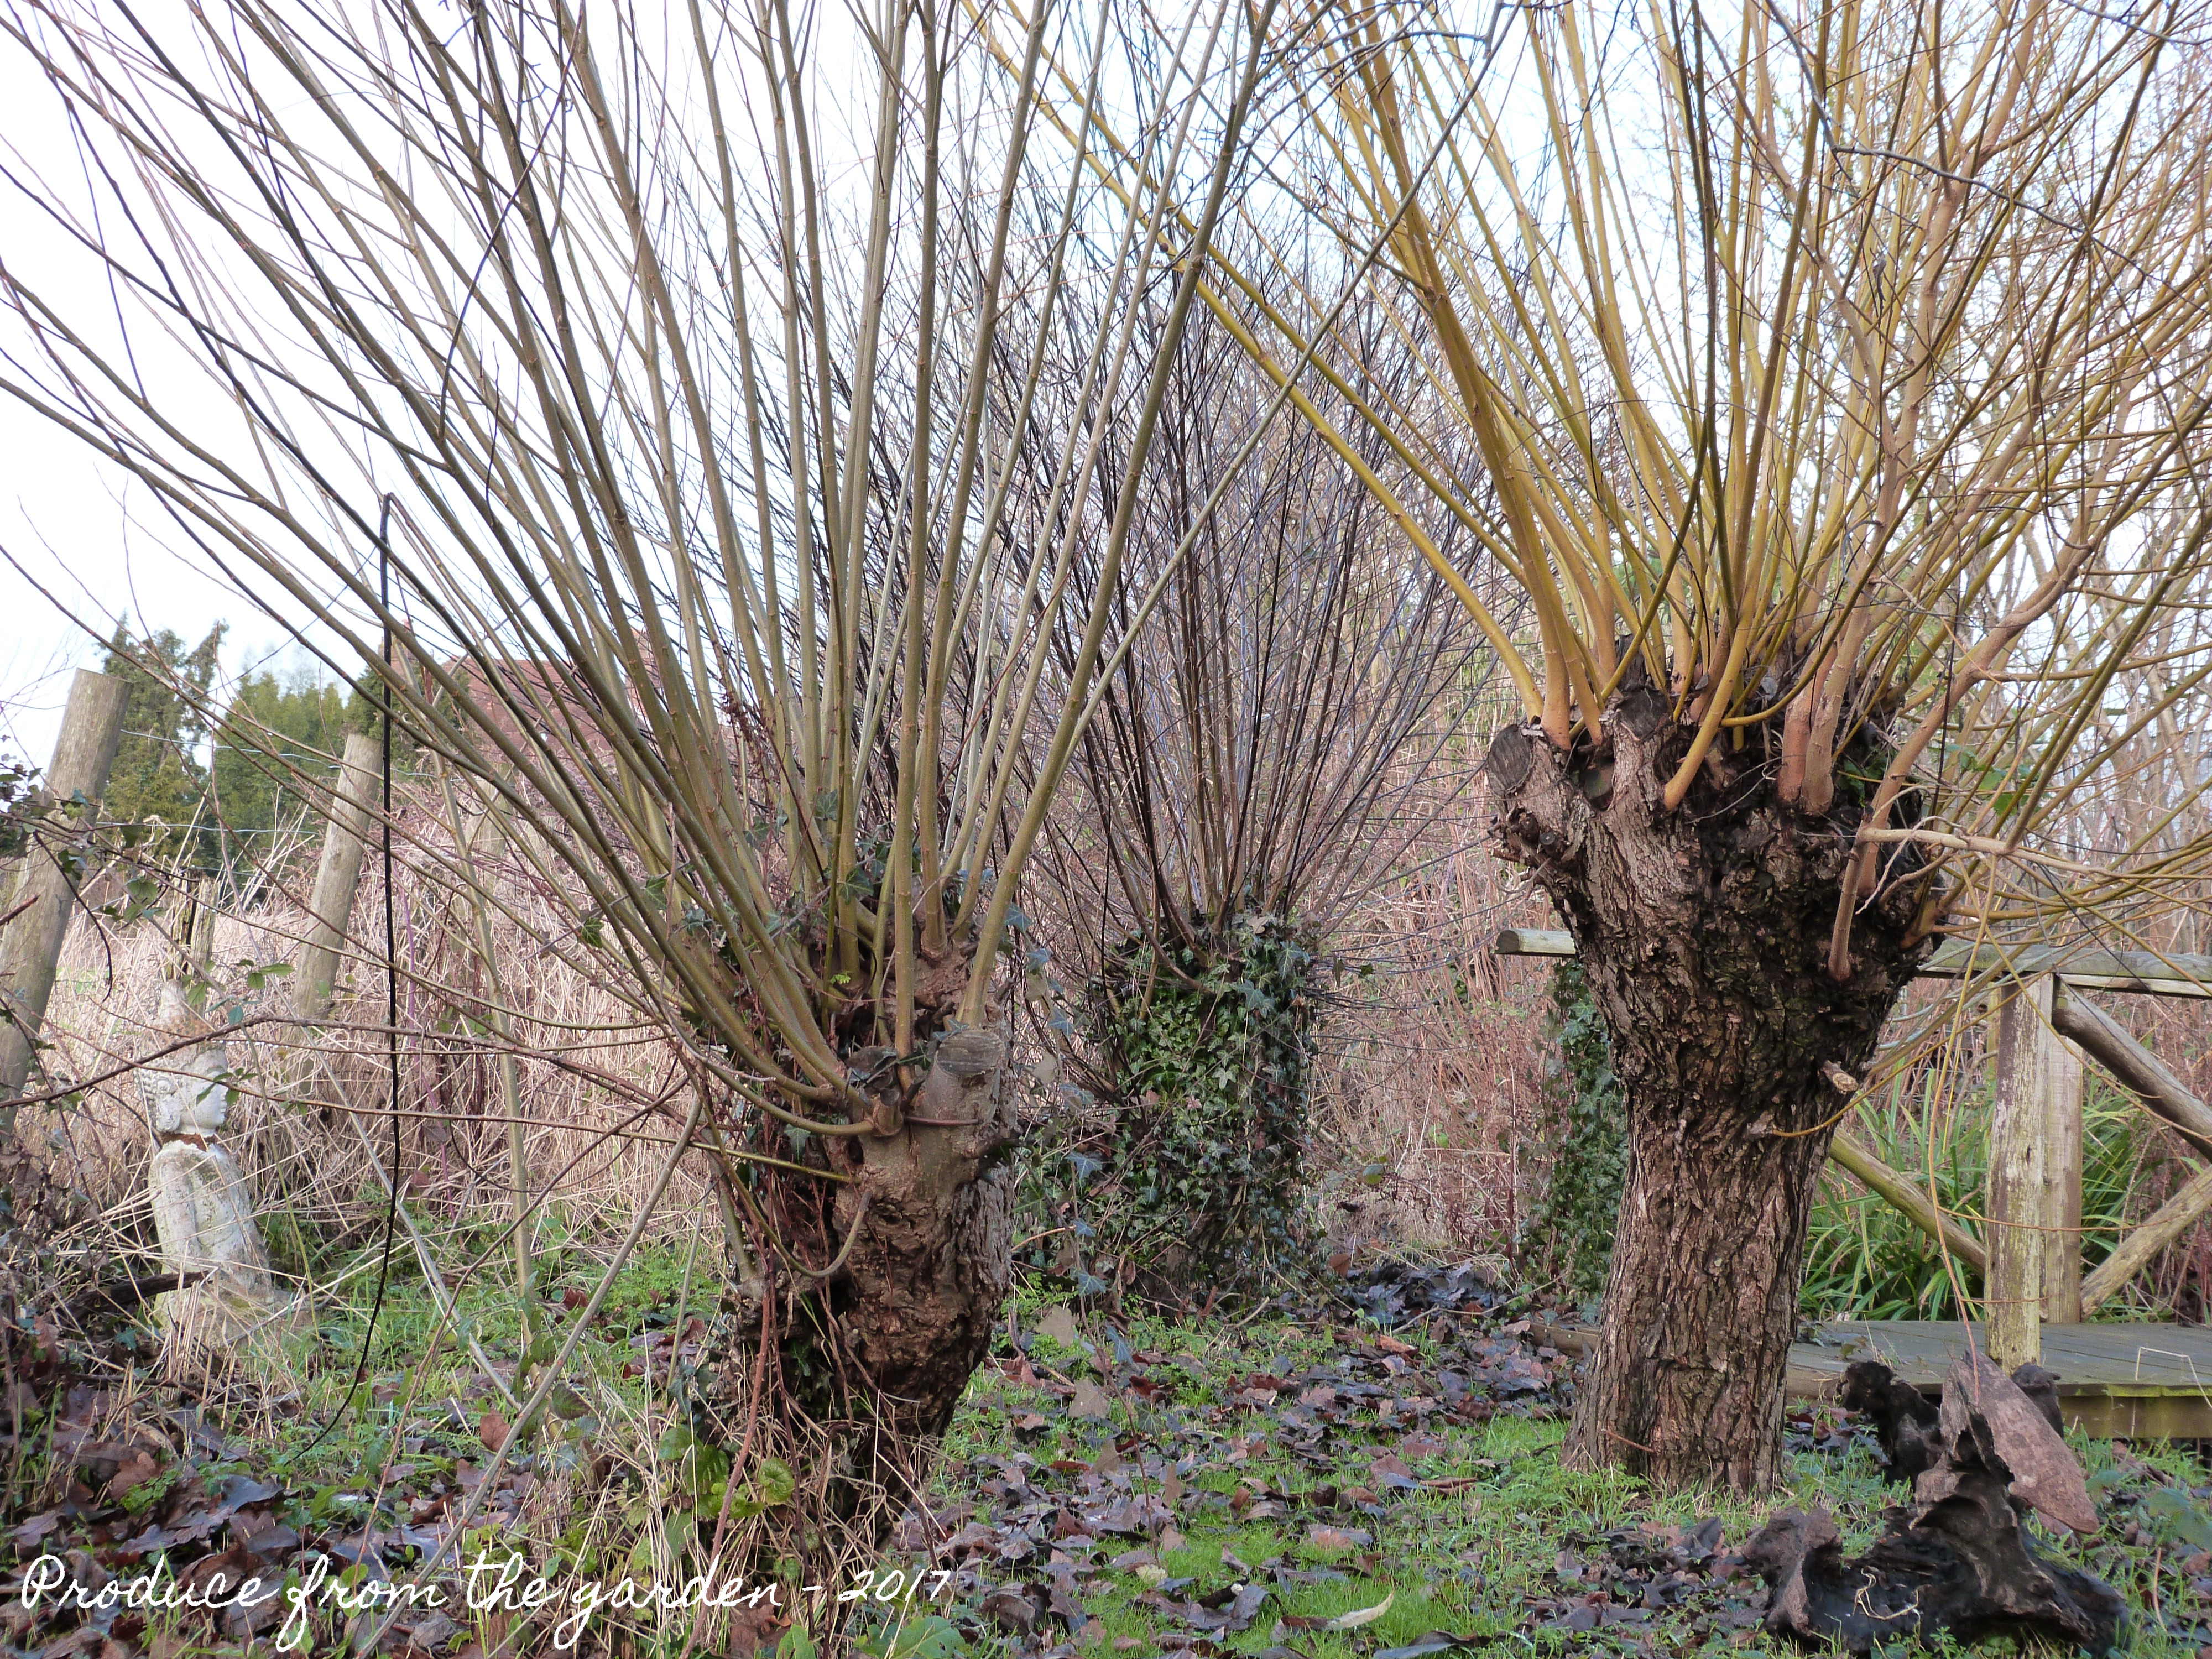
The Willow before coppicing

Coppiced Willow trunkThe willow after coppicing

New willow planted
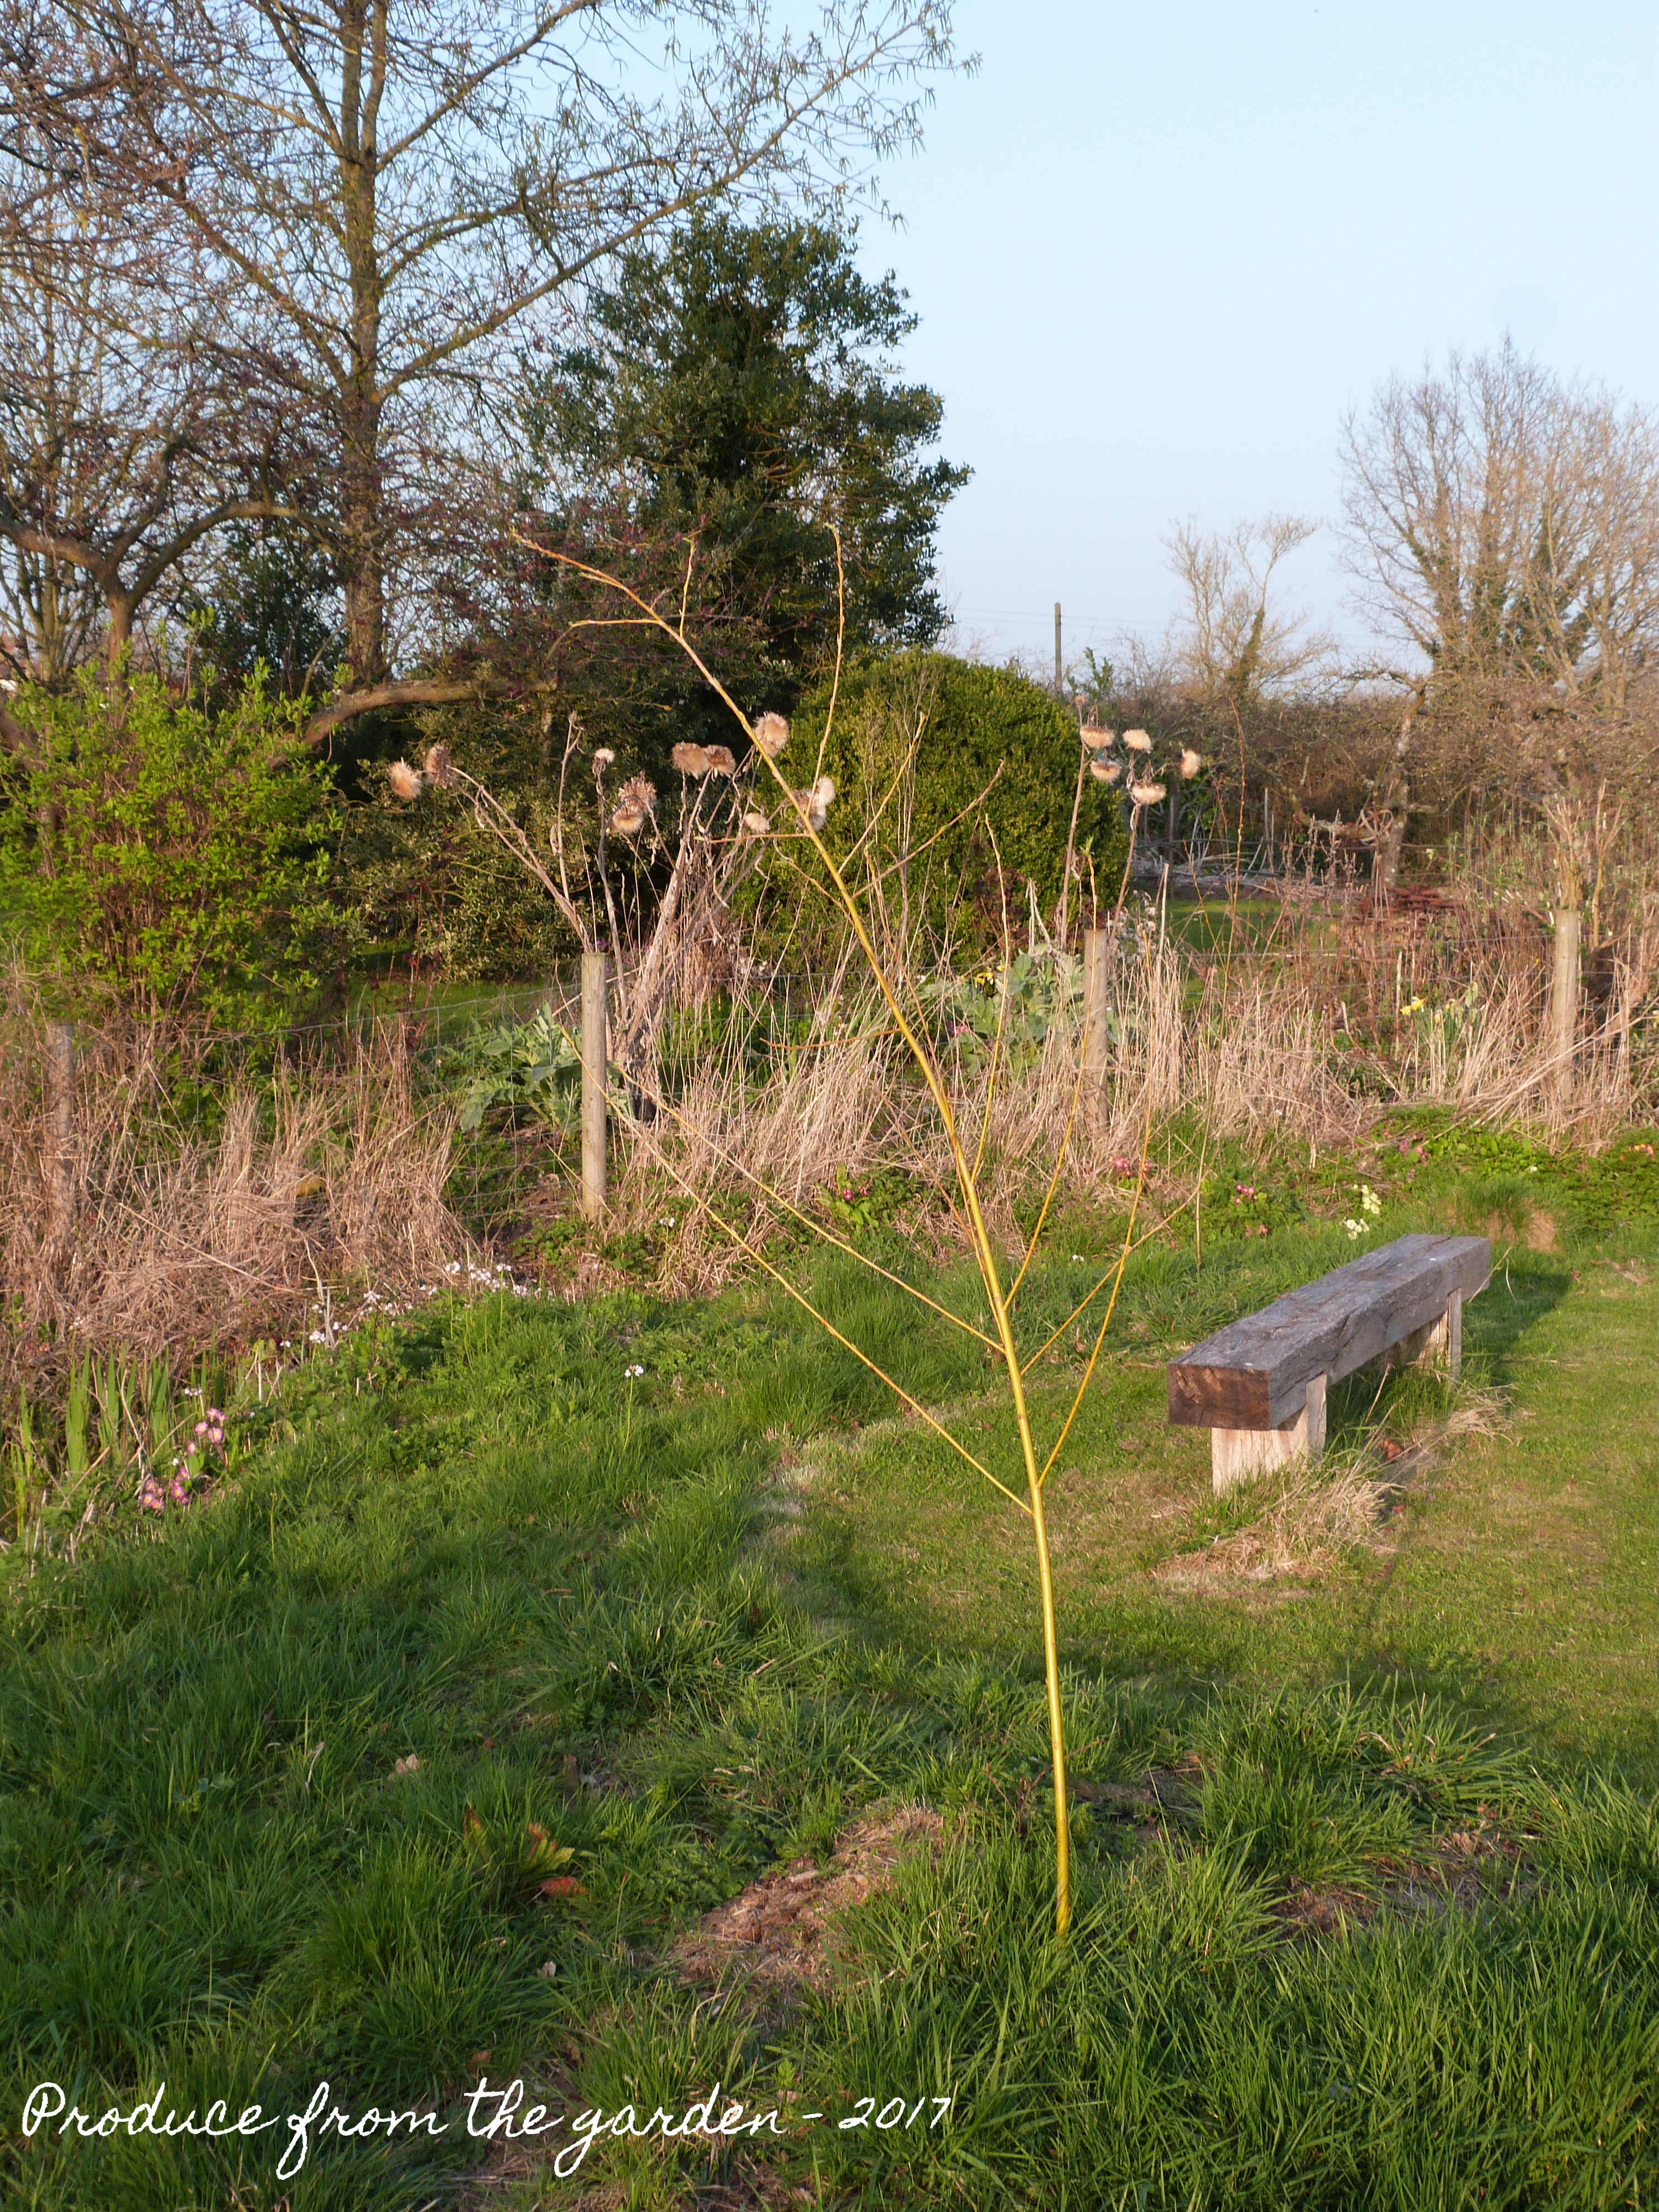
The willow whip I’ve just planted. Next winter I’ll cut back the branches and new growth, creating a stump for the whips to grow from.

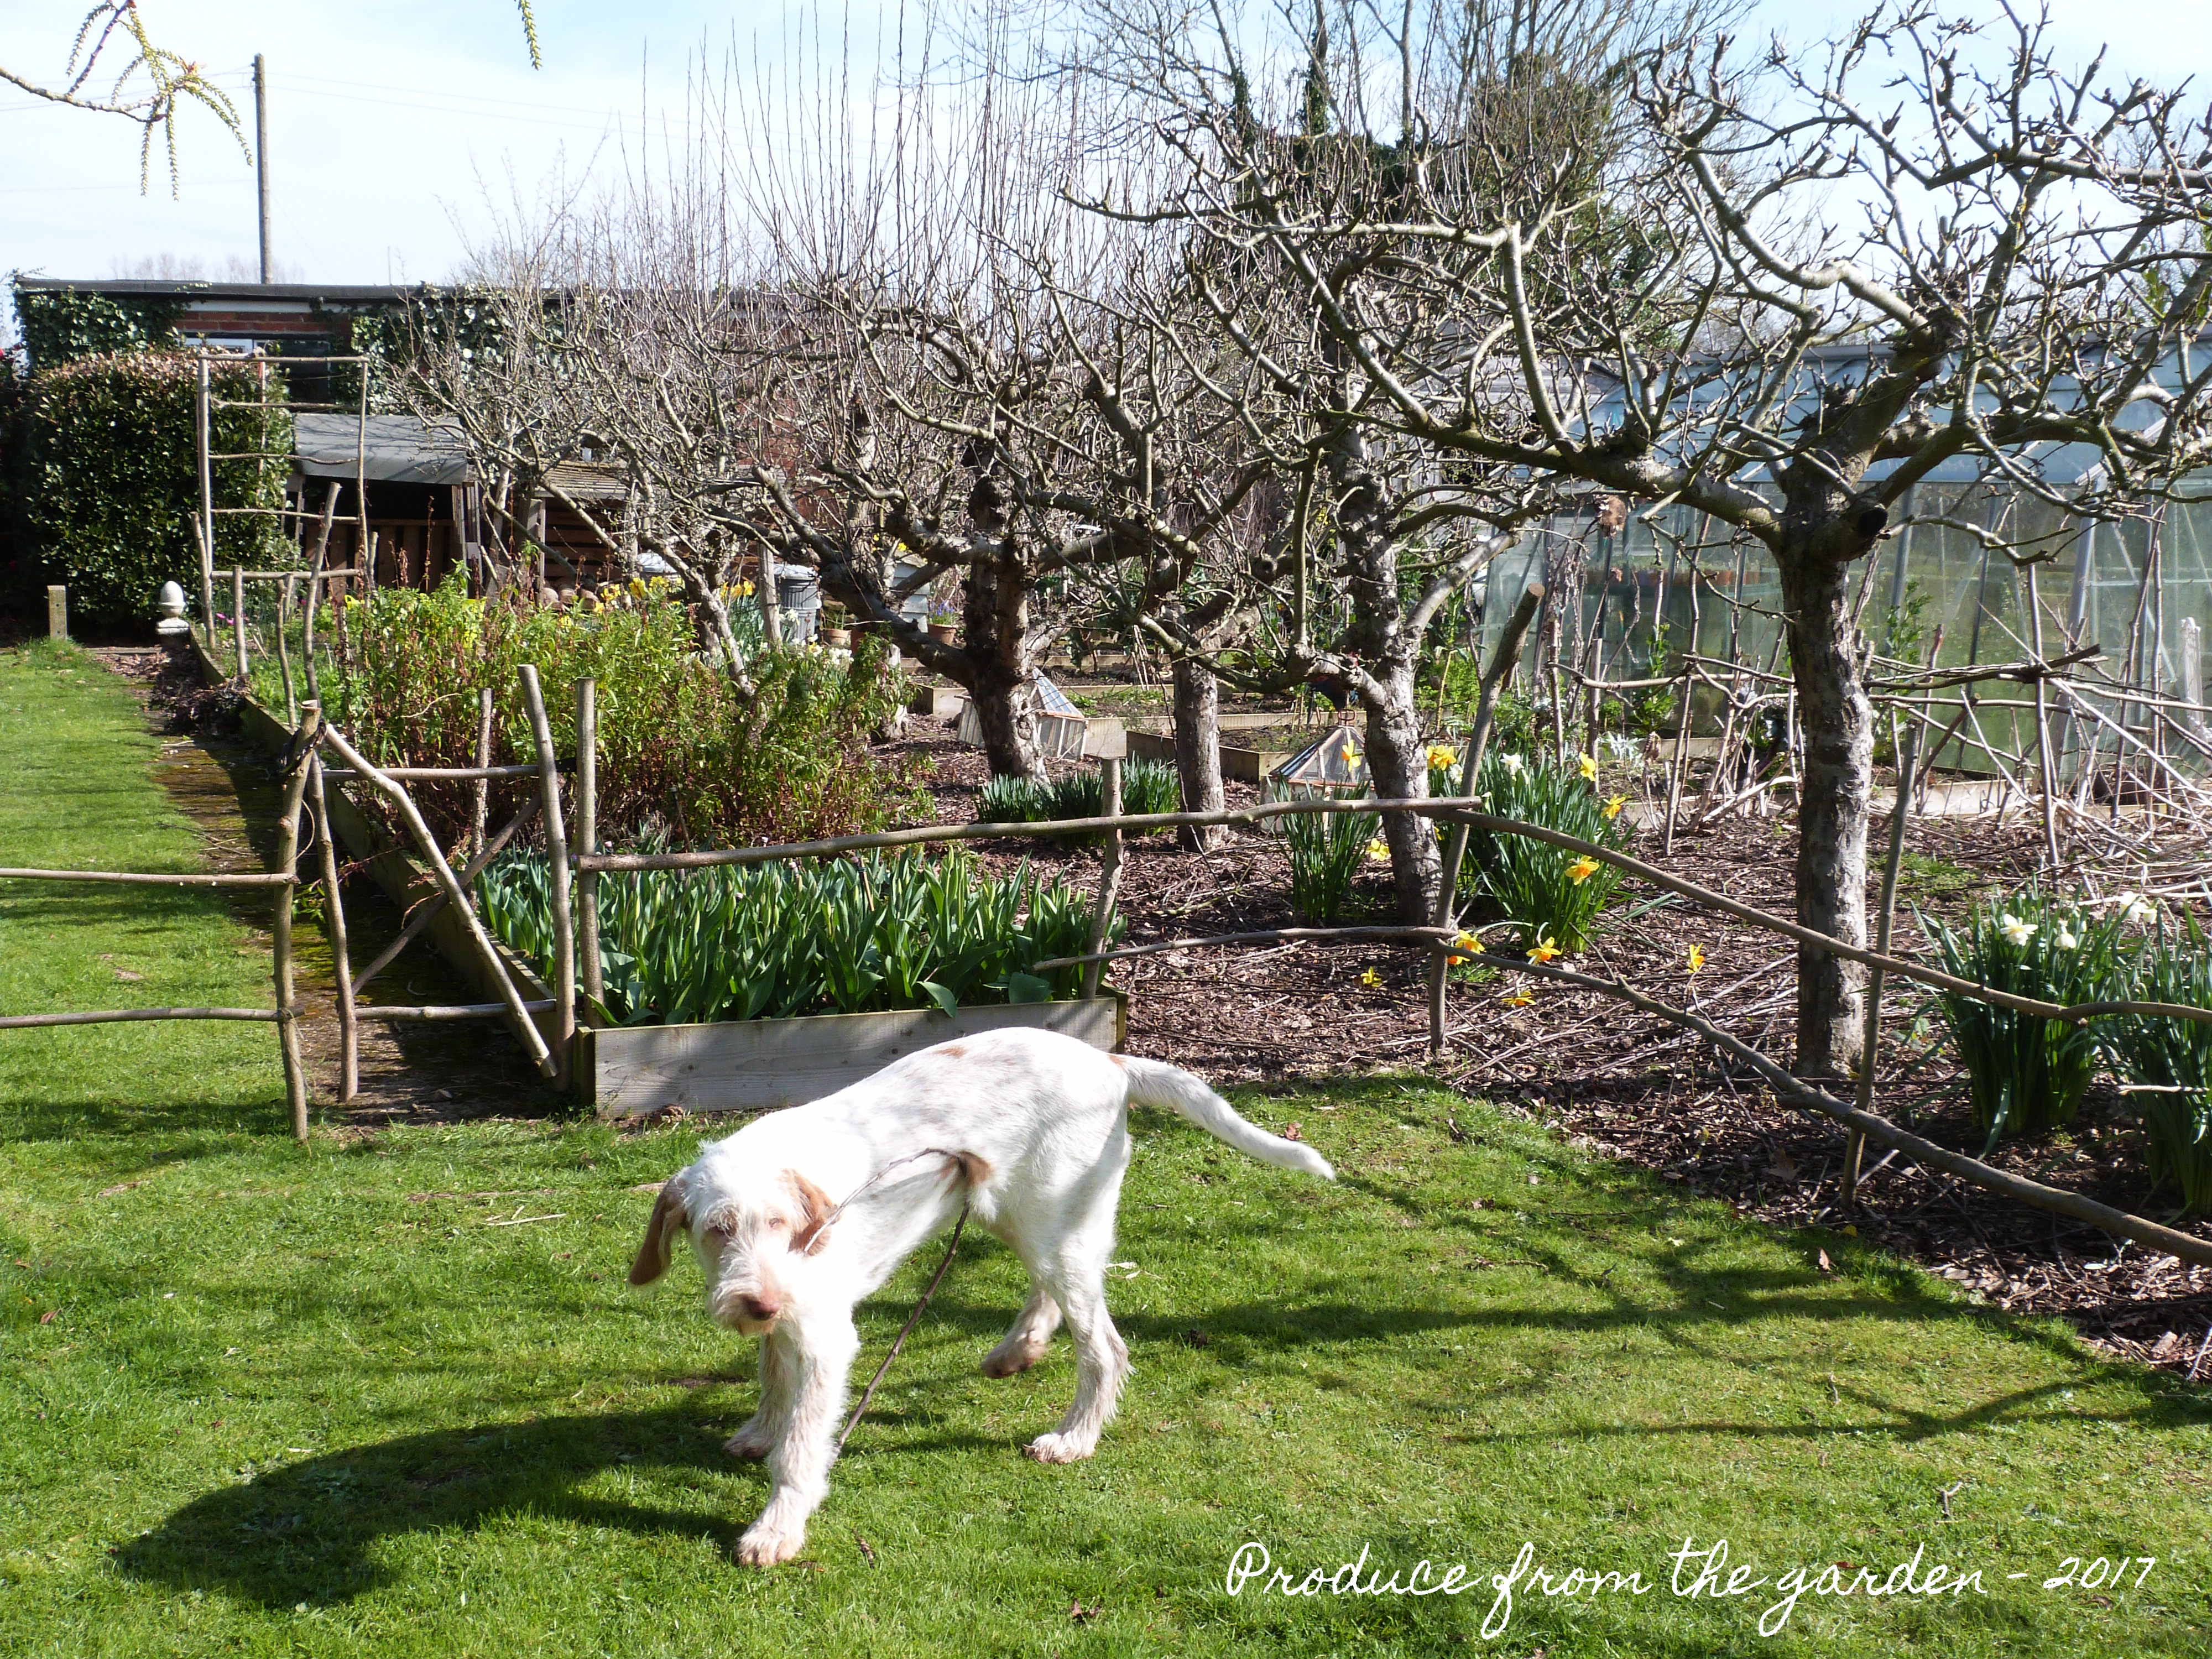
I have used my willow and hazel in various projects this year. The most important has been creating an Alice (my naughty puppy) defence system. Alice’s holes are becoming legendary, and are high up on the husband’s moan list when mowing the lawn, closely followed by all the children’s toys, vehicles and detritus that is liberally scattered around the garden! The holes have become more of a pressing issue for myself in the Kitchen garden. Sowing seed in the freshly prepared beds is a disastrous waste of time! So, I’ve barricaded myself in with a hazel fence and a few gates, which I secure shut with woven willow hoops. The result, I’m gardening in constructive peace. The husband’s still moaning, so all’s back to a comfortable equilibrium in our household.

Hazel fencingThe hazel fencing, keeping Alice here, out of the Kitchen garden!

Rustic hazel garden gate
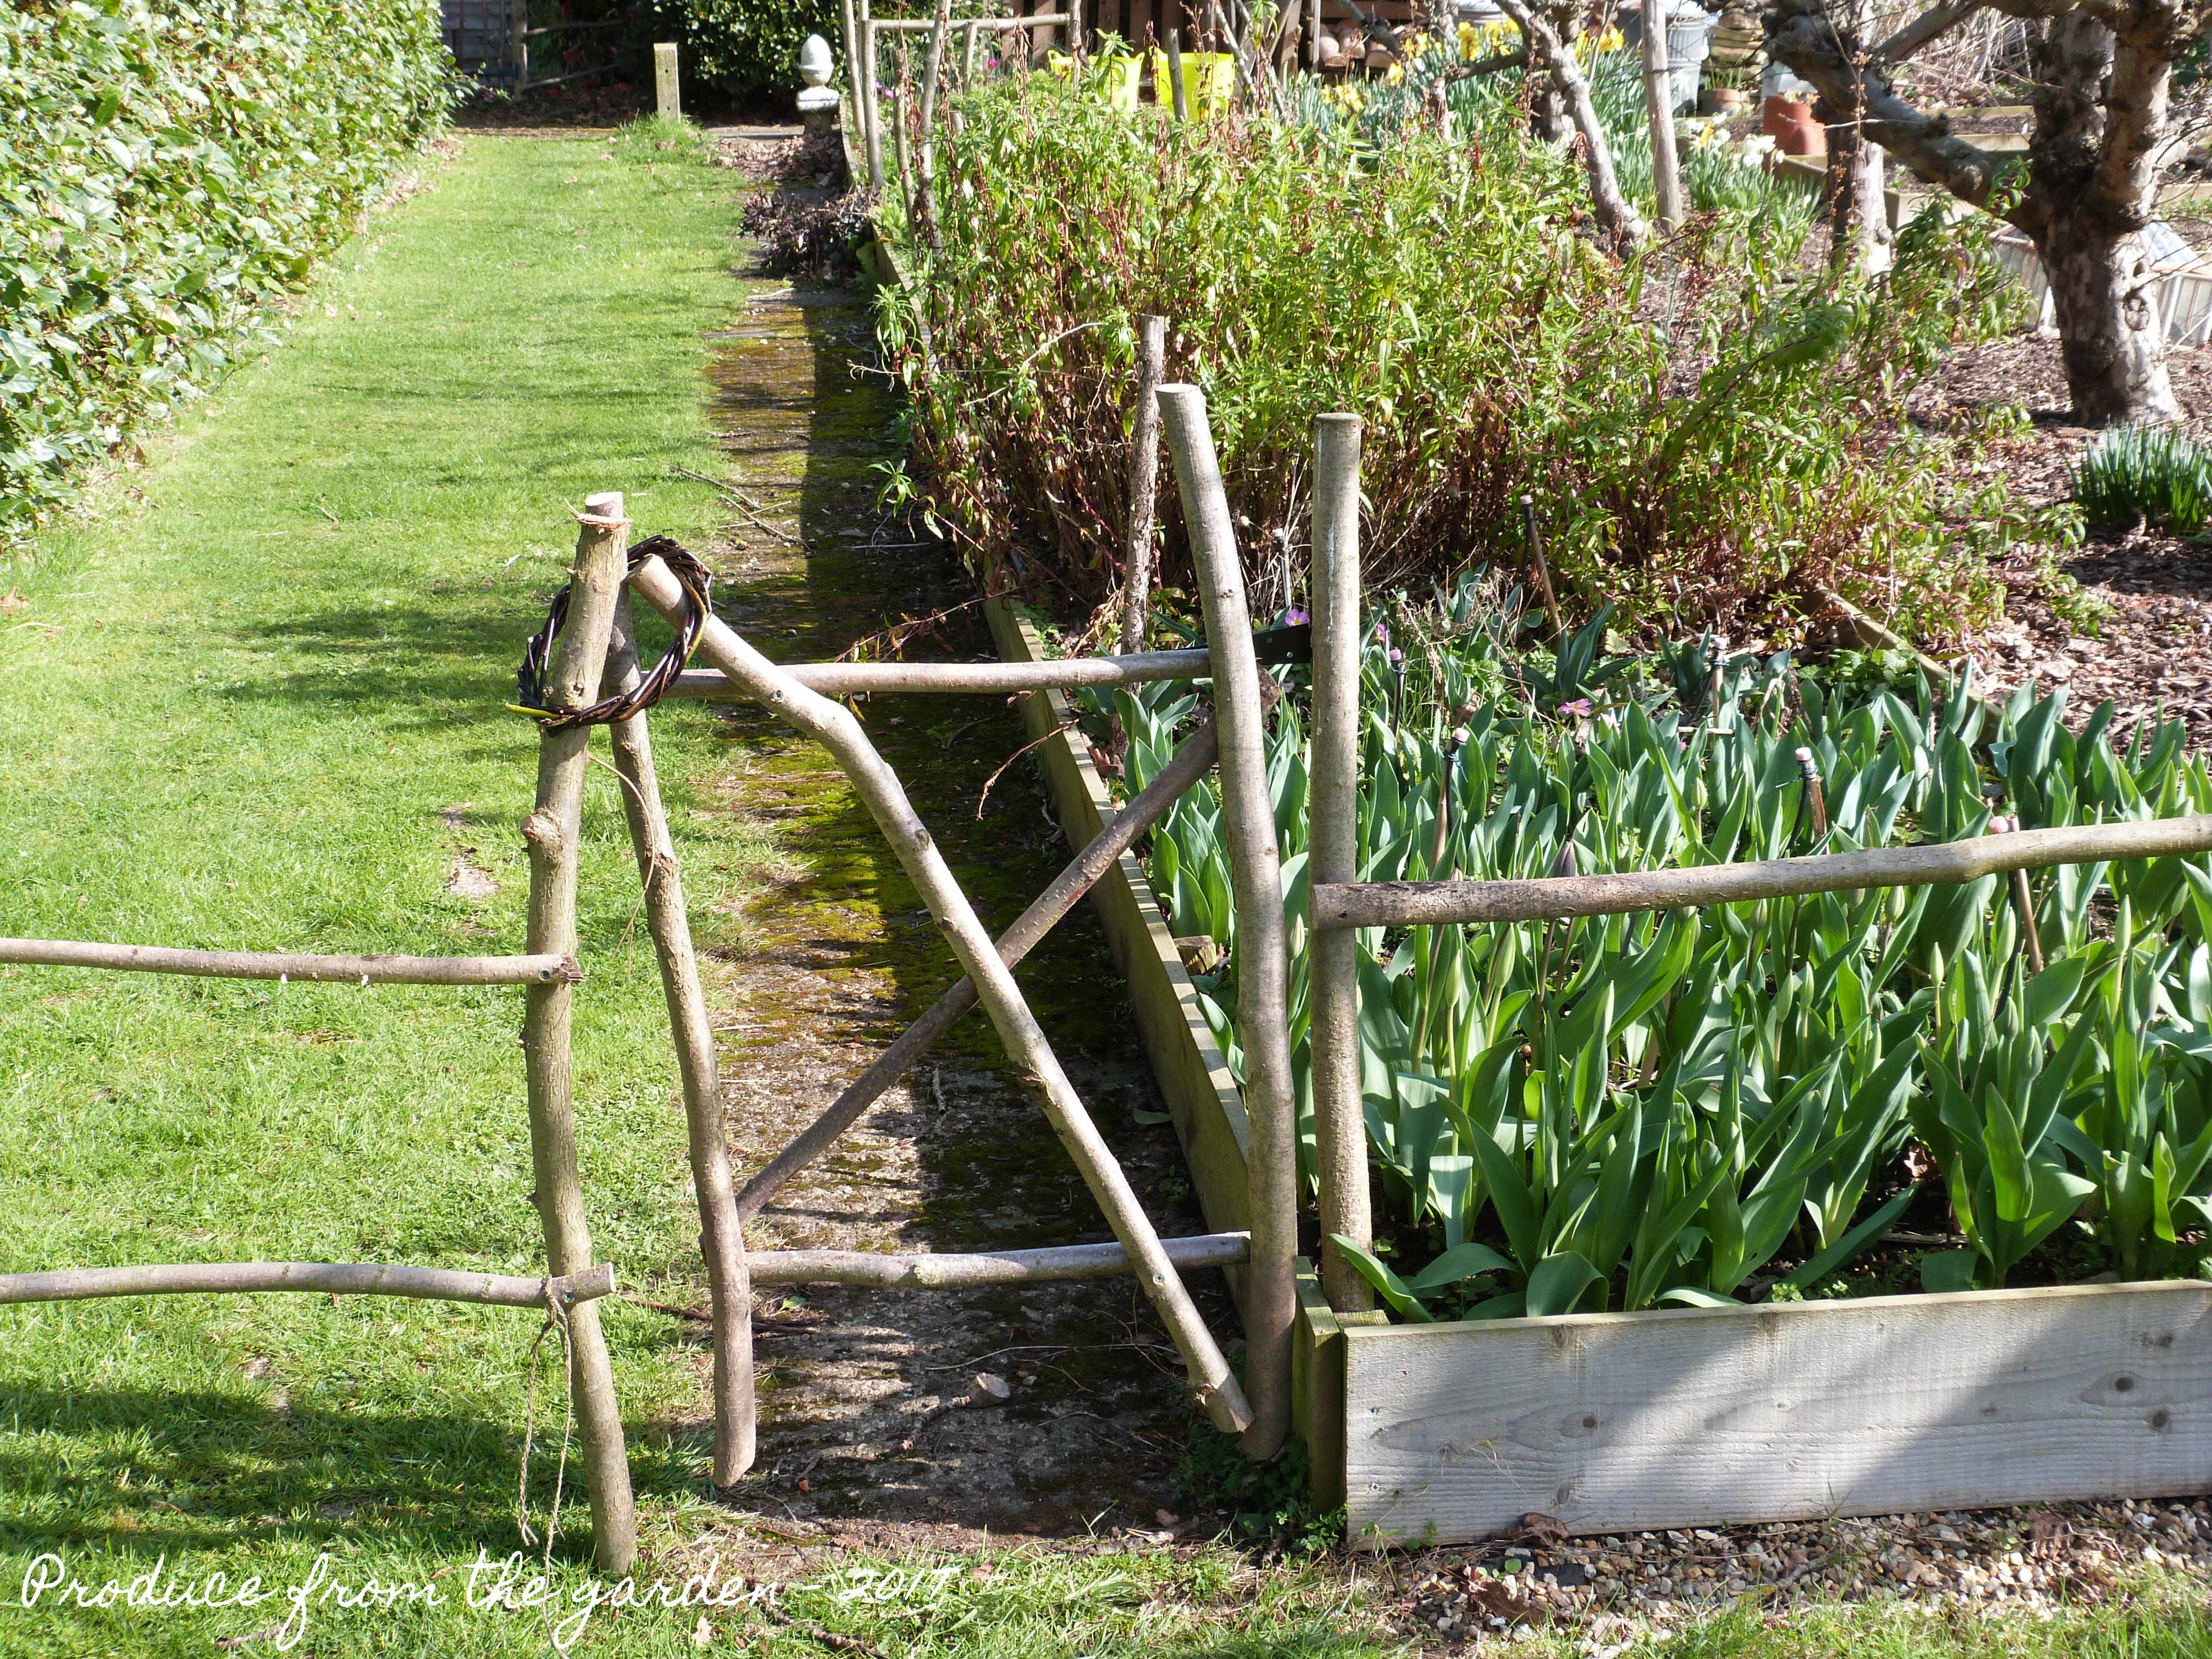
A very simple rustic gate from the hazel, with a woven willow hoop to fasten.

Hazel gateI’m really pleased with this hazel gate I made, a lovely entrance to the kitchen garden.

The hazel stakes create great structures for plants to clamber up.

Runner bean frame
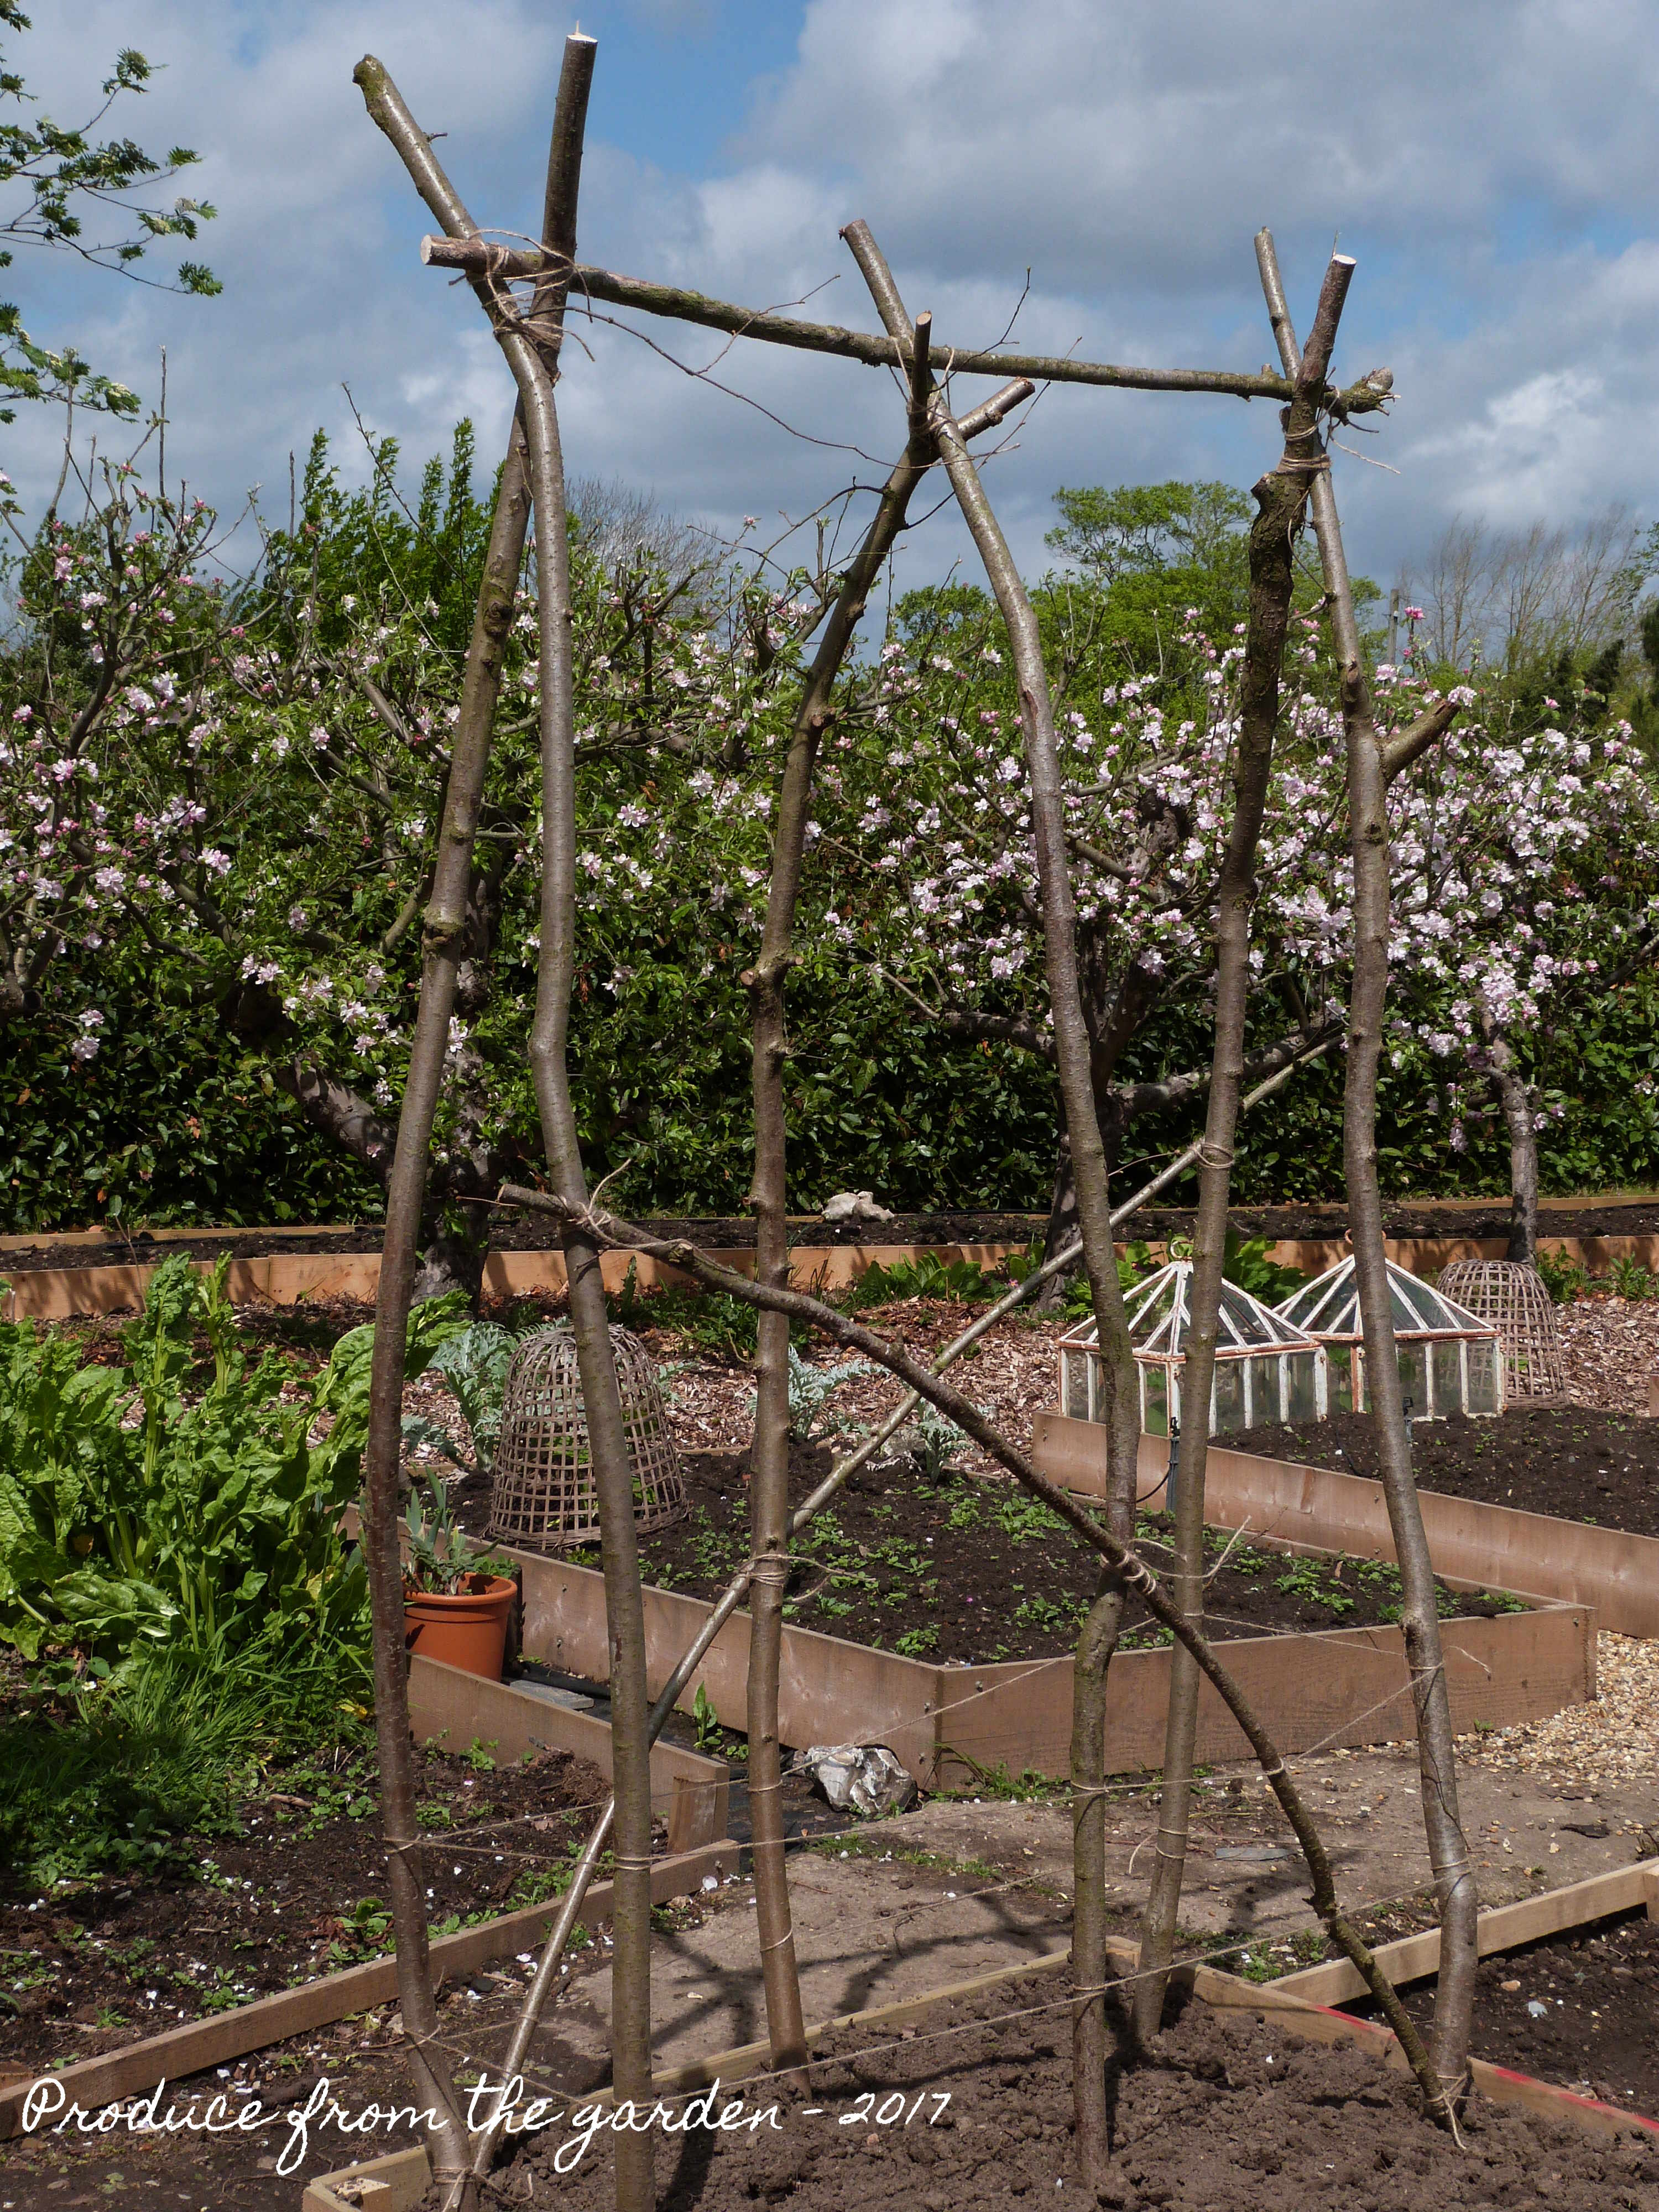
A hazel structure for runner beans

I have tethered the hazel stakes together with garden twine. This is not only a strong supportive structure for Runner beans to clamber up, it also gives a lovely rustic feel to the vegetable patch.

Obelisks look great in borders, they add structure and are a good support for climbers such as clematis or sweet peas. They’re easy to make from hazel stakes with willow woven around them. Don’t worry if the willow weaving looks a bit messy, once finished it all comes together with a homemade natural charm. You’d never be able to buy an obelisk like this in the shops!

Hazel and Willow Obelisk
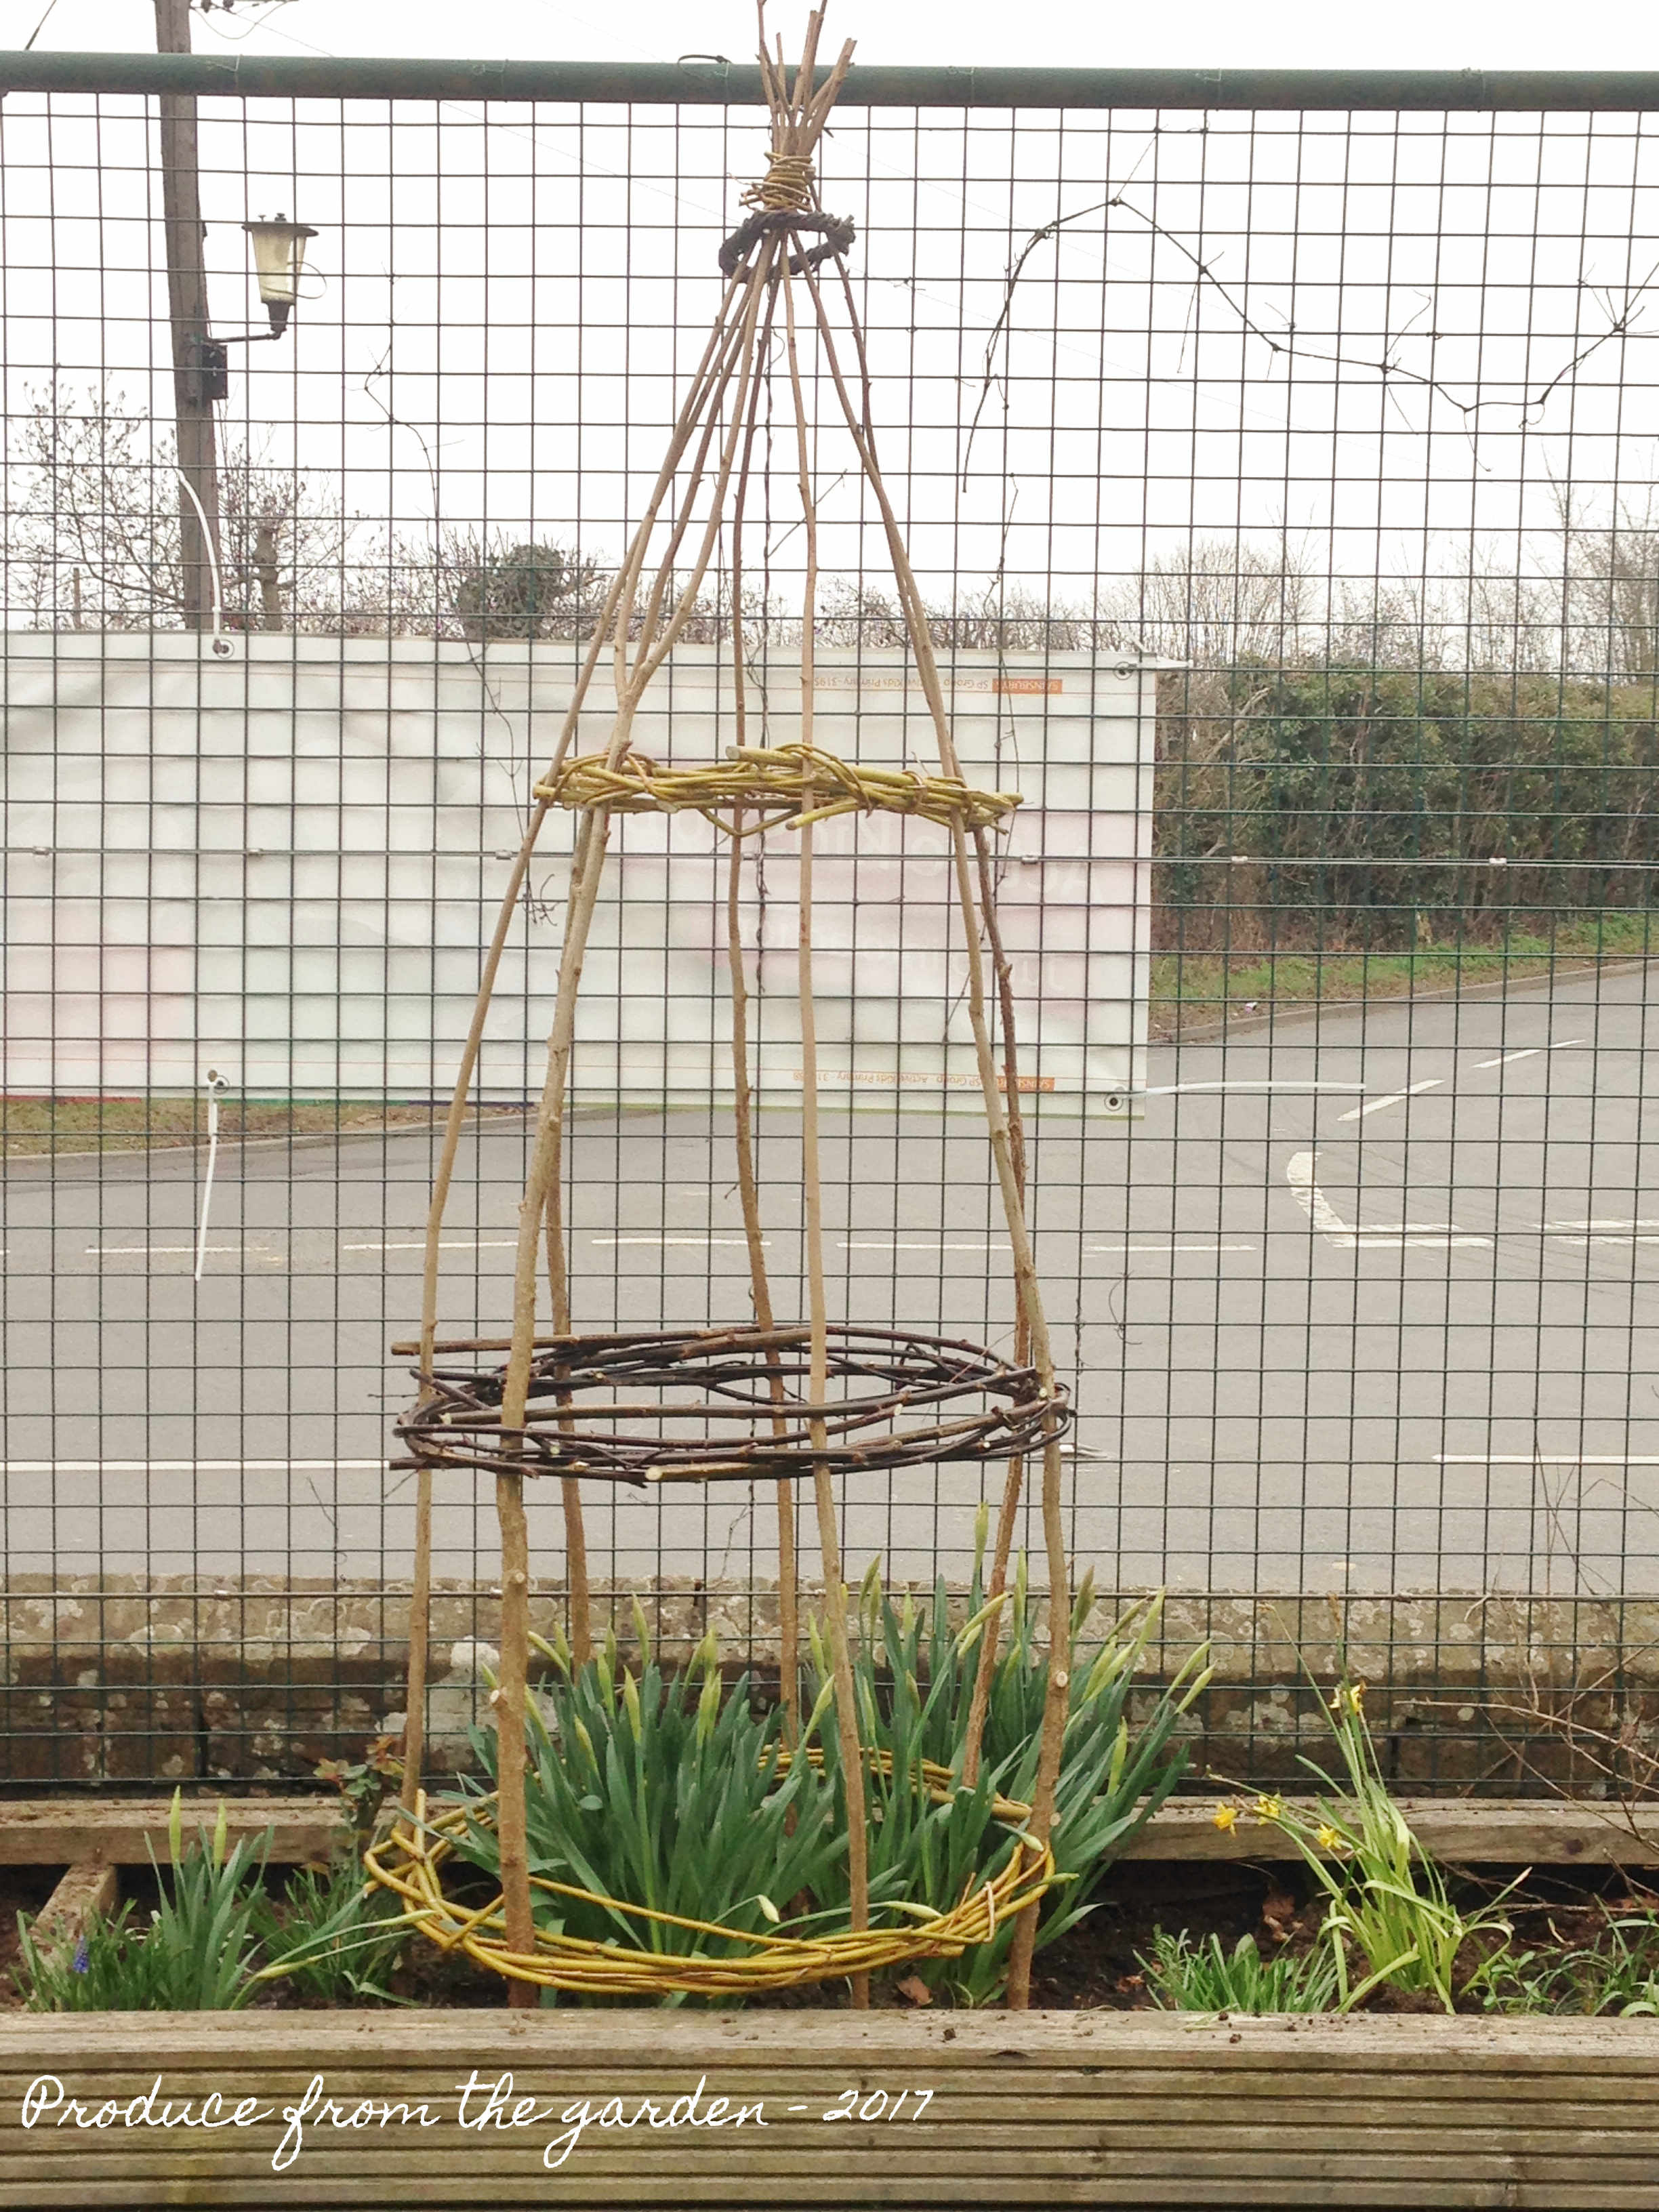
An obelisk I made for the front garden of my boys school

Making an obelisk
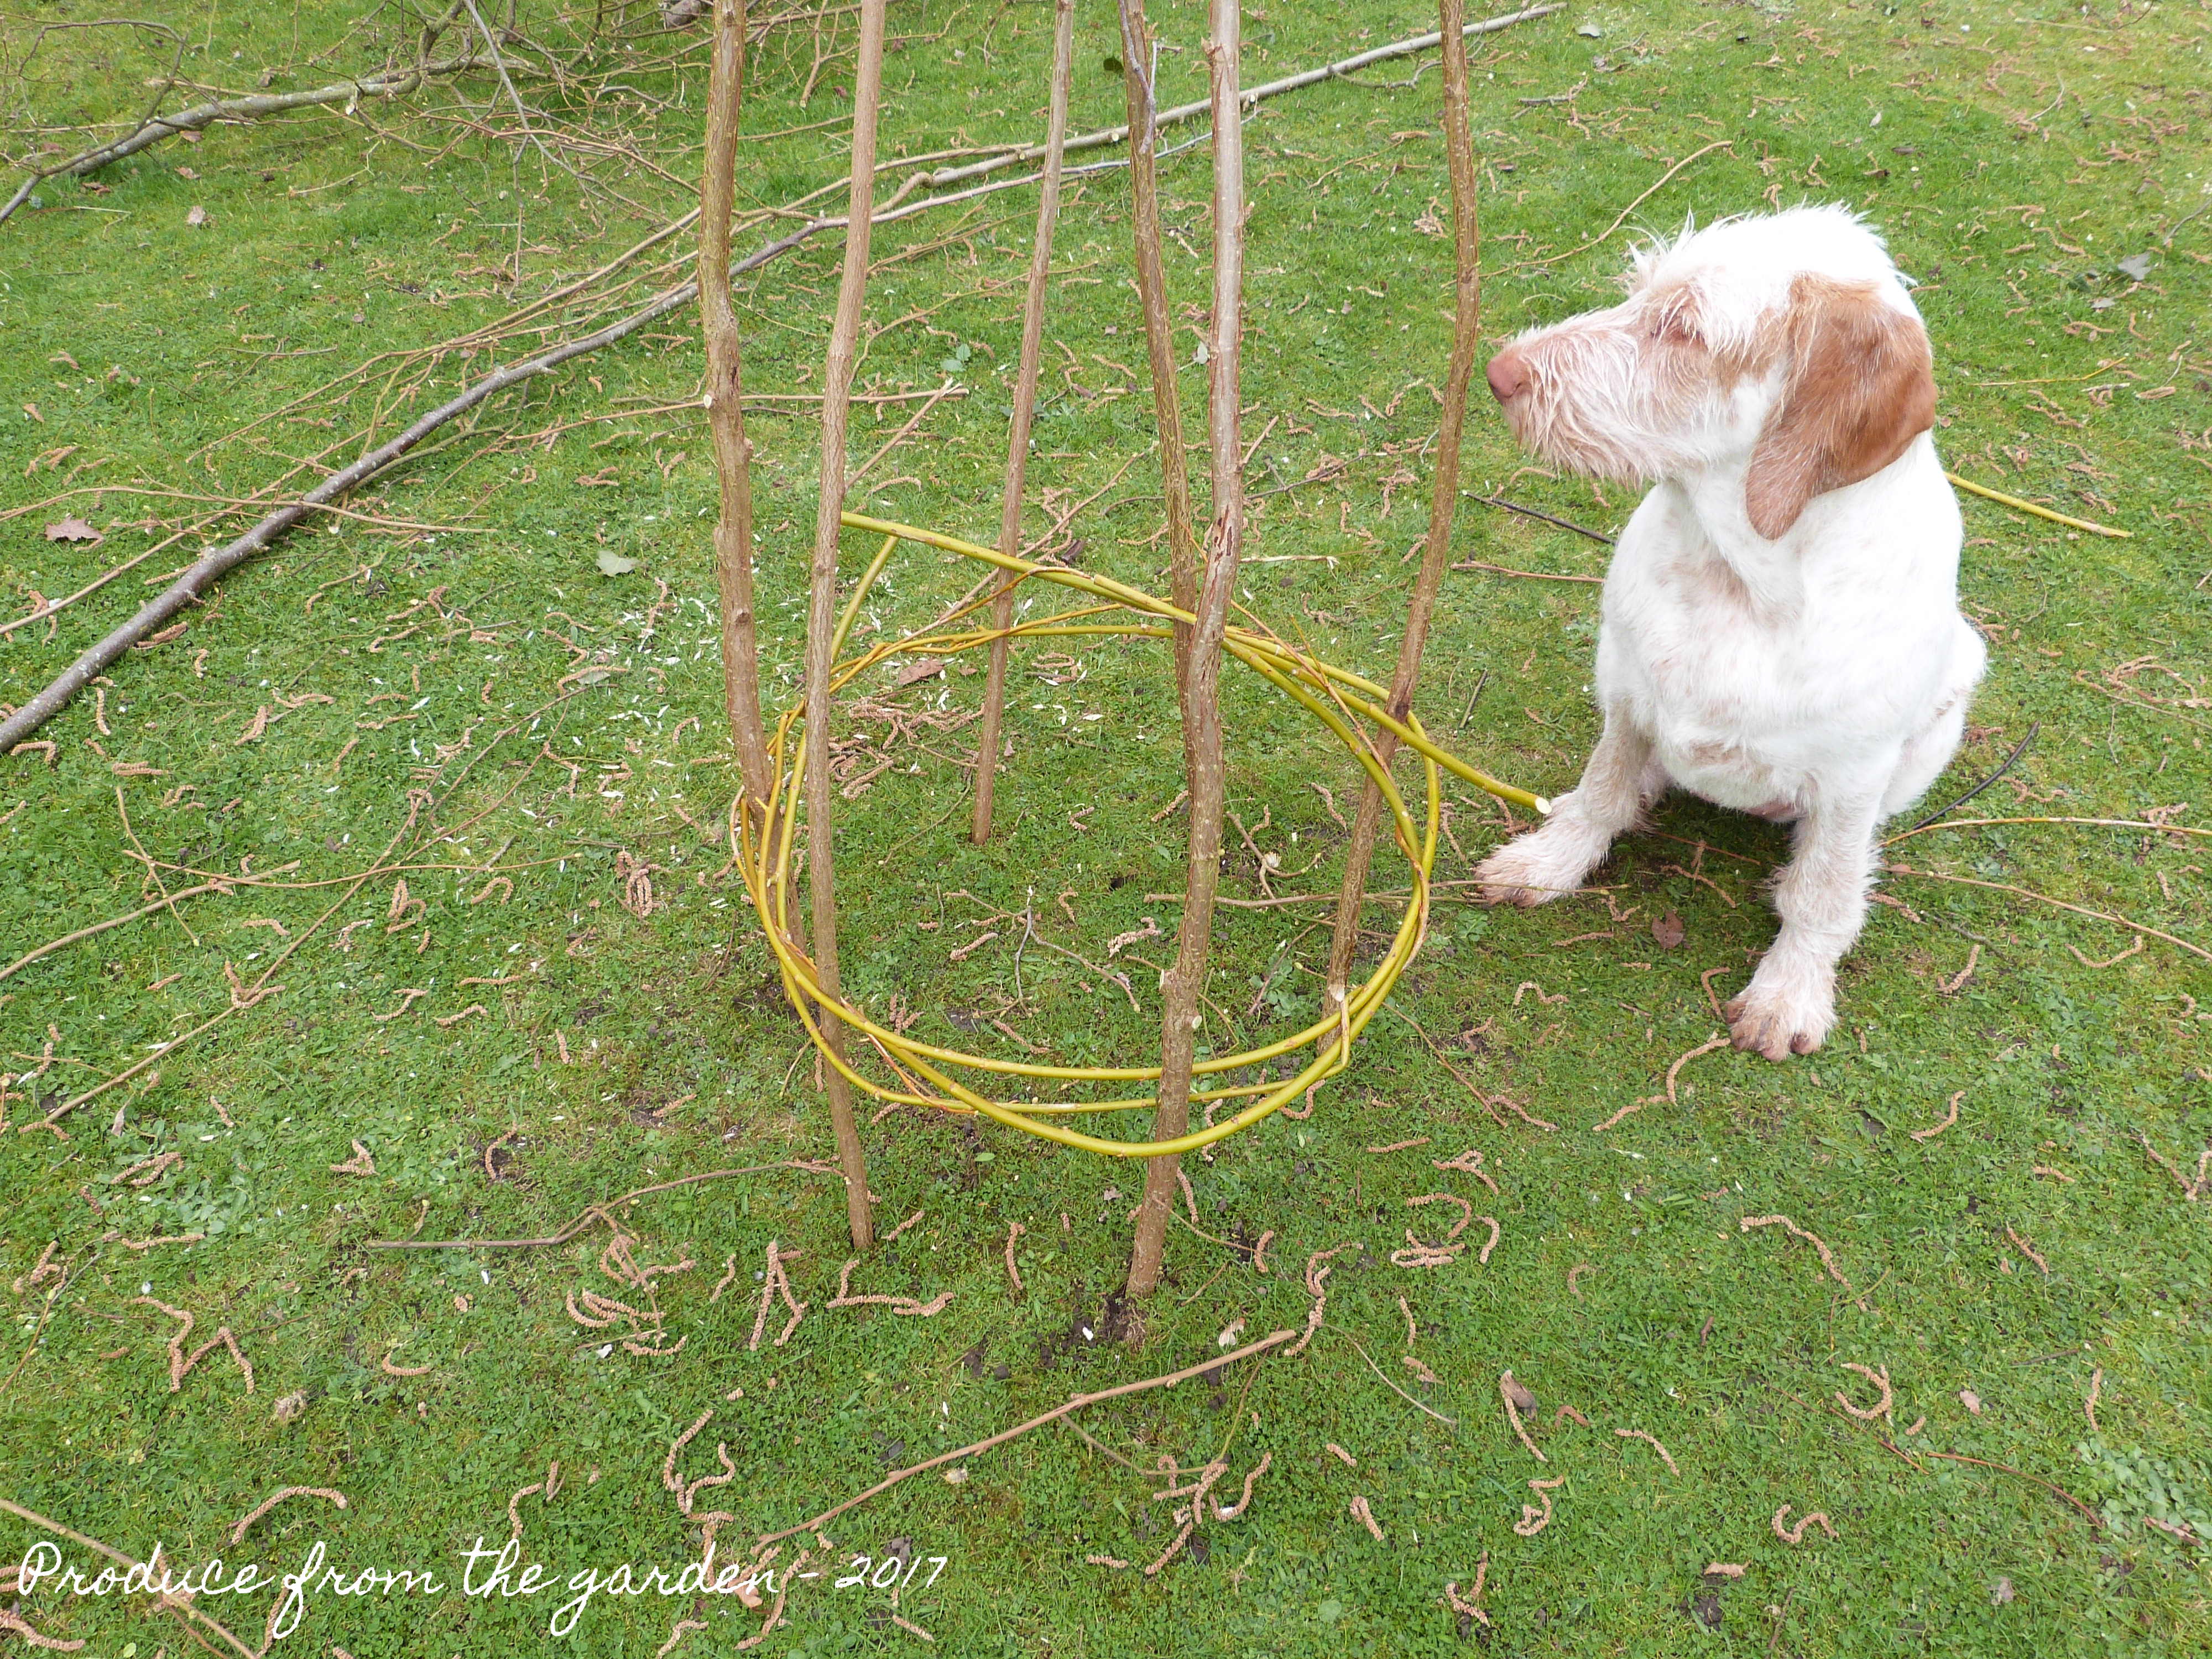
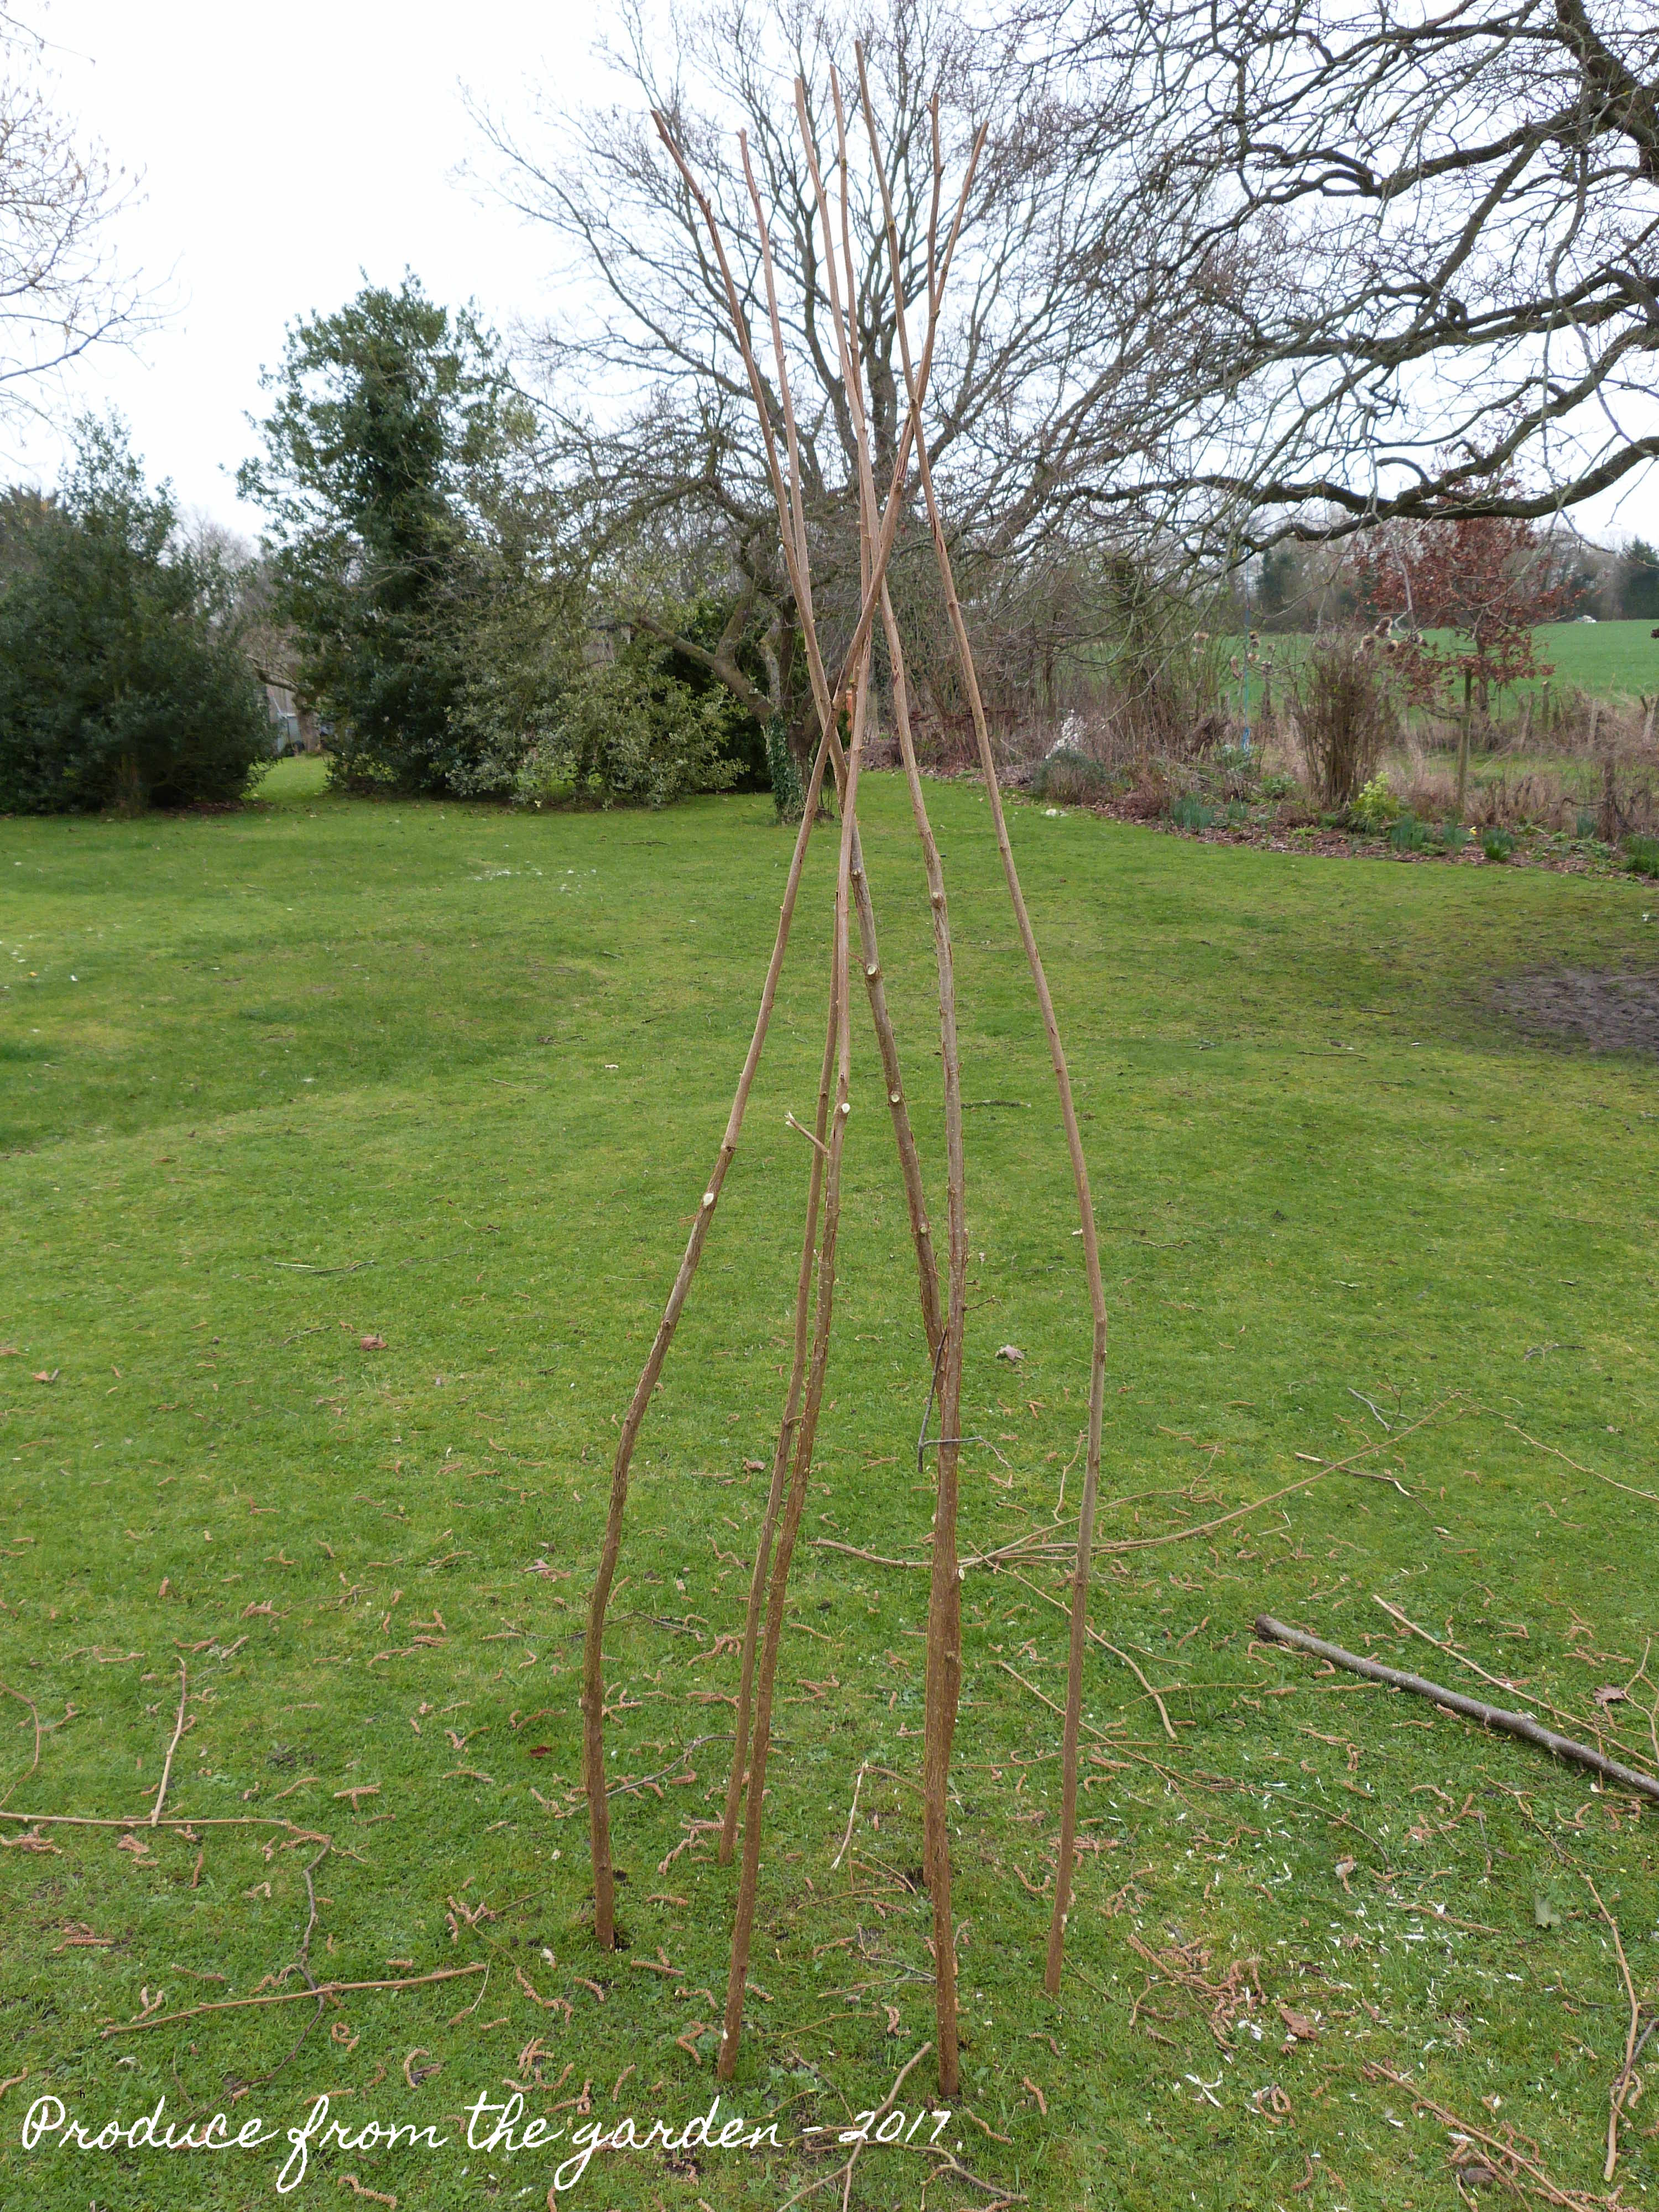
Obelisks are easy to make. First of all secure 6-7 stakes in a circle in the ground.

Top of the Obelisk
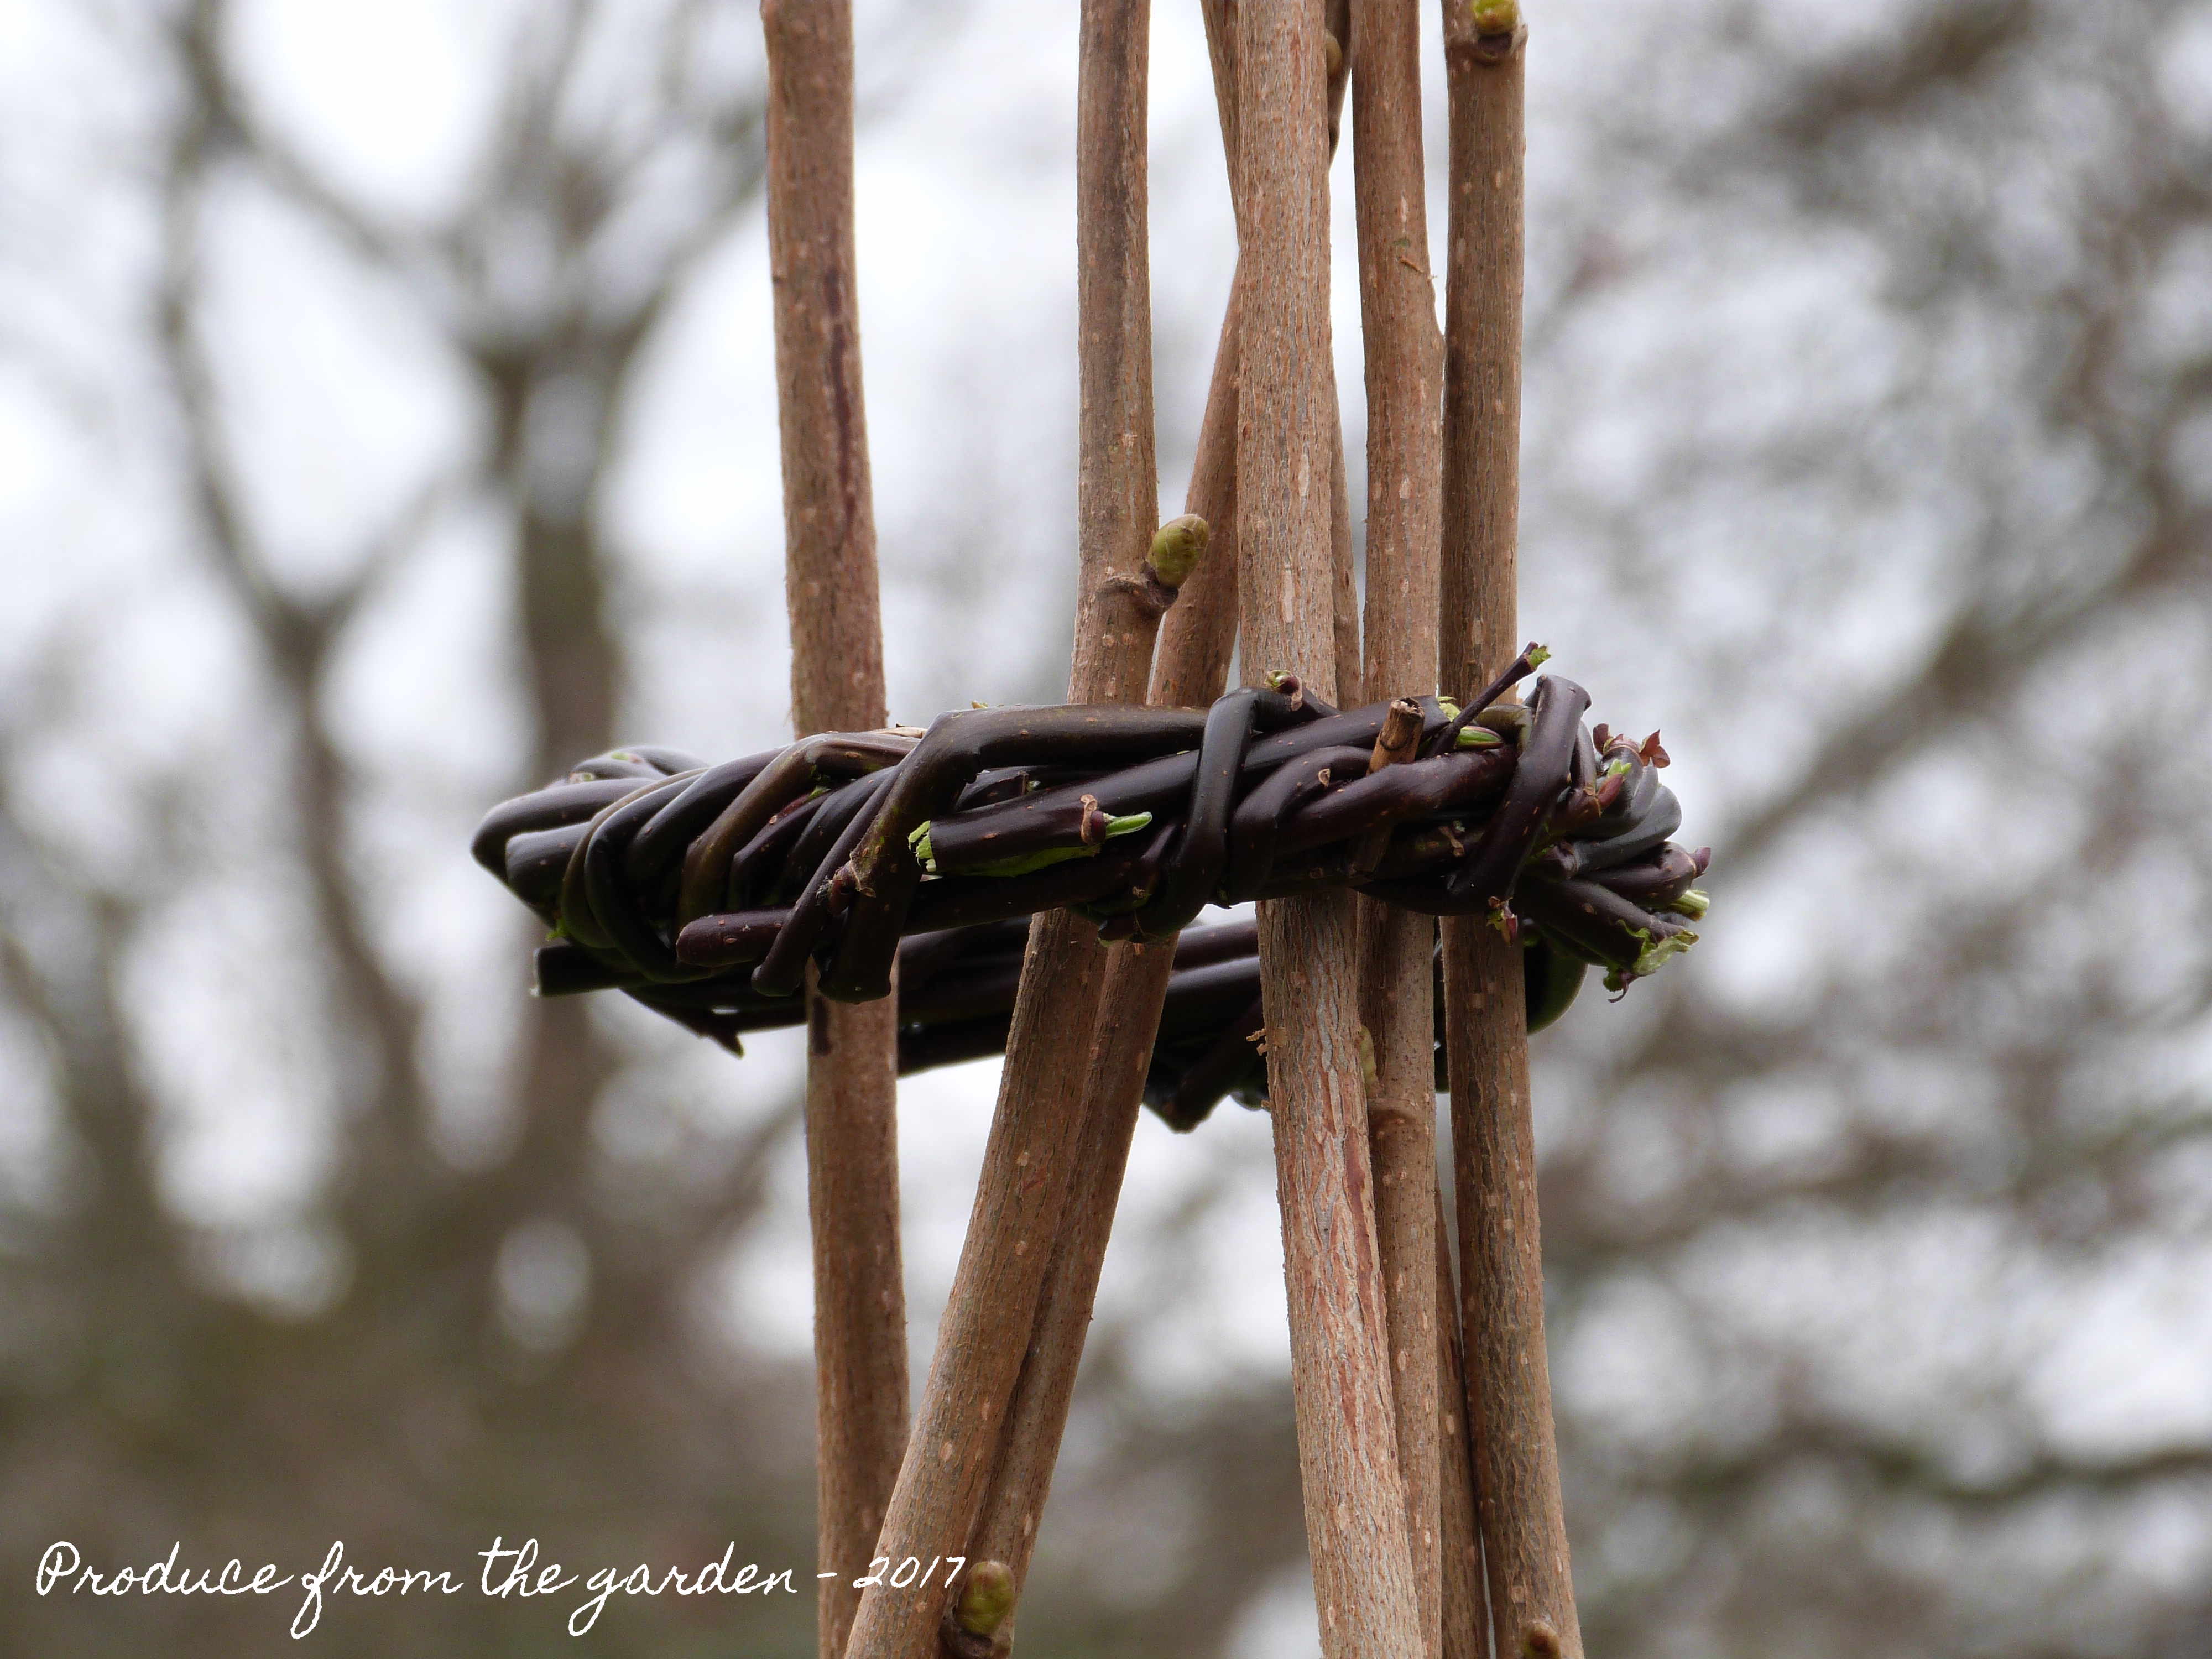
Weave a willow hoop and bring the stakes at the top together.

Weaving willow around the obeliskStart to weave willow around the stakes. I highly recommend this is not done with an Alice!

Completed obelisk
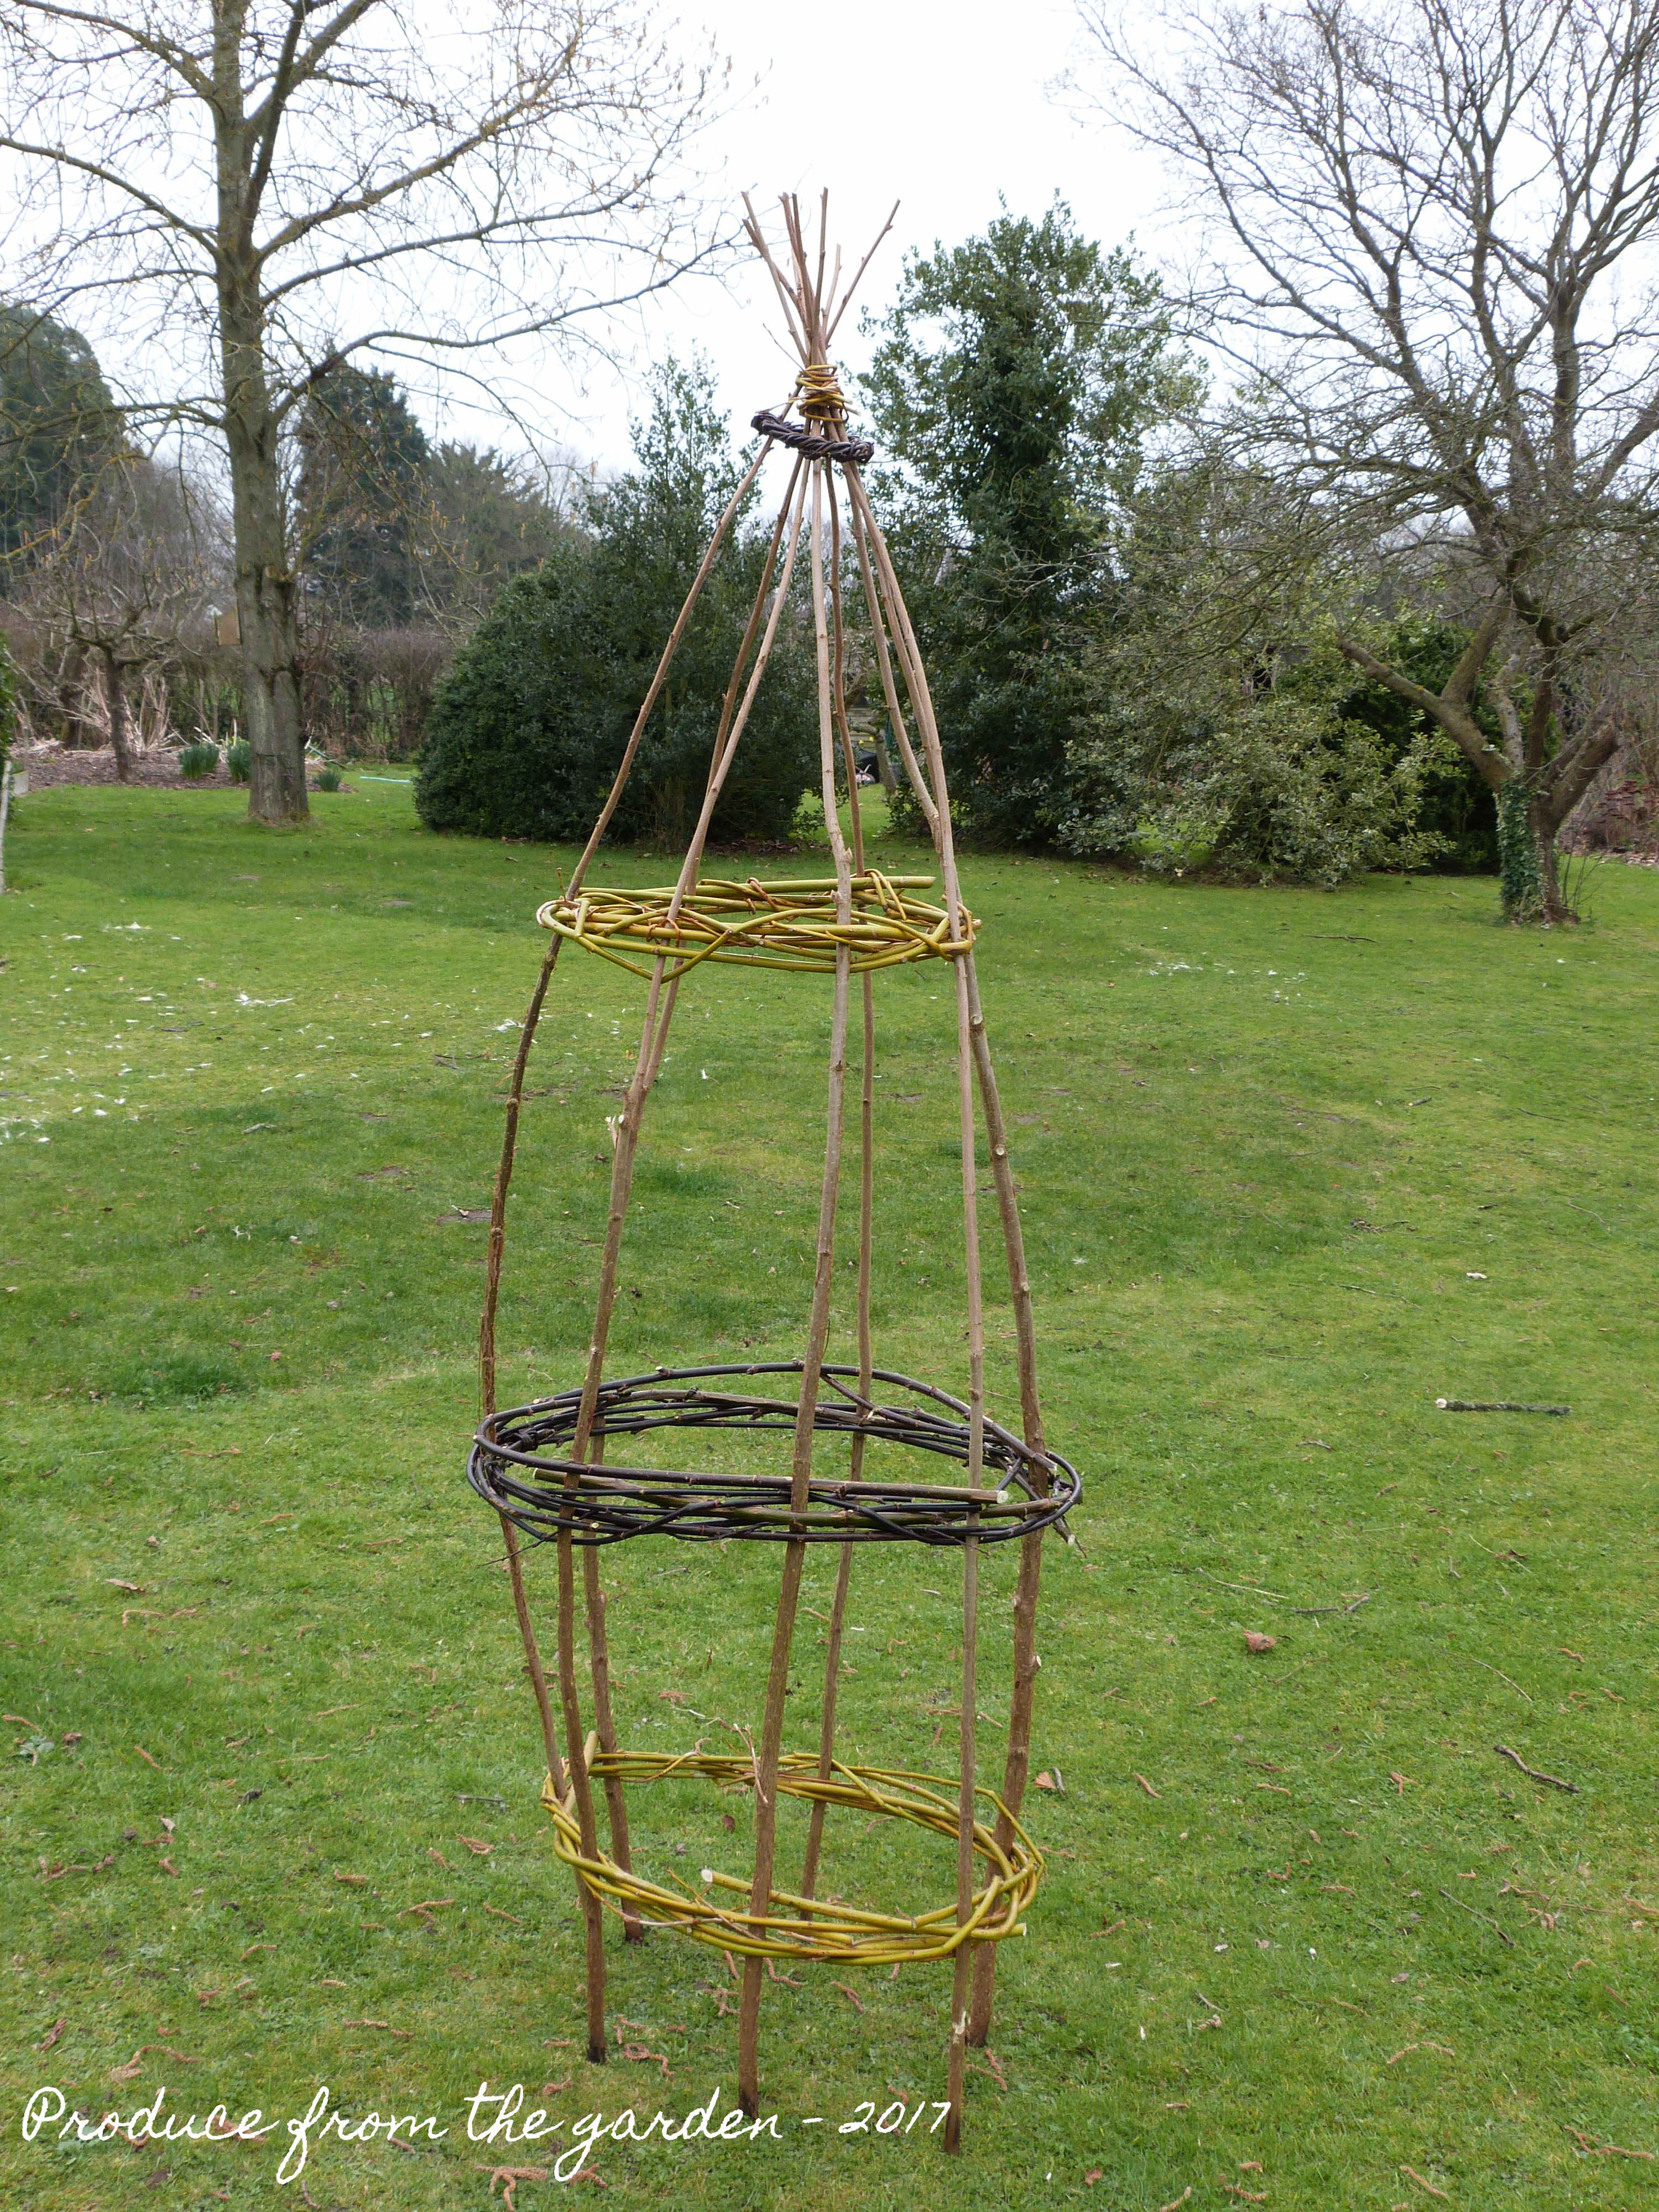
The completed obelisk

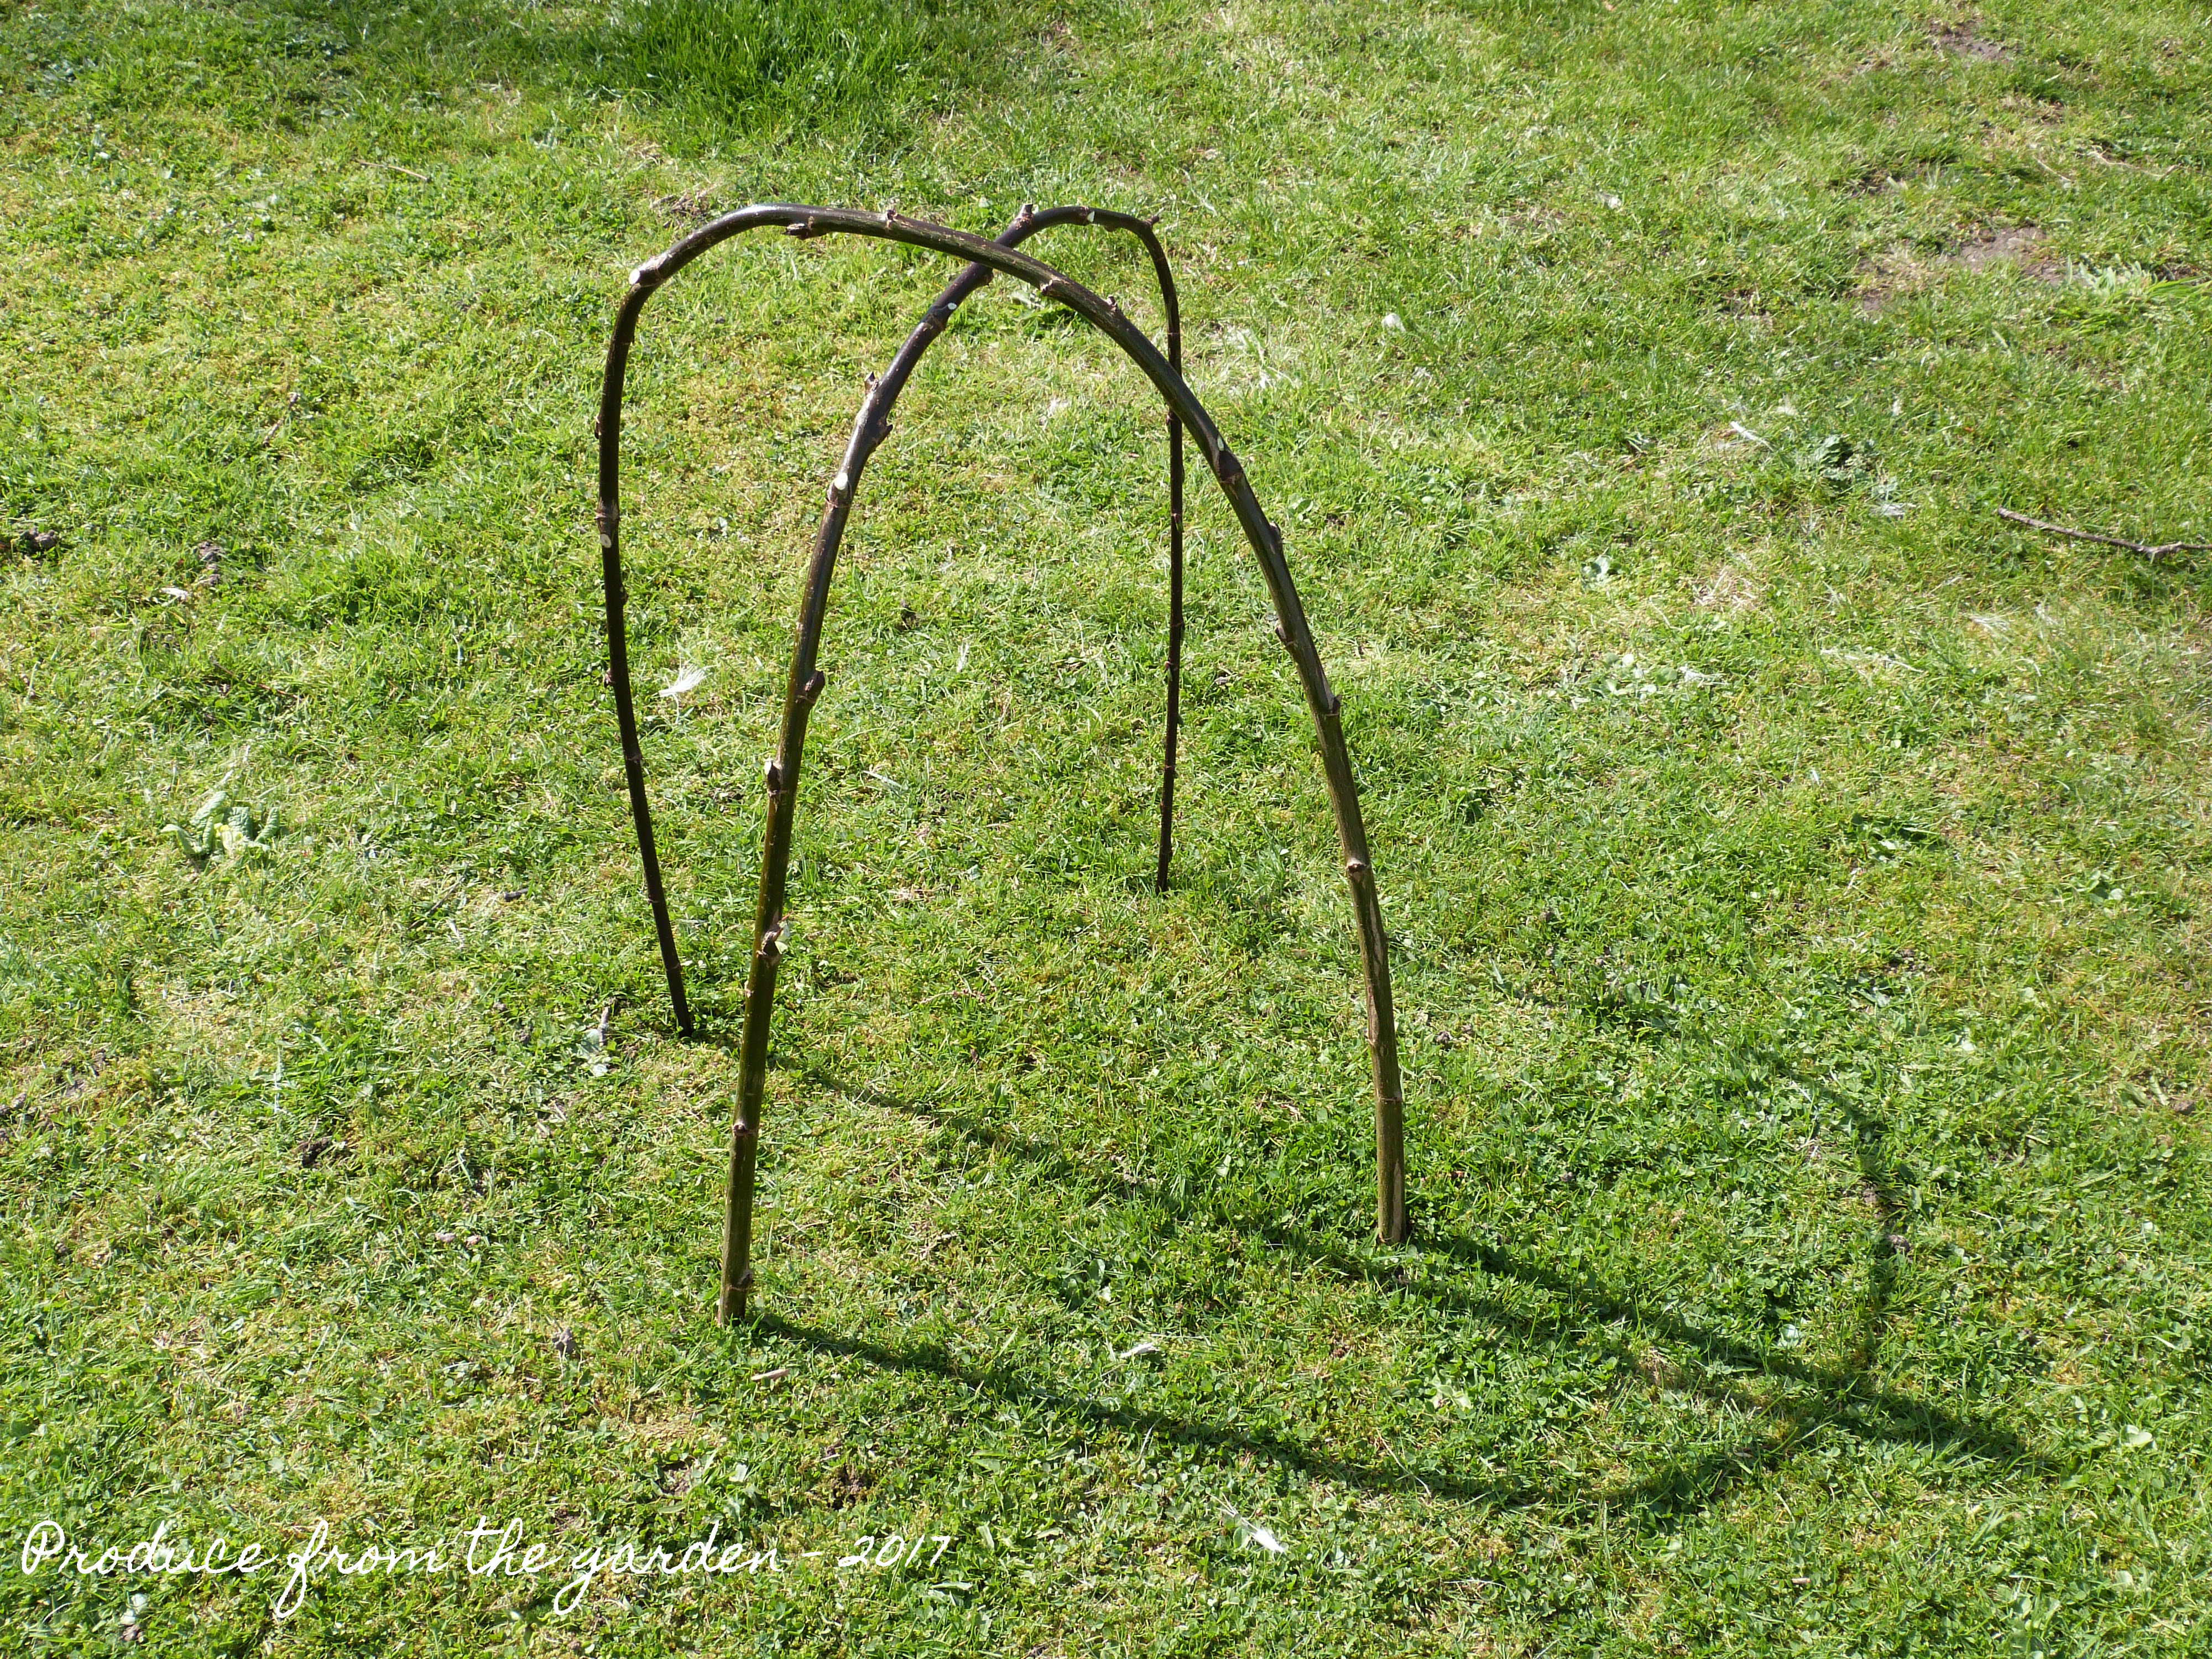
I have also made some willow cloches, I find them useful to pop over tender plants early in the season, giving them a little protection from a chill and wildlife that would like a nibble on their tender shoots! In the same way, I started the obelisk, you just need to secure willow hoops in the ground, this gives you a strong base to weave from.

Starting a Willow ClocheThe start of a willow cloch, place six/seven hoops in the ground, ready to weave willow around.
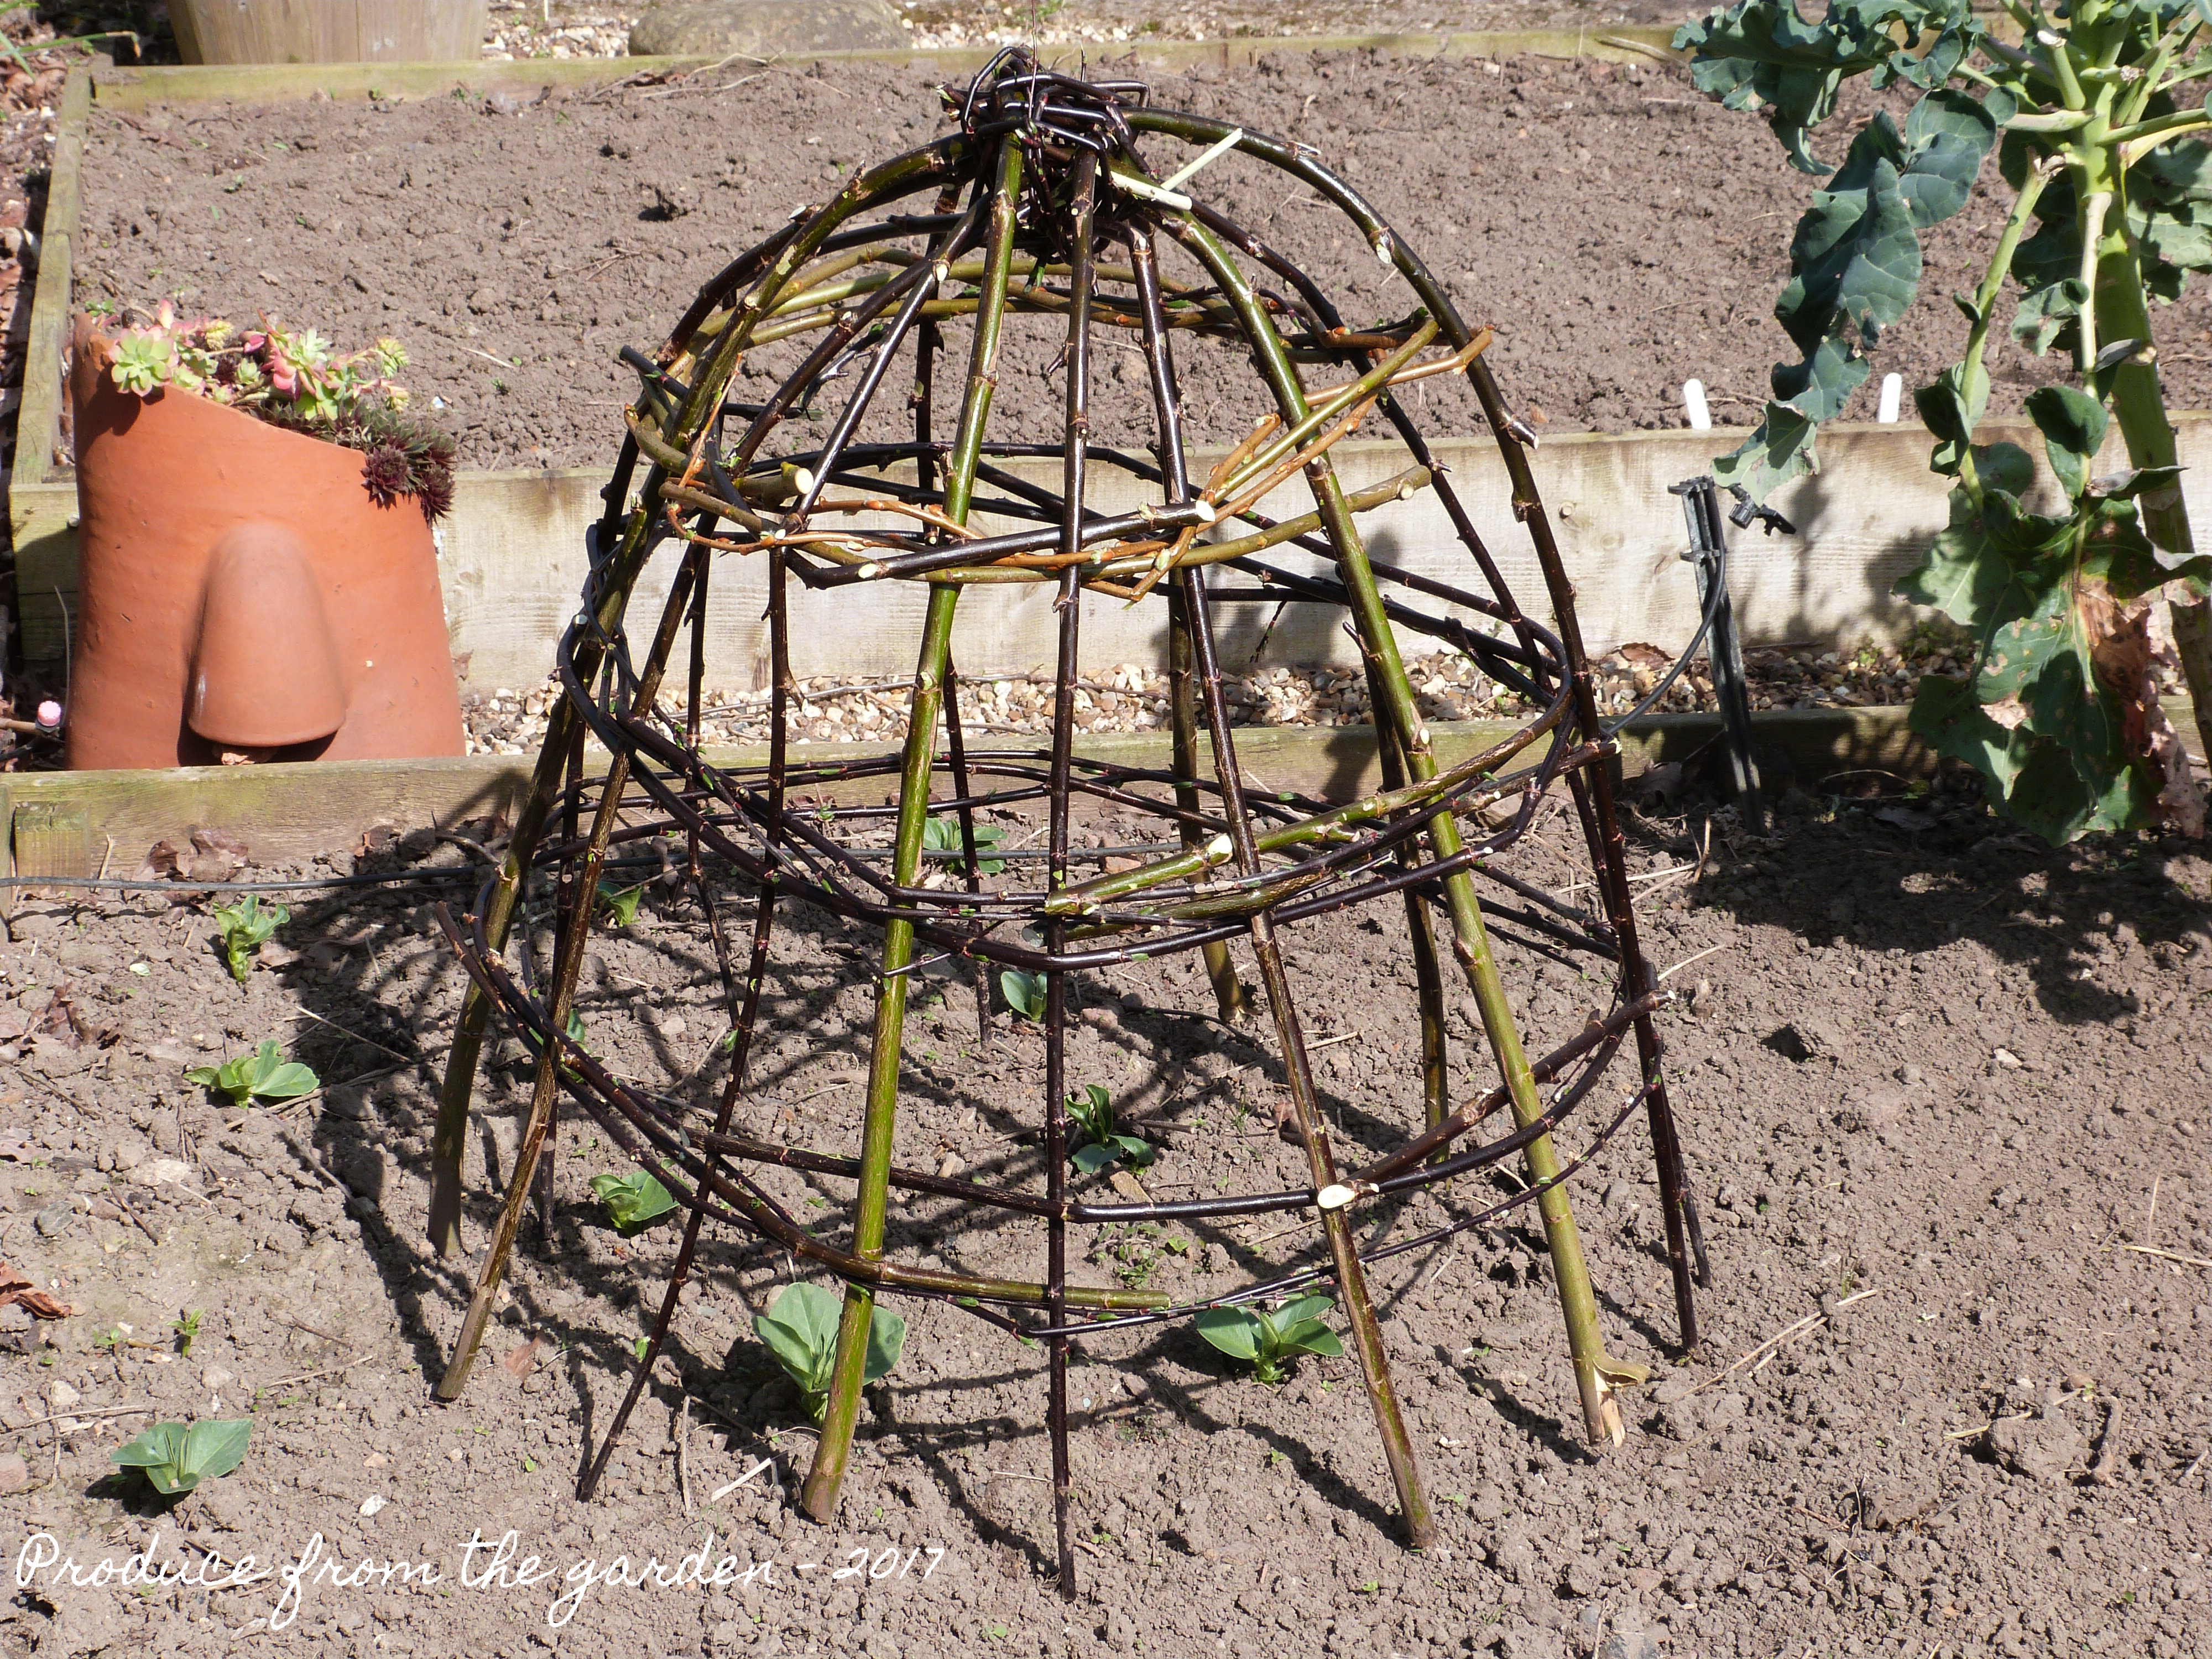
Willow ClocheThe finished cloche

As you’ve already seen, simple woven willow hoops are useful for many purposes in the garden and home, here are a few more I’ve made:

Willow wreath
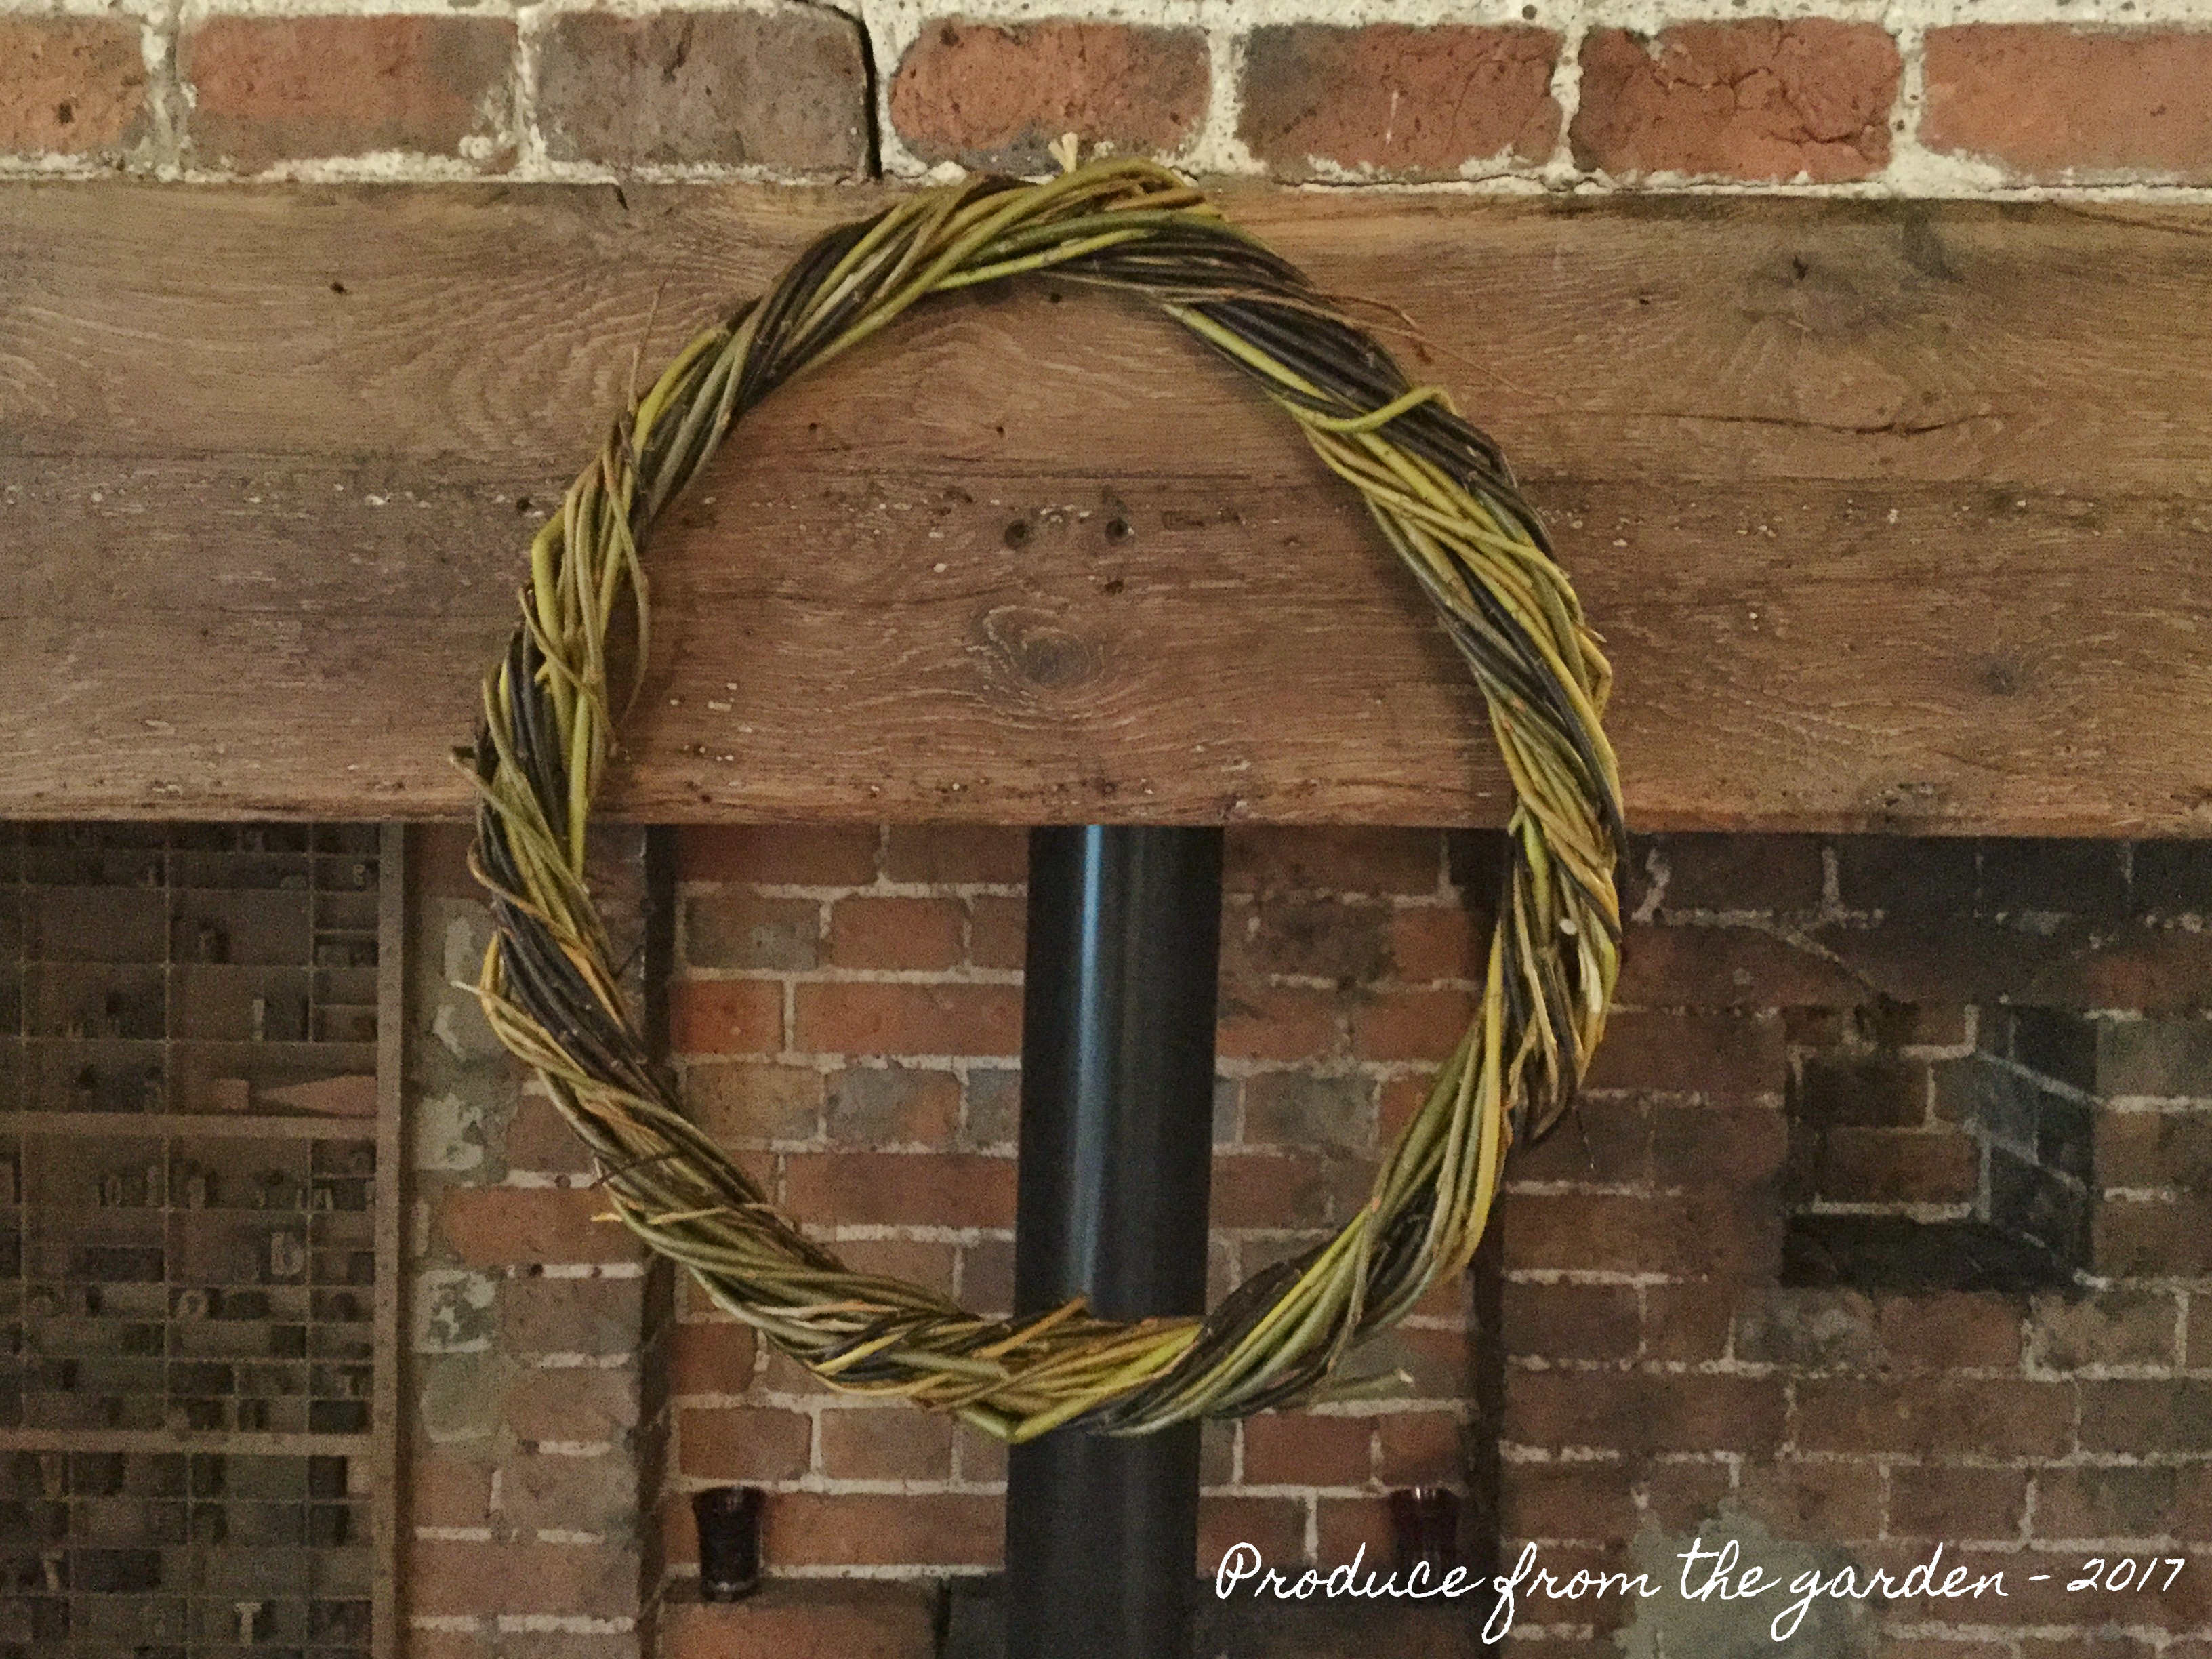
A willow hoop or wreath hanging from our fire place

Bridal wreath
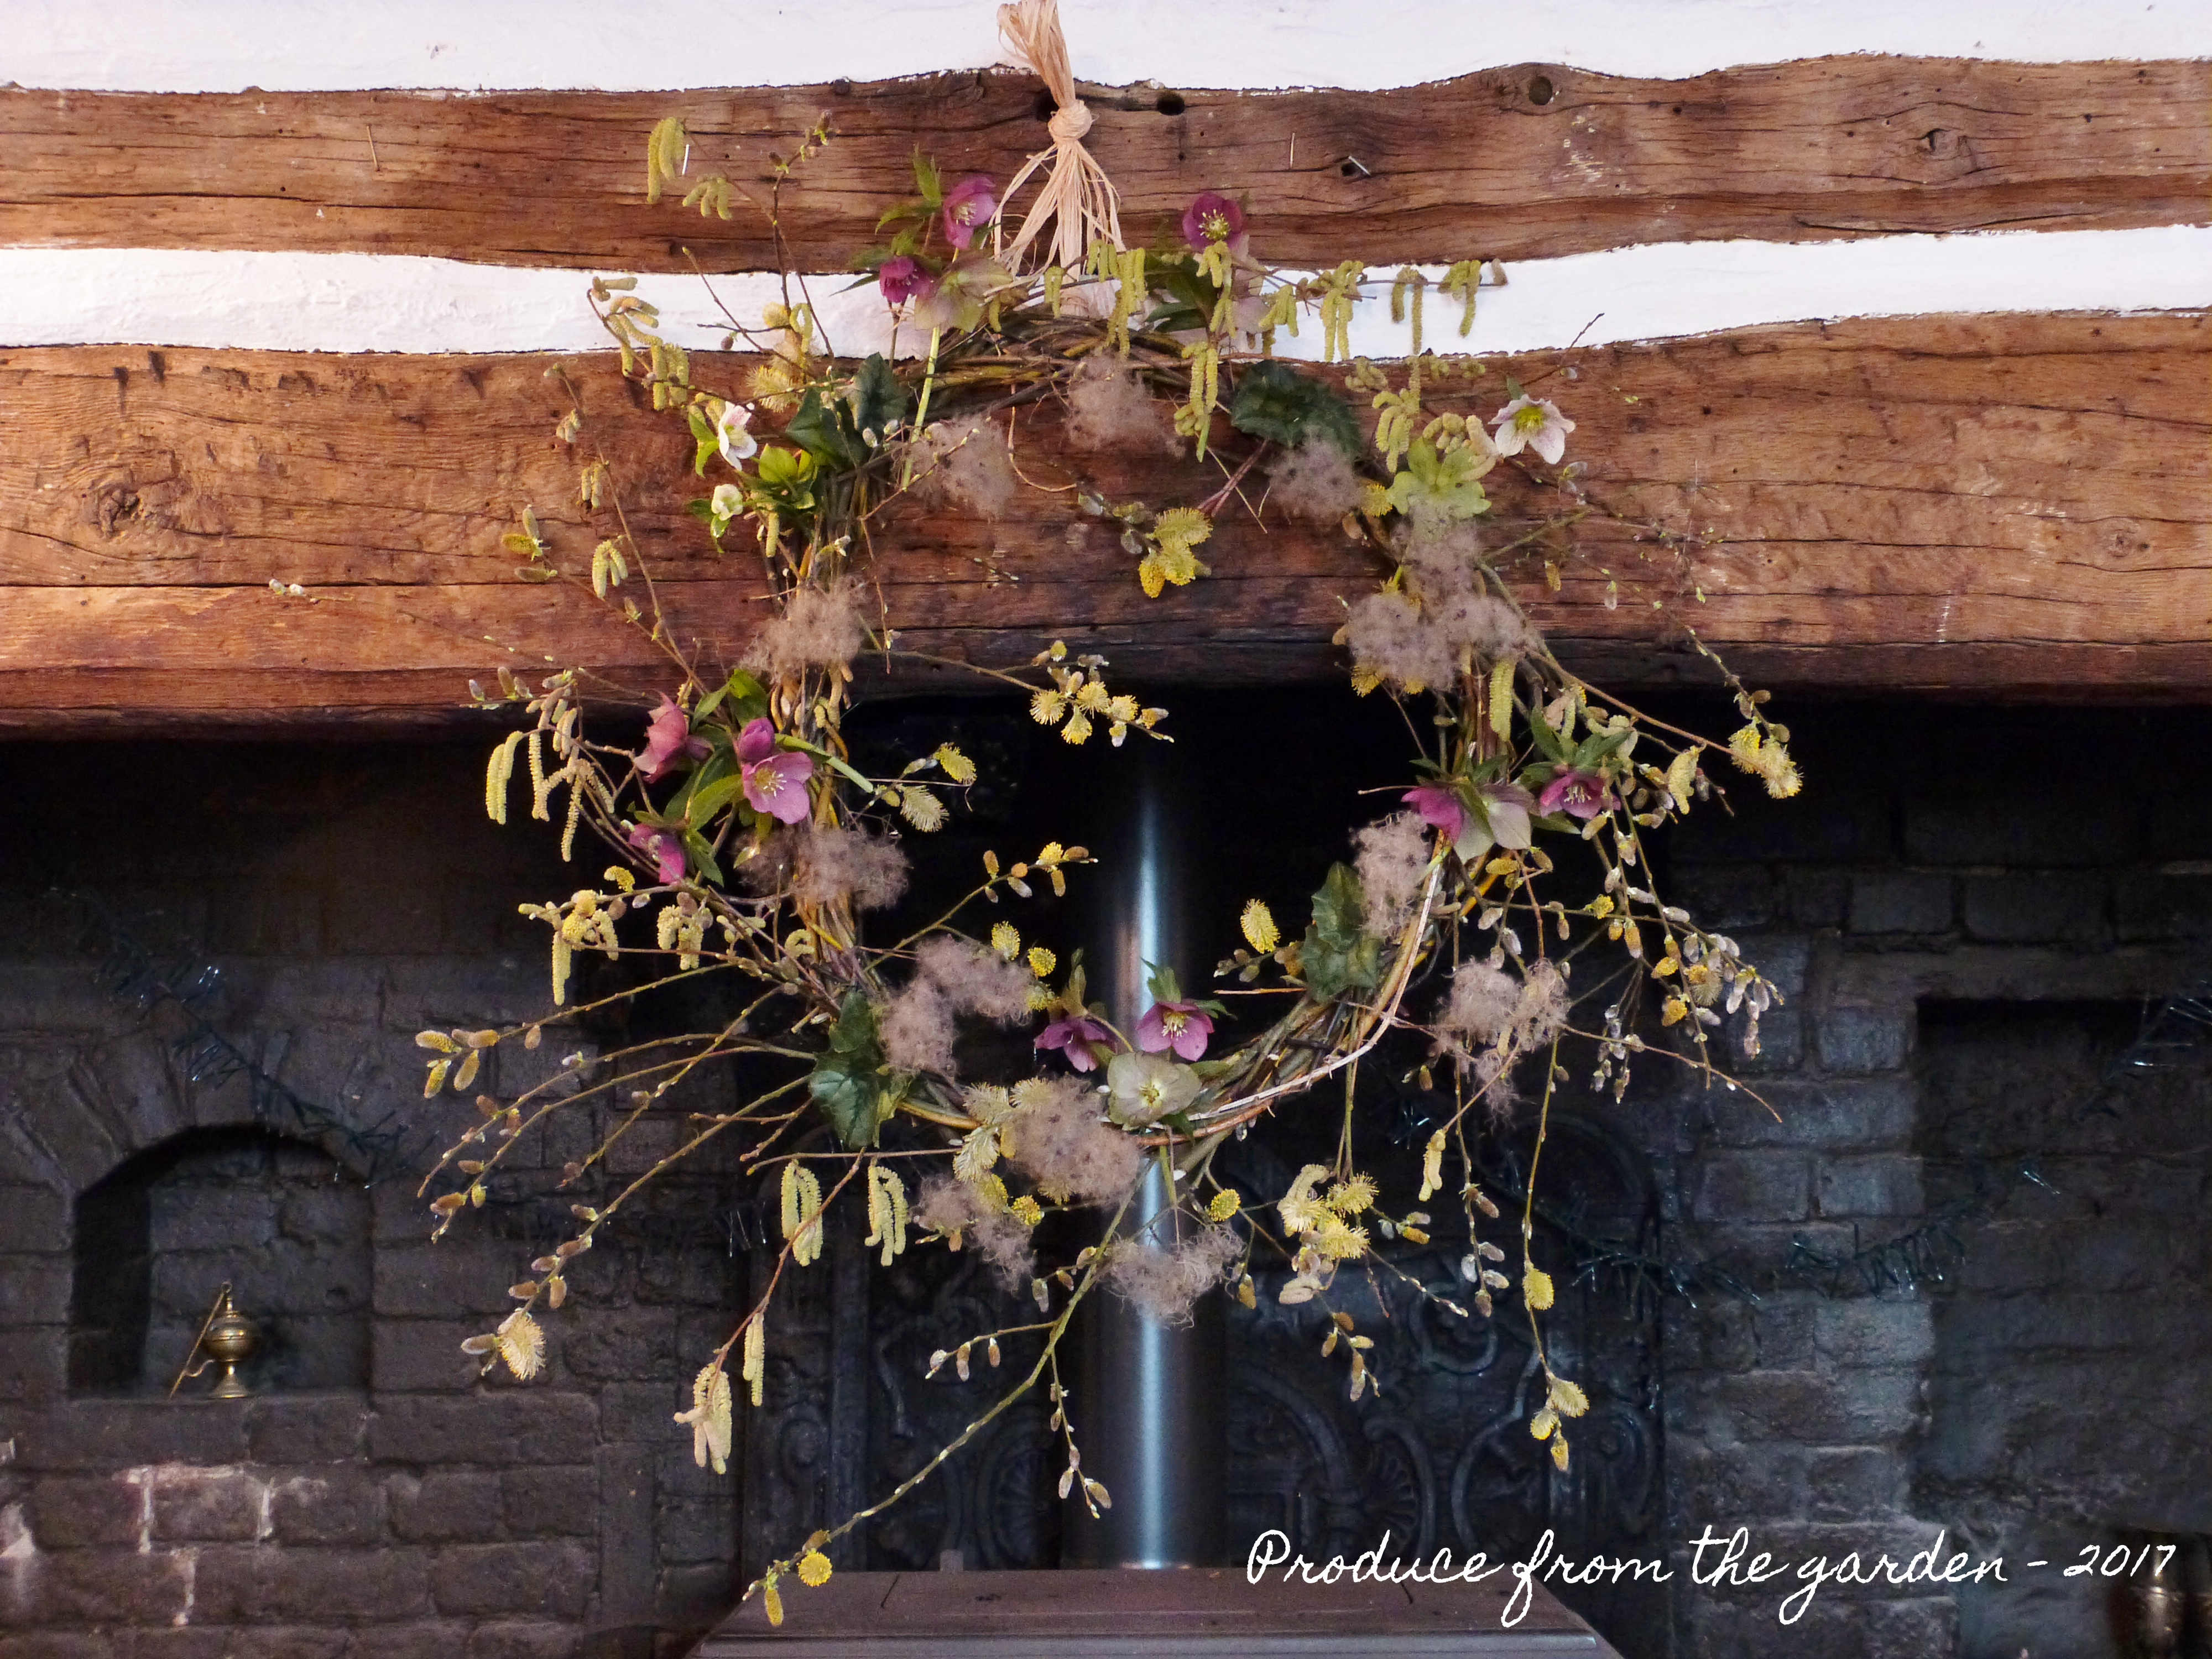
I decorated this willow hoop with flowers and catkins for a friends Spring wedding reception

Willow hanging ringsI’ve hung these hoops from our oak tree as  fun sculptural art from the garden. My boys seem to think they’re the equivalent of Quidditch hoops!!

Off cuts of hazel stakes make wonderful plant label sticks, they look fabulous in the kitchen garden, can be clearly seen and are not so easily taken and distributed around the garden by children and dogs, compared to the little white plastic labels!
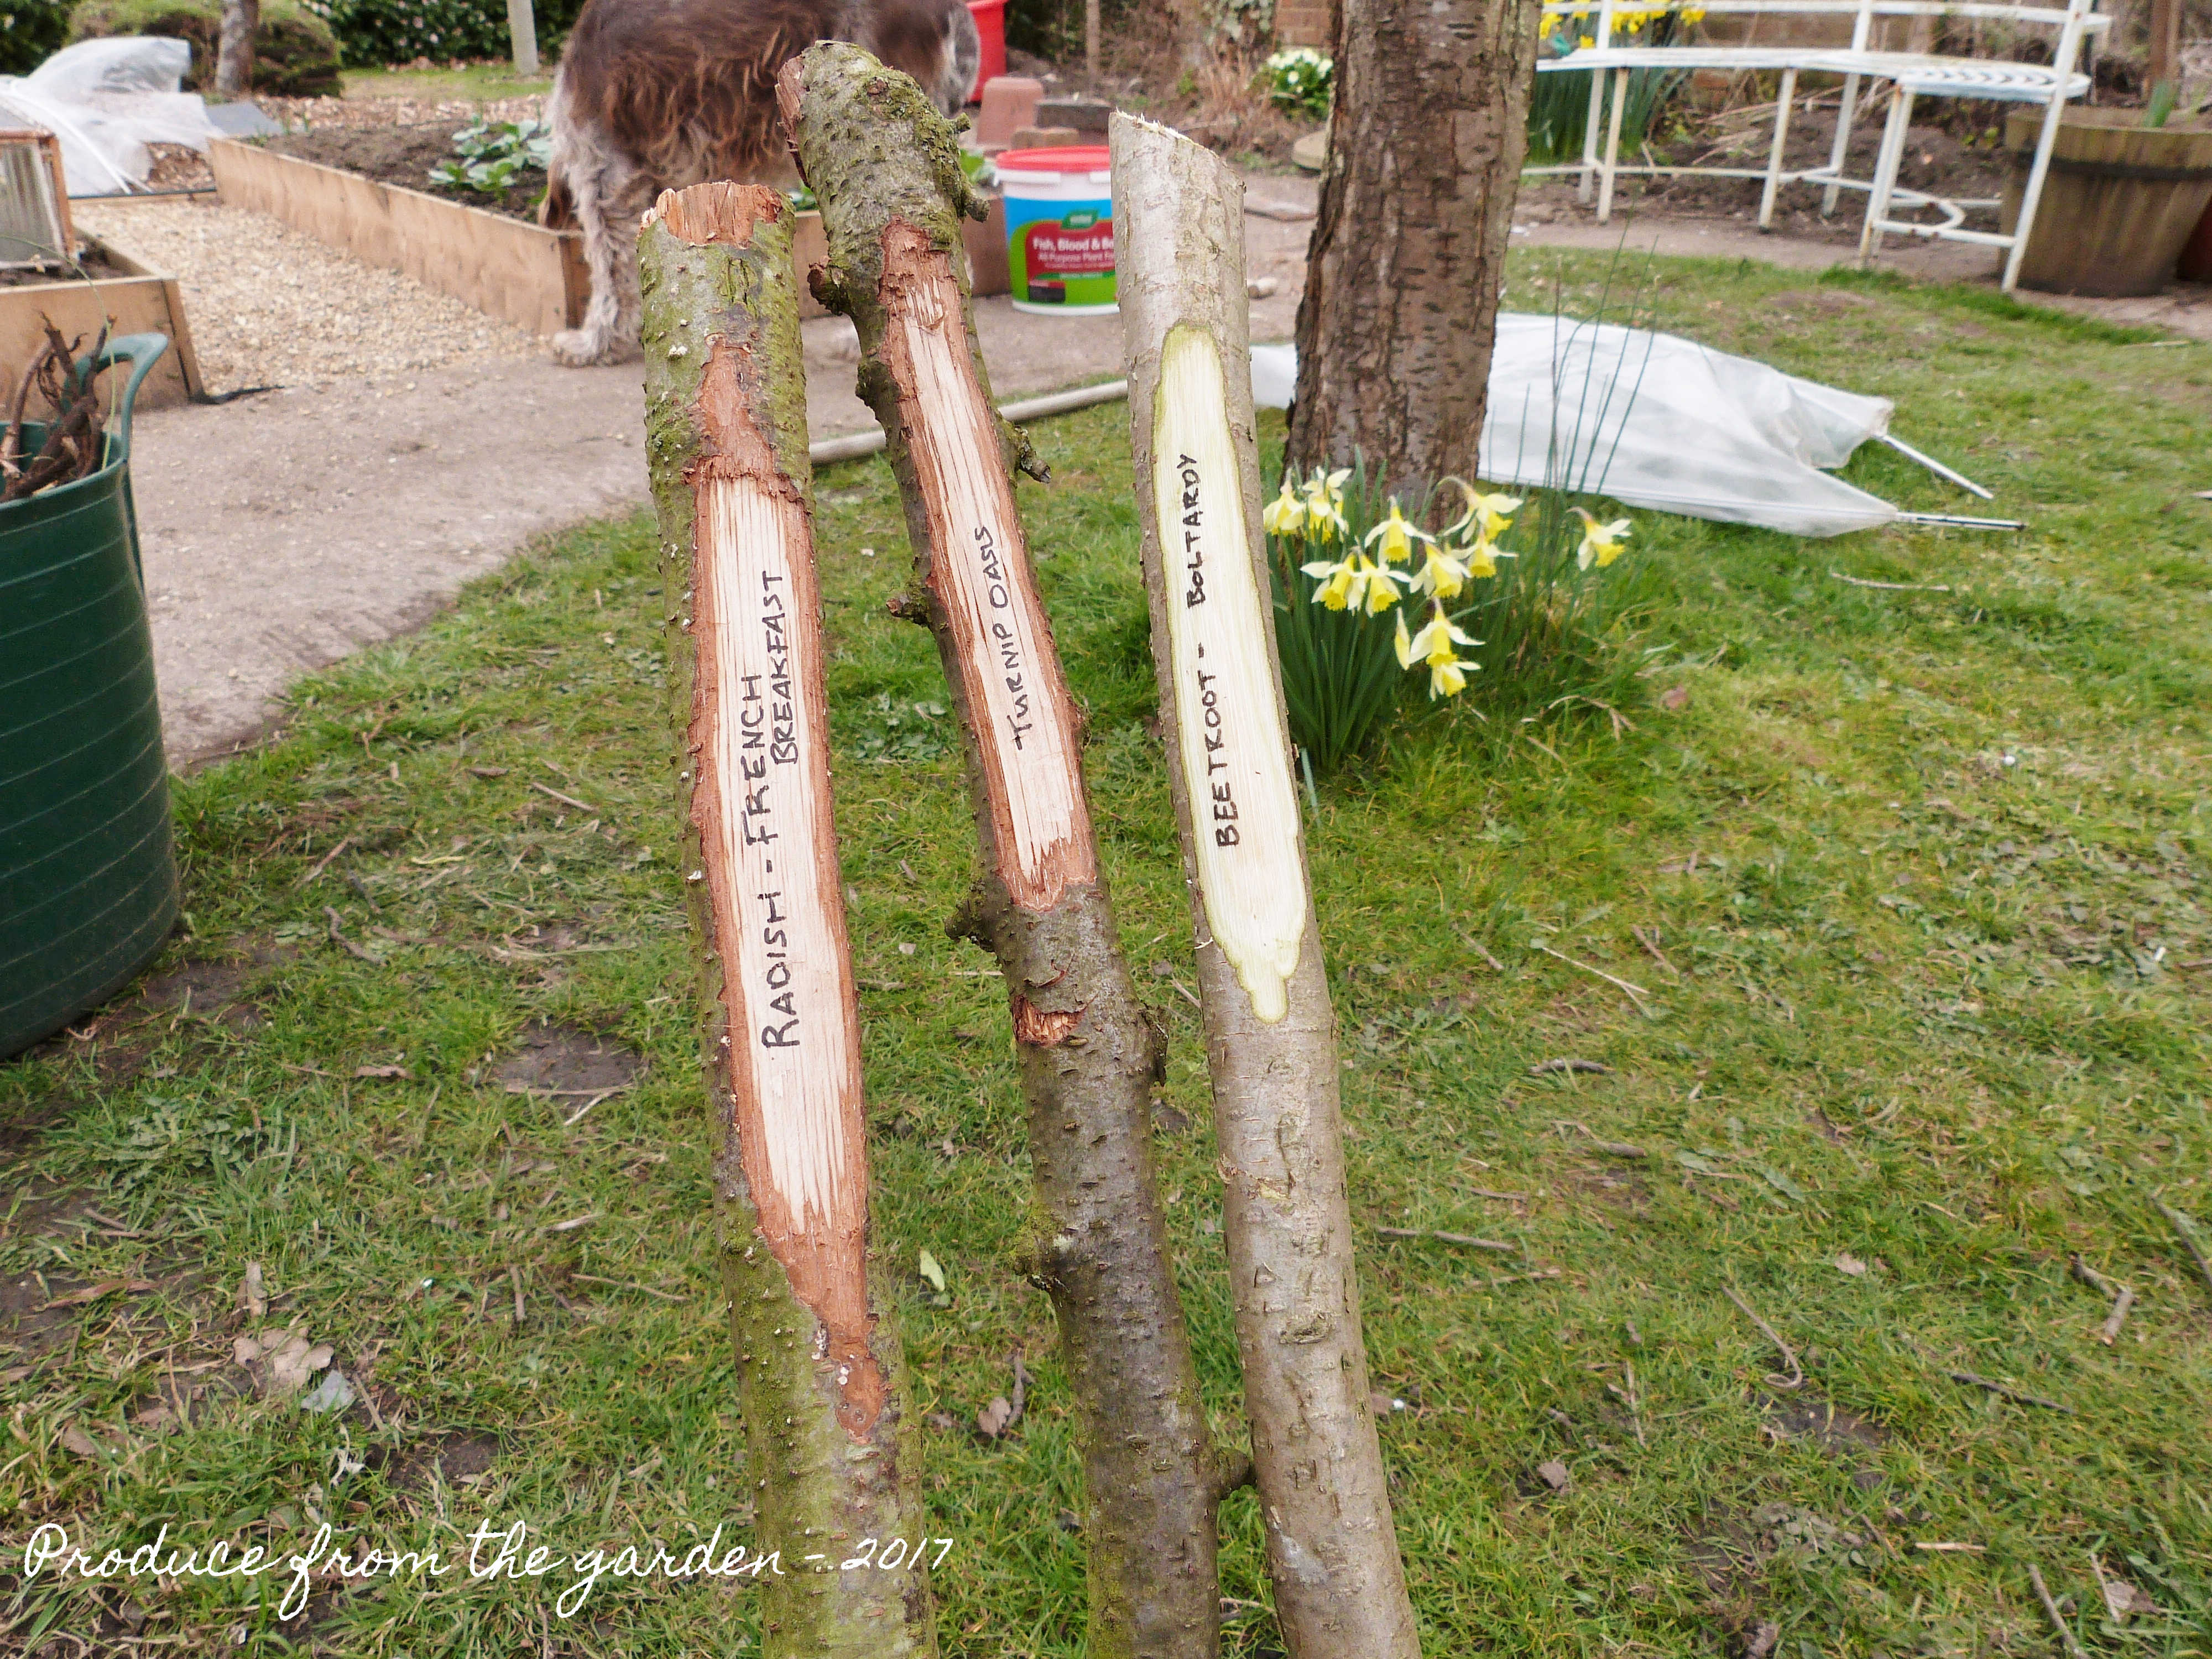
Plant labelsPlant label stakes

Willow hearts are simple to make with two whips of willow bent over, twisted and woven to secure at the bottom. I hung the large heart on our front door for Valentine’s day, it’s now moved to an oak pillar in our dining room.

Willow heart
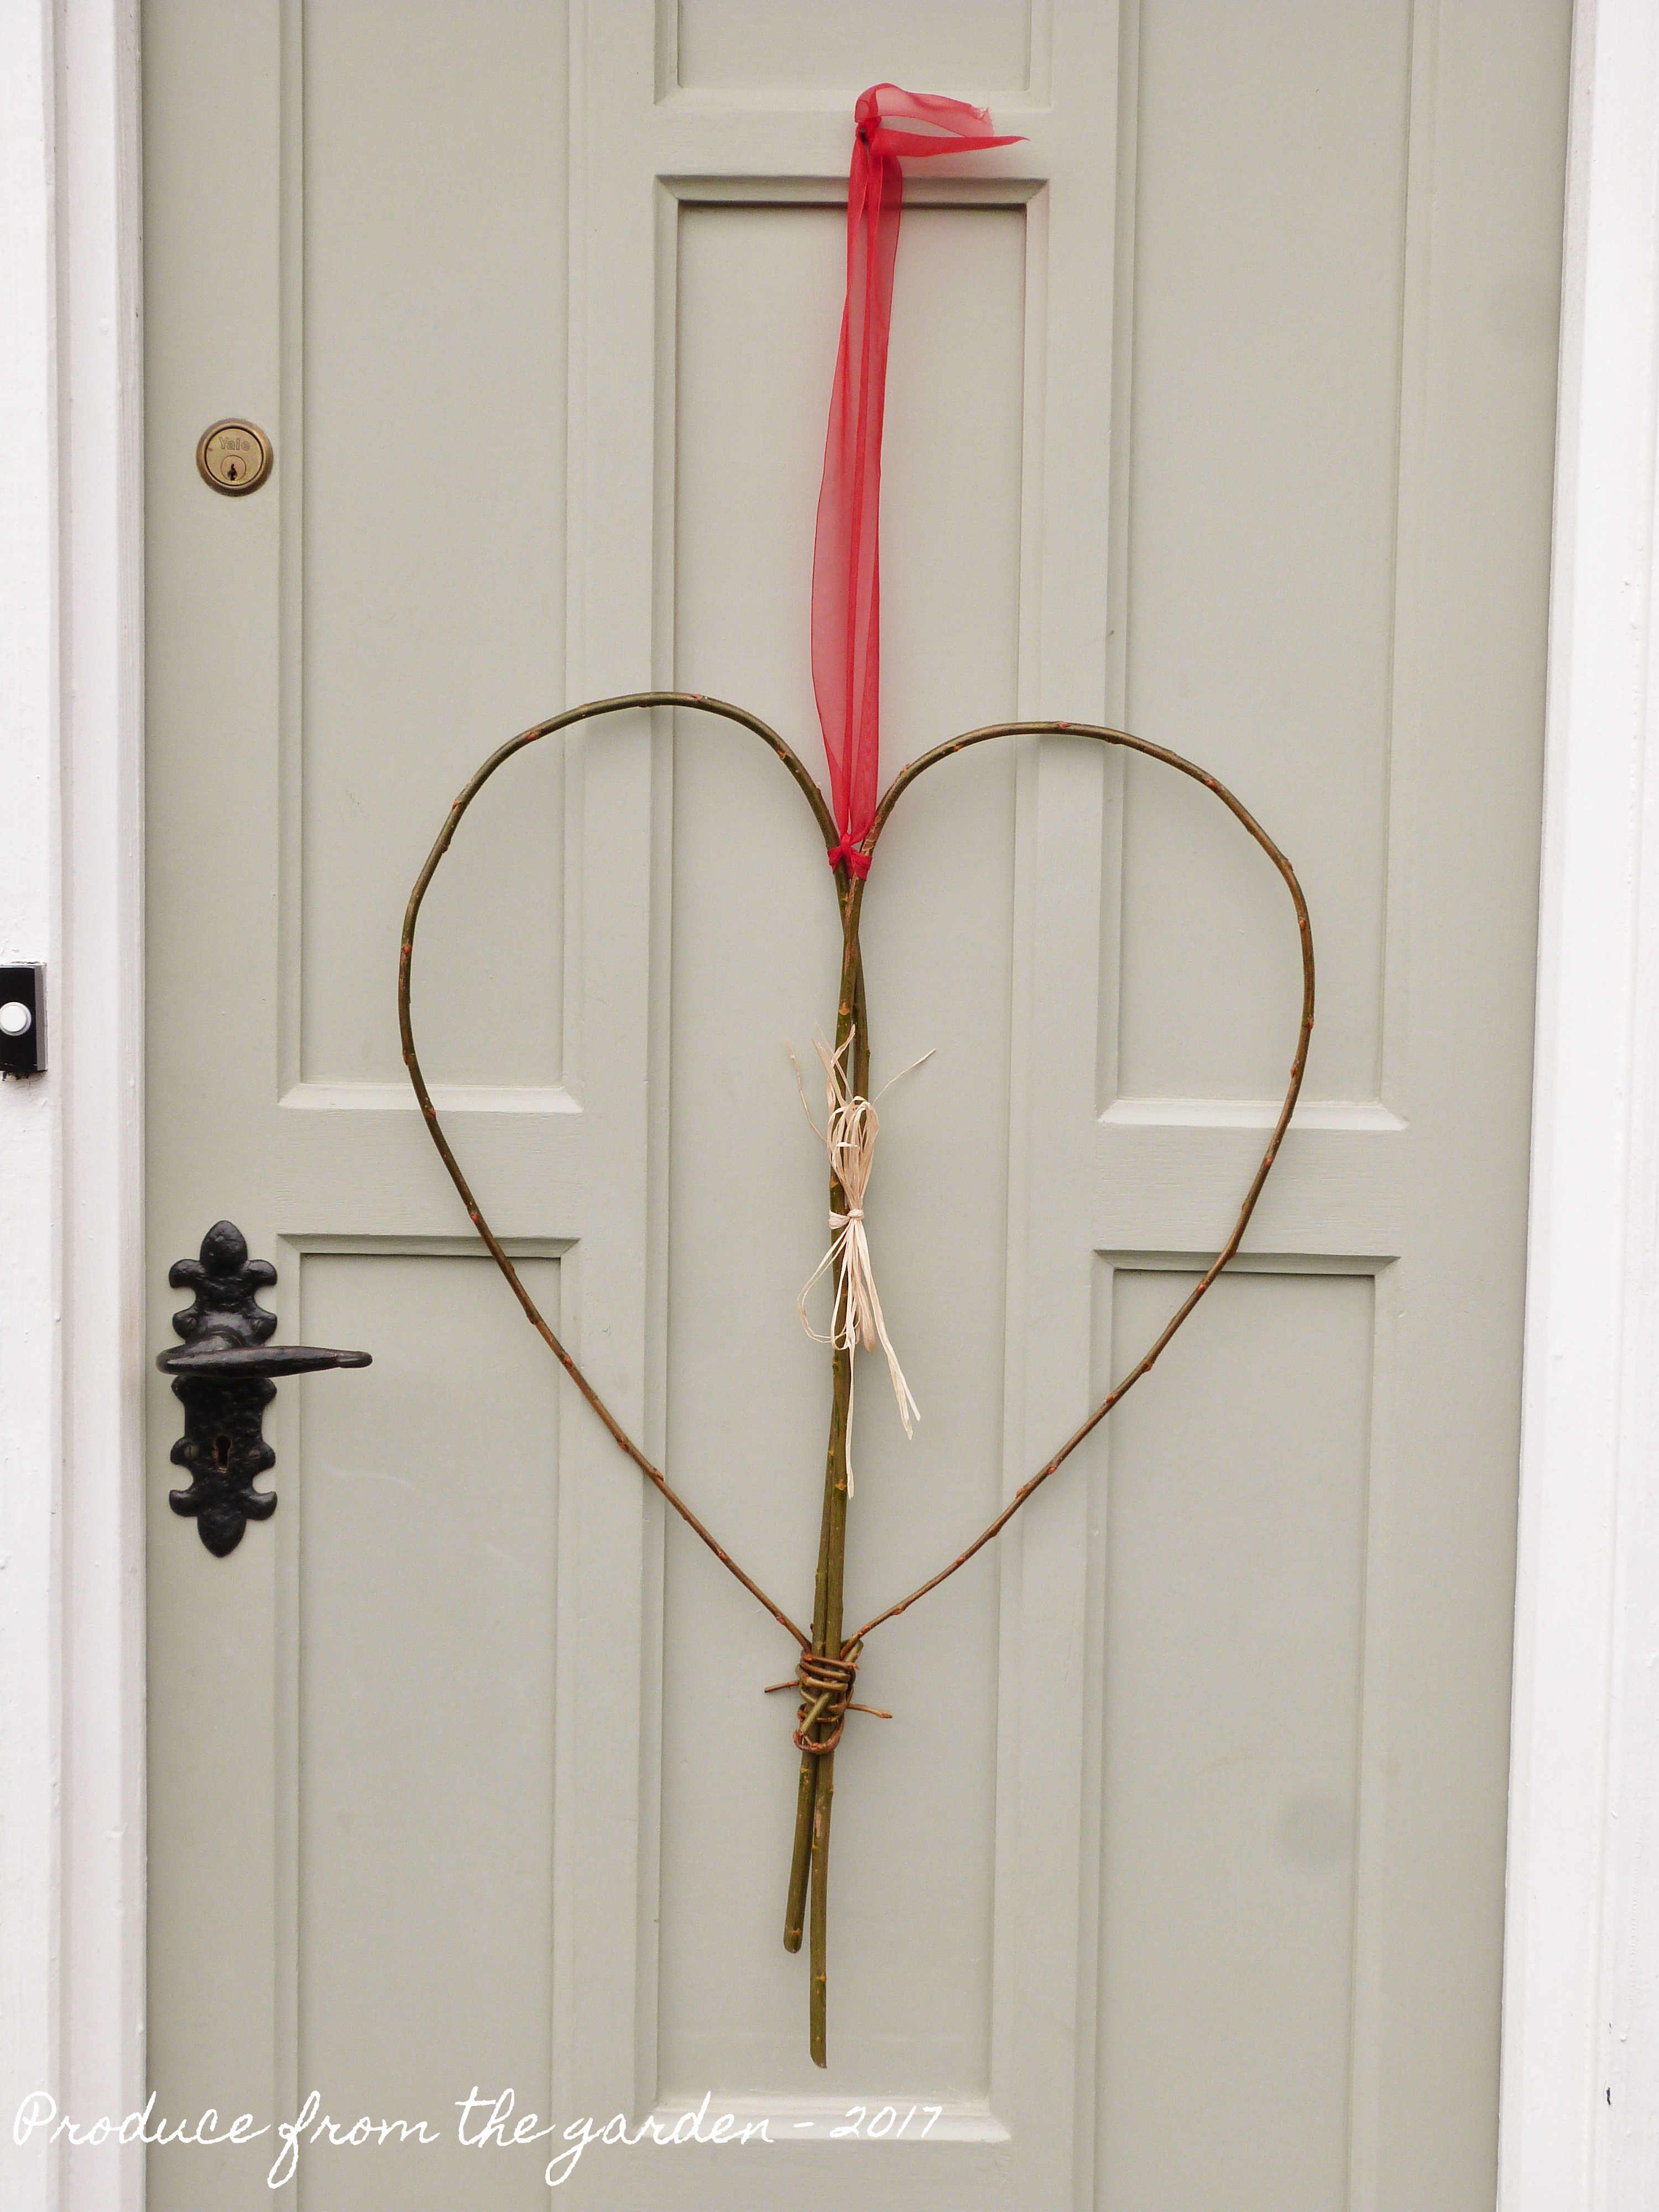
My willow heart on the front door for Valentines day

Trees in the garden are a lovely feature, great for wildlife and even better if you can harvest a crop from them for creating craft from the garden!

Save

Save

Save

Save

All you need to know: Dahlias

Dahlia's in a bucket

Regulars to my blog will know of my passion for Dahlias. They’re amazing flowers that never fail to put a smile on my face. They come in a vast range of colours and shades, but, never blue and quite rightly so, a blue Dahlia is just wrong! Their shapes and sizes are also wonderfully varied, never allowing you to bore of their splendour. If I was a mathematician I would wax lyrical about their geometric patterns and Fibonacci numbers, but I’m not, I just love how some are pom poms, some open flowered, others water lily shaped and the show stoppers are the size of dinner plates! Once they start flowering in late June/July they don’t stop until the first frosts, they’re the best cut flower you can grow and my home never looks better when filled with their blooms. If I was to be hyper critical and in the pursuit of a balanced argument, they are lacking in scent, but it would only lead to a sensory over load whilst taking in their magnificent appearance, so a lack of scent is a good thing!

Dahlia bedThe Dahlia bed in full bloom

How to grow Dahlias:

Now is the time of year to go Dahlia shopping. Buying a Dahlia tuber is the best garden investment you’ll ever make! Your local garden centre will no doubt have a selection, but for a fully satisfying dahlia retail experience I would recommend:

http://www.peternyssen.com/  – A very dangerous web site, their bulbs are amazing and I just can’t stop myself, I worry every spring that the husband will notice the number of new bulbs I’ve invested in!

Dahlia Tubers from Peter NyssenAn exciting Peter Nyssen delivery

http://nationaldahliacollection.co.uk/ – another great dahlia shopping site, they’re based in Cornwall near Penzance, you can visit their amazing dahlia fields in the summer, well worth a trip if you’re on your holidays in that neck of the woods.

Plant up the tubers in approx. 10inch x 10inch pots (enough room for the dahlia to comfortably sit), water and keep them in a green house, conservatory etc. They’ll start to shoot, feed them every few weeks and keep watered. Don’t plant them out until the end of May when there’s no chance of frost, you’ll have nearly a foot of growth, and they be strong healthy plants that will be sufficiently mature to withstand a slug and snail attack. Dahlias are quite greedy plants, they like to be planted in ground that has been enriched with manure/ chicken poo pellets, in fact any fertiliser.

Planting a dahlia tuberPlace the tuber on a bed on compost in the pot

Planted Dahlia tuberFill the pot with compost leaving the old stem showing at the top of the pot

Dahlia tuber shootingNew dahlia shoots, if you have more than five, you can take cuttings from them with a sharp knife

Once planted you’ll need to stake them, many dahlias can hit a meter or more in height and width. A strong breeze will snap the stems destroying a dahlia plant in its prime.

Either cut the flowers for the home or let them put on a show in your border. If you’re not treating them as a cut flower it’s important to snip off the spent buds after flowering, dahlias are a cut and come again crop, that will stop flowering if they think they’ve gone to seed. Clip the for the pointy Spent buds, the dome shape buds are about to flower.

Dahlias in my home:

Dahlias on the fire place

Dahlias cut flowers

Dahlia Cafe au Lait in a vase

Dahlia in brown glass bottle

October posy of garden flowers

After the first frost the dahlia foliage will go black. You need to decide if you’re going to dig up your tubers or leave them in them planted over winter. Being a fan of low maintenance gardening techniques I leave mine in. I cut back the black foliage leaving a foot of stem (it’s a marker so you know where to look for new growth next year), I then mound up with 12 inches (30cm) of insulating mulch (wood chip, manure etc.), I’ve managed to successfully get dahlia through winters hitting -10°C. In spring, knock back the mulch ready for shoots to break through, do bear in mind this will be latter than the one brought on in the green house.

If you’re far more organised than me, want to ensure the survival of your dahlias over winter and bring on an earlier flower crop (June instead of July) dig up the tuber, (don’t store them in a tray like the books say, you’ll lose loads to rot), pop them in a pot with compost. Very lightly water and then just leave in the greenhouse over winter, when they start to shoot in Spring just follow the same steps as when you plant a new tuber.

Propagating dahlias:

You can never have too many dahlia plants! So, if you’re new to growing dahlias you’ll soon want to know how to multiply your stock.

Cuttings

When you’re growing dahlia tubers in pots you only really want five or six main stems, the others can be cut off, taking a little snag of tuber, pop into compost and grow on in the greenhouse, soon you’ll have a new plant. Just one tip, if the stem is older and hollow the cutting won’t take, it must be solid. Once the cutting starts growing and has a good root system, pot it on. It might not flower this year and it will benefit from staying in a pot and not plant out, a tuber will form over summer take the pot back into the green house for winter and then plant out the following year.

Dahlia cuttingA new cutting

Seeds

This is the first year I’ve sown dahlia seeds, previously I’ve not gone down this route as I usually can’t stand the faddy duddy colours that the dahlia seeds often come in. However, I saw a cheap out of date packet of mixed colour pom poms and I couldn’t resist. Once sown I popped the seeds in my propagator and they germinated within four days. I’ll report back on their success, I’m keeping my fingers crossed for pinks and whites, I won’t be doing it again if I end up with yellows and peach flowers!

Dahlia seedlingsDahlia seedlings, they will need potting on in a few days.

Tuber division

After a few years, the dahlia tubers do get to an enormous size and do benefit from being dug up at the end of the season and divided up, then following the overwintering in a greenhouse method. This is an easy way to bulk up your dahlia stock.


If I’ve not convinced you yet to grow dahlias, take a look through these beauties:

Dahlia Sam HopkinsDahlia Sam Hopkins

Dahlia Possible Glorie van heemstedeDahlia possible Glorie van Heemstede

Dahlia Hillcrest RoyalDahlia Hillcrest Royal

Dahlia FurkaDahlia Furka

Dahlia EdinburghDahlia Edinburgh

Dahlia Cafe au LaitDahlia Cafe au Lait

Dahlia AmbitionDahlia Ambition

I hope I’ve inspired you to go dahlia shopping, it’s well worth it, they’re my number one flower and it’s incredibly easy to catch the slightly obsessive Dahlia bug!


Save

Time to start cutting flowers for your home

Life’s on the up, we’re out of that dreary January/February patch. I’ve changed web service providers, so hopefully large chunks of my blog won’t go missing again, and most importantly the gardens blooming with late winter, early spring flowers. I’m filling the house with blooms again. My spirits are lifted!

Here are some of todays cut flowers giving my home a lift.

Late Winter PosyA winter posy of flowers from the garden. Tete a Tete Daffodils, Primulas, Pulmonaria, ornamental cherry blossom, and ‘Red Giant’ Mustard salad leaves from the greenhouse.

Crocus in a vaseA single crocus stem in a miniature bottle

A collection of winter flowers in a vaseI think a grouping of late Winter, early Spring flowers can make a stunning display

Hellebore in vaseA Hellebore, an essential garden and cut flower at this time of year. Try also floating the flowers in a dish.

Hellebores in a vaseTwo Hellebore stems sat on the Piano.

tete a tete daffodilDaffodils, Tete a Tete.

Save

Save