How to make a Christmas garland

Christmas garlands are a fabulous way to decorate a fireplace or staircase and they’re much easier to make than you’d think. This fireplace garland took me two hours and that included the time spent in the garden picking the foliage.

Equipment needed:

  • Foliage from the garden, evergreen glossy leaves last the longest. I used branches from non-drop Christmas tree, Ivy, holy, garrya and dried cardoon flower heads
  • florist wire
  • garden twine
  • garden snips or secateurs
  • fairy lights
  • ribbon (optional)
  • gold old Spray paint (optional)
Christmas decorating foliage from the garden
Equipment required

Measure the length of the garden twine to the length of garland you require. Bunch three or so stems of one type of foliage together, tie stems firmly with wire to secure in place. Then wire to the start of the garden twine.

Note the stems wired together and then wired to the twine.

Take the next wired bunch of foliage and wire it to the twine so that it just covers the stems and wires of the previous bunch, and repeat.

Once I had a length for the first section of my garland I decided to secure the twine into place, with nails in the top two corners and in the centre. If you decide to continue working on a table and it’s for a fireplace make sure you’ve marked the middle point on the twine as once you get to the centre the foliage needs to be tied in the opposite direction.

Attaching the garden twine to the nails on the fireplace

Continue to tie in the bunches of foliage with the garland in situ.

tieing foliage to a garland
The first half of the garland. Please note the cardoon heads have only just been spray painted gold so still wet and needing the protection of paper!

In the centre I chose a single stem of christmas tree to splay across and then directioned another single stem of christmas tree to mirror on the other side. I continued the garland attaching foliage in the same order as the first side, to mirror and keep the garland balanced. Once the main garland was completed I added extra gold sprayed cardoon heads, a central Christmas bauble, battery powered (I have no power point near the fireplace) fairy lights on a bronze coloured wire. You can add extras like ribbon bows if you like.

The finished garland
The centre of the garland

Decorating with Mistletoe and then using the berries to propagate your own

Mistletoe is as closely linked to Christmas as holly and ivy and I love to hang a bunch from the ceiling, the symmetrical branching, silvery green foliage and white pearl like berries make it the most elegant yuletide decoration.

I am very fortunate as my Mother-in -law has vast quantities of mistletoe growing in her apple trees and willows. This year it was harvested and sold for charity, although you wouldn’t know, there’s still masses of it decking the bows of the tress. She very kindly cut me a magnificent mistletoe sphere. It looks fabulous hanging above our dining table, a carefully selected spot, as our ceilings are too low to hang it normally.

Mistletoe growing in apple treesMistletoe in my Mother-in-laws apple trees

MistletoeA close up of the berry ladden mistletoe

Mistletoe in cricket bat willowsMistletoe at the top of the giant cricket bat willows

Hanging mistletoeMistletoe hanging above our dining table

It would be lovely to harvest my own Christmas mistletoe from the garden. So I’m trying my luck at propagation. I have taken a few of the berries, slit the skin and then squeezed the seed and sticky goo out of it. I then stuck the goo surrounding the seed to an apple tree branch which is 3-4 years old. I understand that if the seed germinates the mistletoe is slow to establish and we’ll have to wait at least 4 years for a clump to form. February is the optimum time to sow mistletoe, I will save all the seeds from our Christmas sphere, storing them in the light. In February I will follow same process as above, selecting young 3-4 year old wood for it to establish on. Mistletoe also grows happily on willow, I have selected Bramley apple trees as they are the most established and sturdy fruit trees in the garden, I regularly coppice the willow so mistletoe would never have time to establish.

Mistletoe seed and propagationMy attempt to establish mistletoe in our Bramley apple trees, I will apply further berries in February

Mistletoe is steeped in tradition and has been linked with mid winter traditions and the winter solstice, pre dating Christianity and Christmas. Its link with pagan festivals means many churches exclude it as a Christmas decoration. Kissing under the mistletoe at Christmas is a tradition that stems from it being a symbol of fertility, originating from the evergreen mistletoe foliage being parasitic on deciduous trees, representing strong life and vitality. The forking paired branches, paired leaves and berries full of white sticky juice hint of sexual organs.

Christmas decorations

Our house is on the old side, low ceilings and lots of beams, a Christmas decorators dream; I can bang in nails where I like, they’re barley visible so can be left for the following year. This is our second Christmas in this home, last year we were still renovating so festive decor was minimal, I’ve made up for it this year. After foraging in the garden I returned enthusiastically with mounds of holly with genuine berries on (a first for me), Ivy and various sprigs of evergreen foliage including, rosemary, bay, olive and garrya. I lay the yule tide foliage out on the dining table and started placing it into various receptacles, most sourced from charity shops for a few pence, then painted a neutral dark grey colour leftover from a tester paint pot. Below are a few of my Christmas creations.

Christmas flower arrangmentAn arrangement in our porch to complement the wreath on the front door

Candle decorationA candle decoration

Christmas flower pot decorationsFlower pot candles, great gifts to make for gardeners

Christmas flower pots close upFlower pot candles close up

It was not all plain sailing, my plan was to make a simple garland to adorn our fire place and the image of what I wanted was in my head, but, the practicalities of achieving it was not! The husband would quip that there was nothing new there. The obstacle I encountered is that I have no mantle piece and nothing to place or attach the garland to. See picture below.

Fire placeA picture to show the lack of mantle and christmas garland hanging space!

So my problem solving ingenuity (husband would say haphazard, bodge it, incompetence) came to the fore. There is a thin lip (less than a cm) of the bressumer beam that sticks out before the brick work. I thought if I banged a nail into this lip, I could hang a water tight receptacle filled with Oasis to the nail. Inspiration struck, I chopped up a drinks bottle with an additional tag which could be folded, hole inserted into it and hung from the nail.

cutting down a drinks bottleThe garland invention

I then painted the cut off drinks bottle with my dark grey paint.

Making a arrangement vasePainted in a muted background colour

Once the paint was dry I filled the bottle with soaked oasis, and hung it off my carefully hammered in nail. I then started to place the foliage into the bottle, being careful to keep in balanced.

Start of mantle arrangementThe first sprigs to be placed into the bottle

The end result is just what I wanted, a simple, natural garland from the garden.

Mantle arrangement close upThe finished garland, a simple but festive effect

Mantle arrangementThe after shot, and it’s yet to fall down!

How to make a Christmas wreath from your garden produce

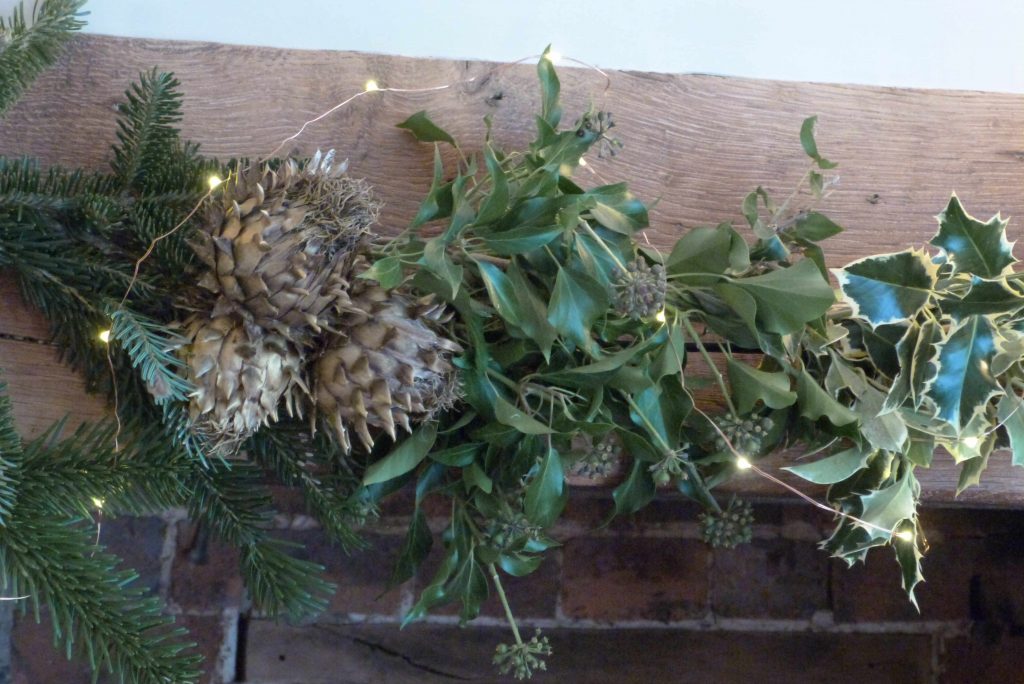
I love the build up to Christmas, more than Christmas itself. The children’s nativities, carol concerts, Christmas parties and my favourite Yule tide activity, decorating our home. This always starts with a stroll around the garden with my large wicker trug and secateurs, seeking festive foliage and anything pretty looking. I was pleased and surprised to see that the birds hadn’t gorged themselves on my bumper holly berry crop, so for the first time in years I am sporting genuine home grown holly berries in my decorations. More about my holly trimmed swags and candle arrangements in my next blog posting. Today is dedicated to the Christmas wreath, my favourite Christmas decoration.

The term wreath comes from the word ‘Writhen’ which means twisted or contorted out of normal shape or form, hence the twisted evergreen foliage into a circle. Wreaths were first used by the Romans who hung them on their doors as a sign of victory and of their status in society; the ancient Greeks gave the victors of their Olympic games a laurel wreath to wear on their heads. Christians celebrating Christmas adopted the twisted circle of the wreath as a representation of Christ’s eternal love, strength and creation of new life. To me they represent a warm festive welcome into friends and families homes. A simple wreath gives your home and instant Christmas lift. I often think homes without wreaths at this time of year look stark and bare.

I always make wreaths with produce from my garden, adding a few ribbons and baubles to give it a little extra lift and sparkle. I do like traditional holy wreaths but in recent years I’ve preferred to take a more colourful fun approach, I also think it matches the colour of our front door better!

Christmas wreath
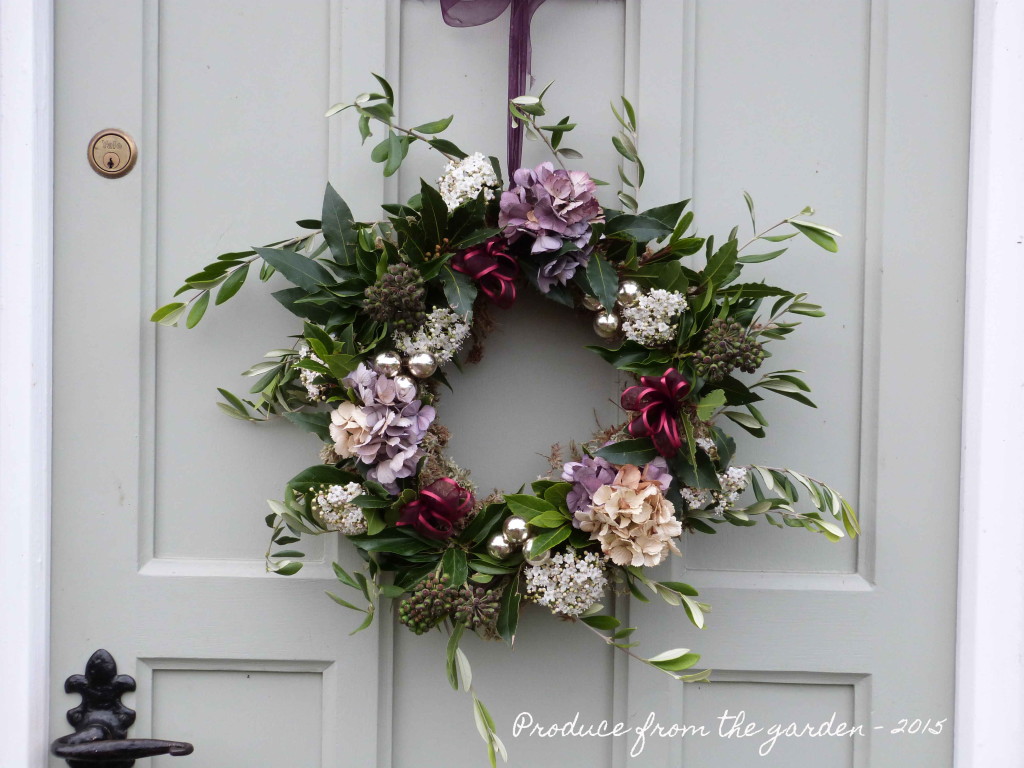
This years wreath hanging on our front door

Below is my step by step guide to making your own wreath from the garden:

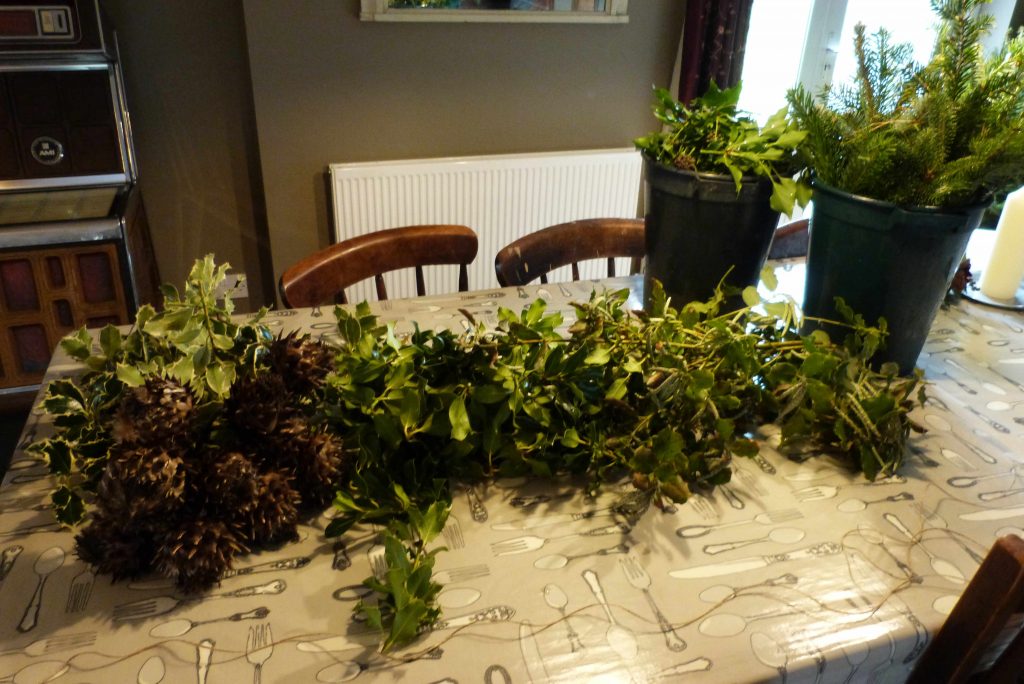
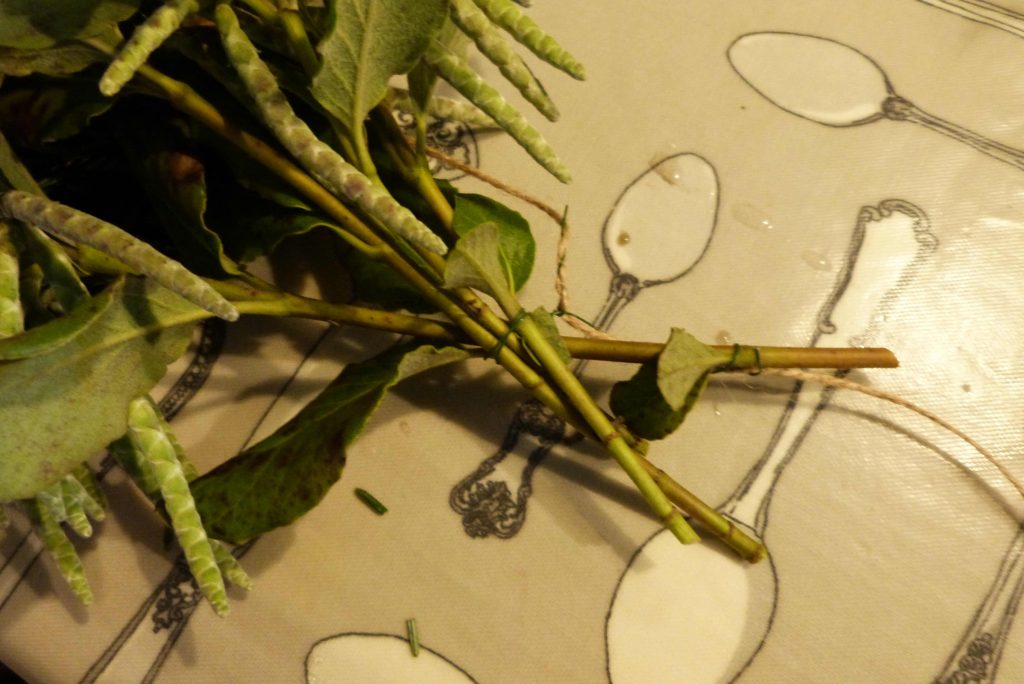
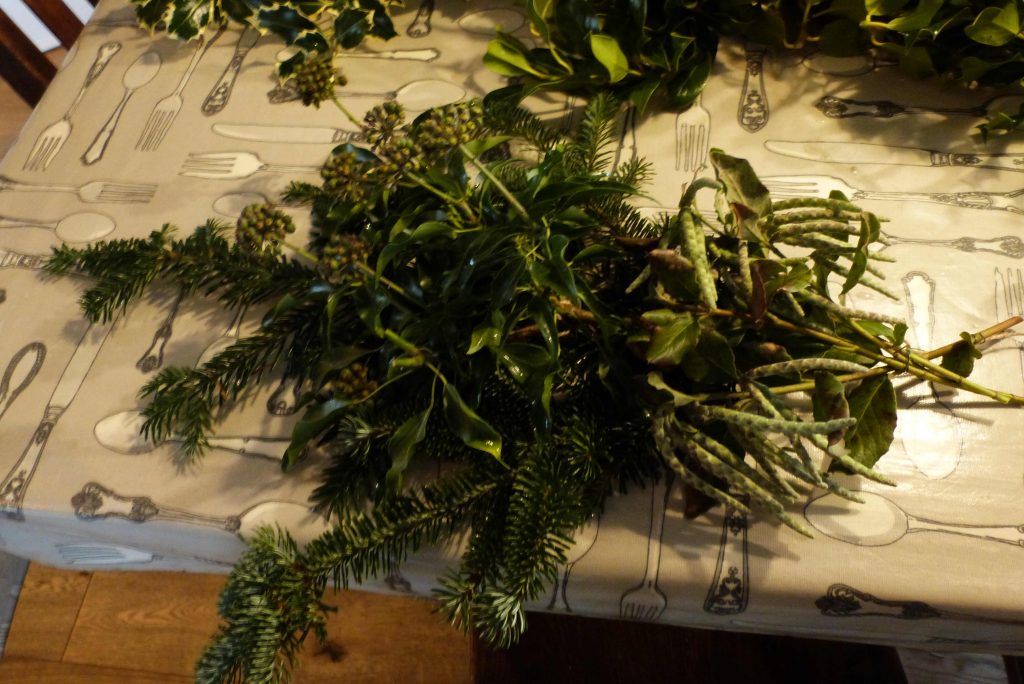
1.First of all I collect a variety of evergreen foliage from the garden, dig out ribbon, Christmas baubles and sprayed wired hedgerow finds, all reused every year. In late summer/autumn I cut and save some of my hydrangea flowers for winter arrangements, this year they’re going to be the star performer of the wreath.

Materials for the wreath
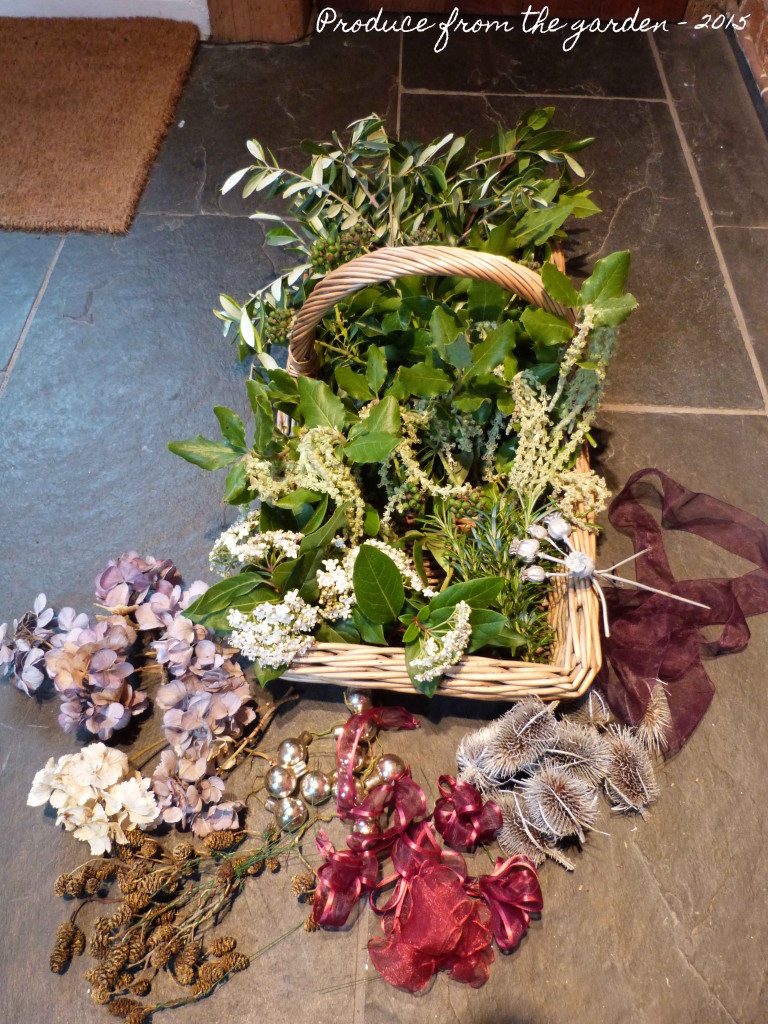
Various materials I’ve collected for the wreath

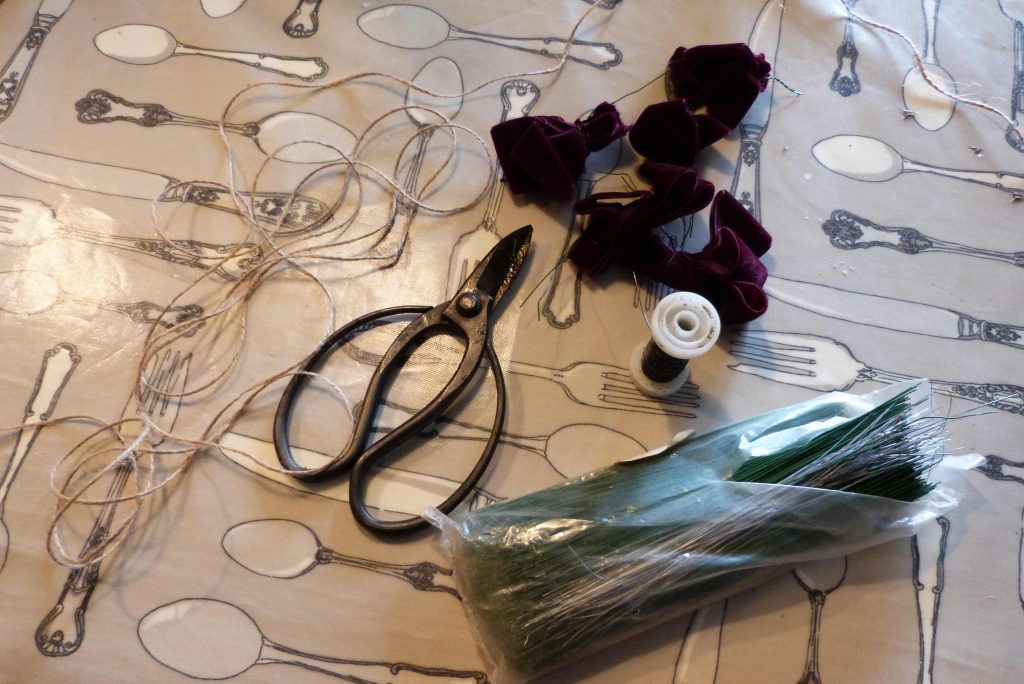
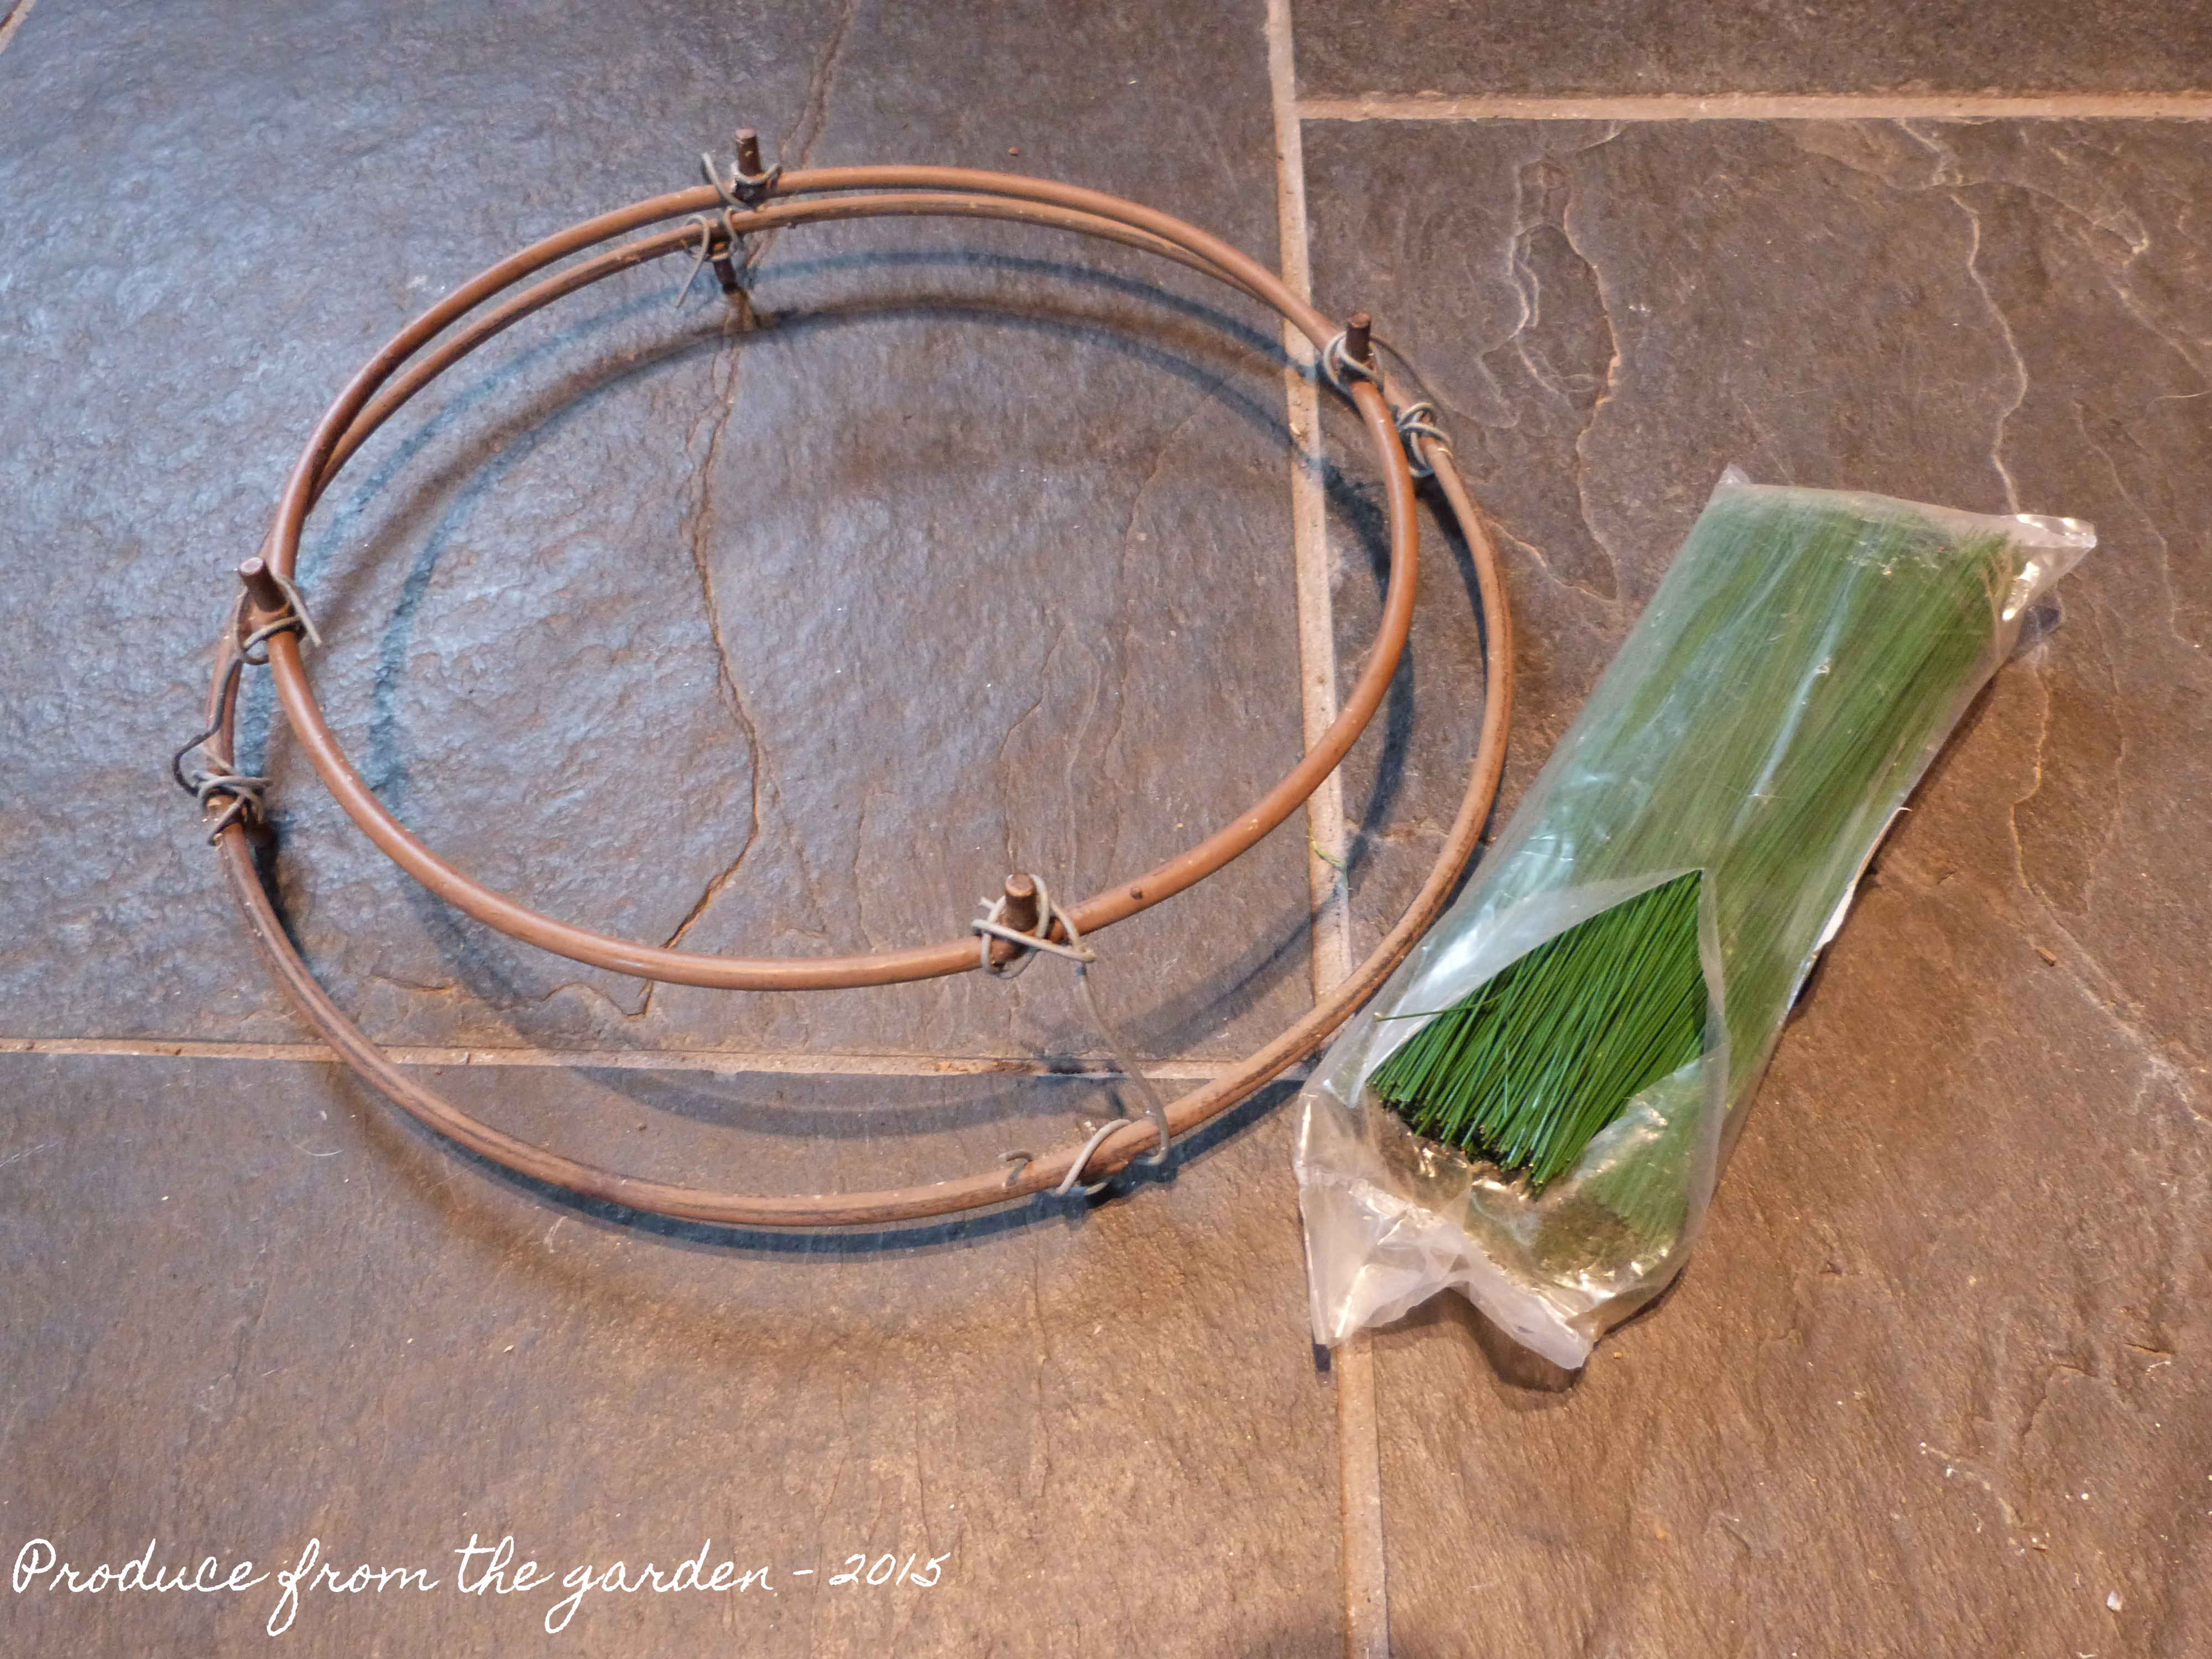
2. Buy a wire wreath frame and some flower arranging wires from your local florist, they literally cost a few pounds, or like me who has mislaid her wreath frame and forgot to buy a new one, wire together two rings from a garden obelisk!

Wreath ring and wireA wreath frame and flower arranging wire

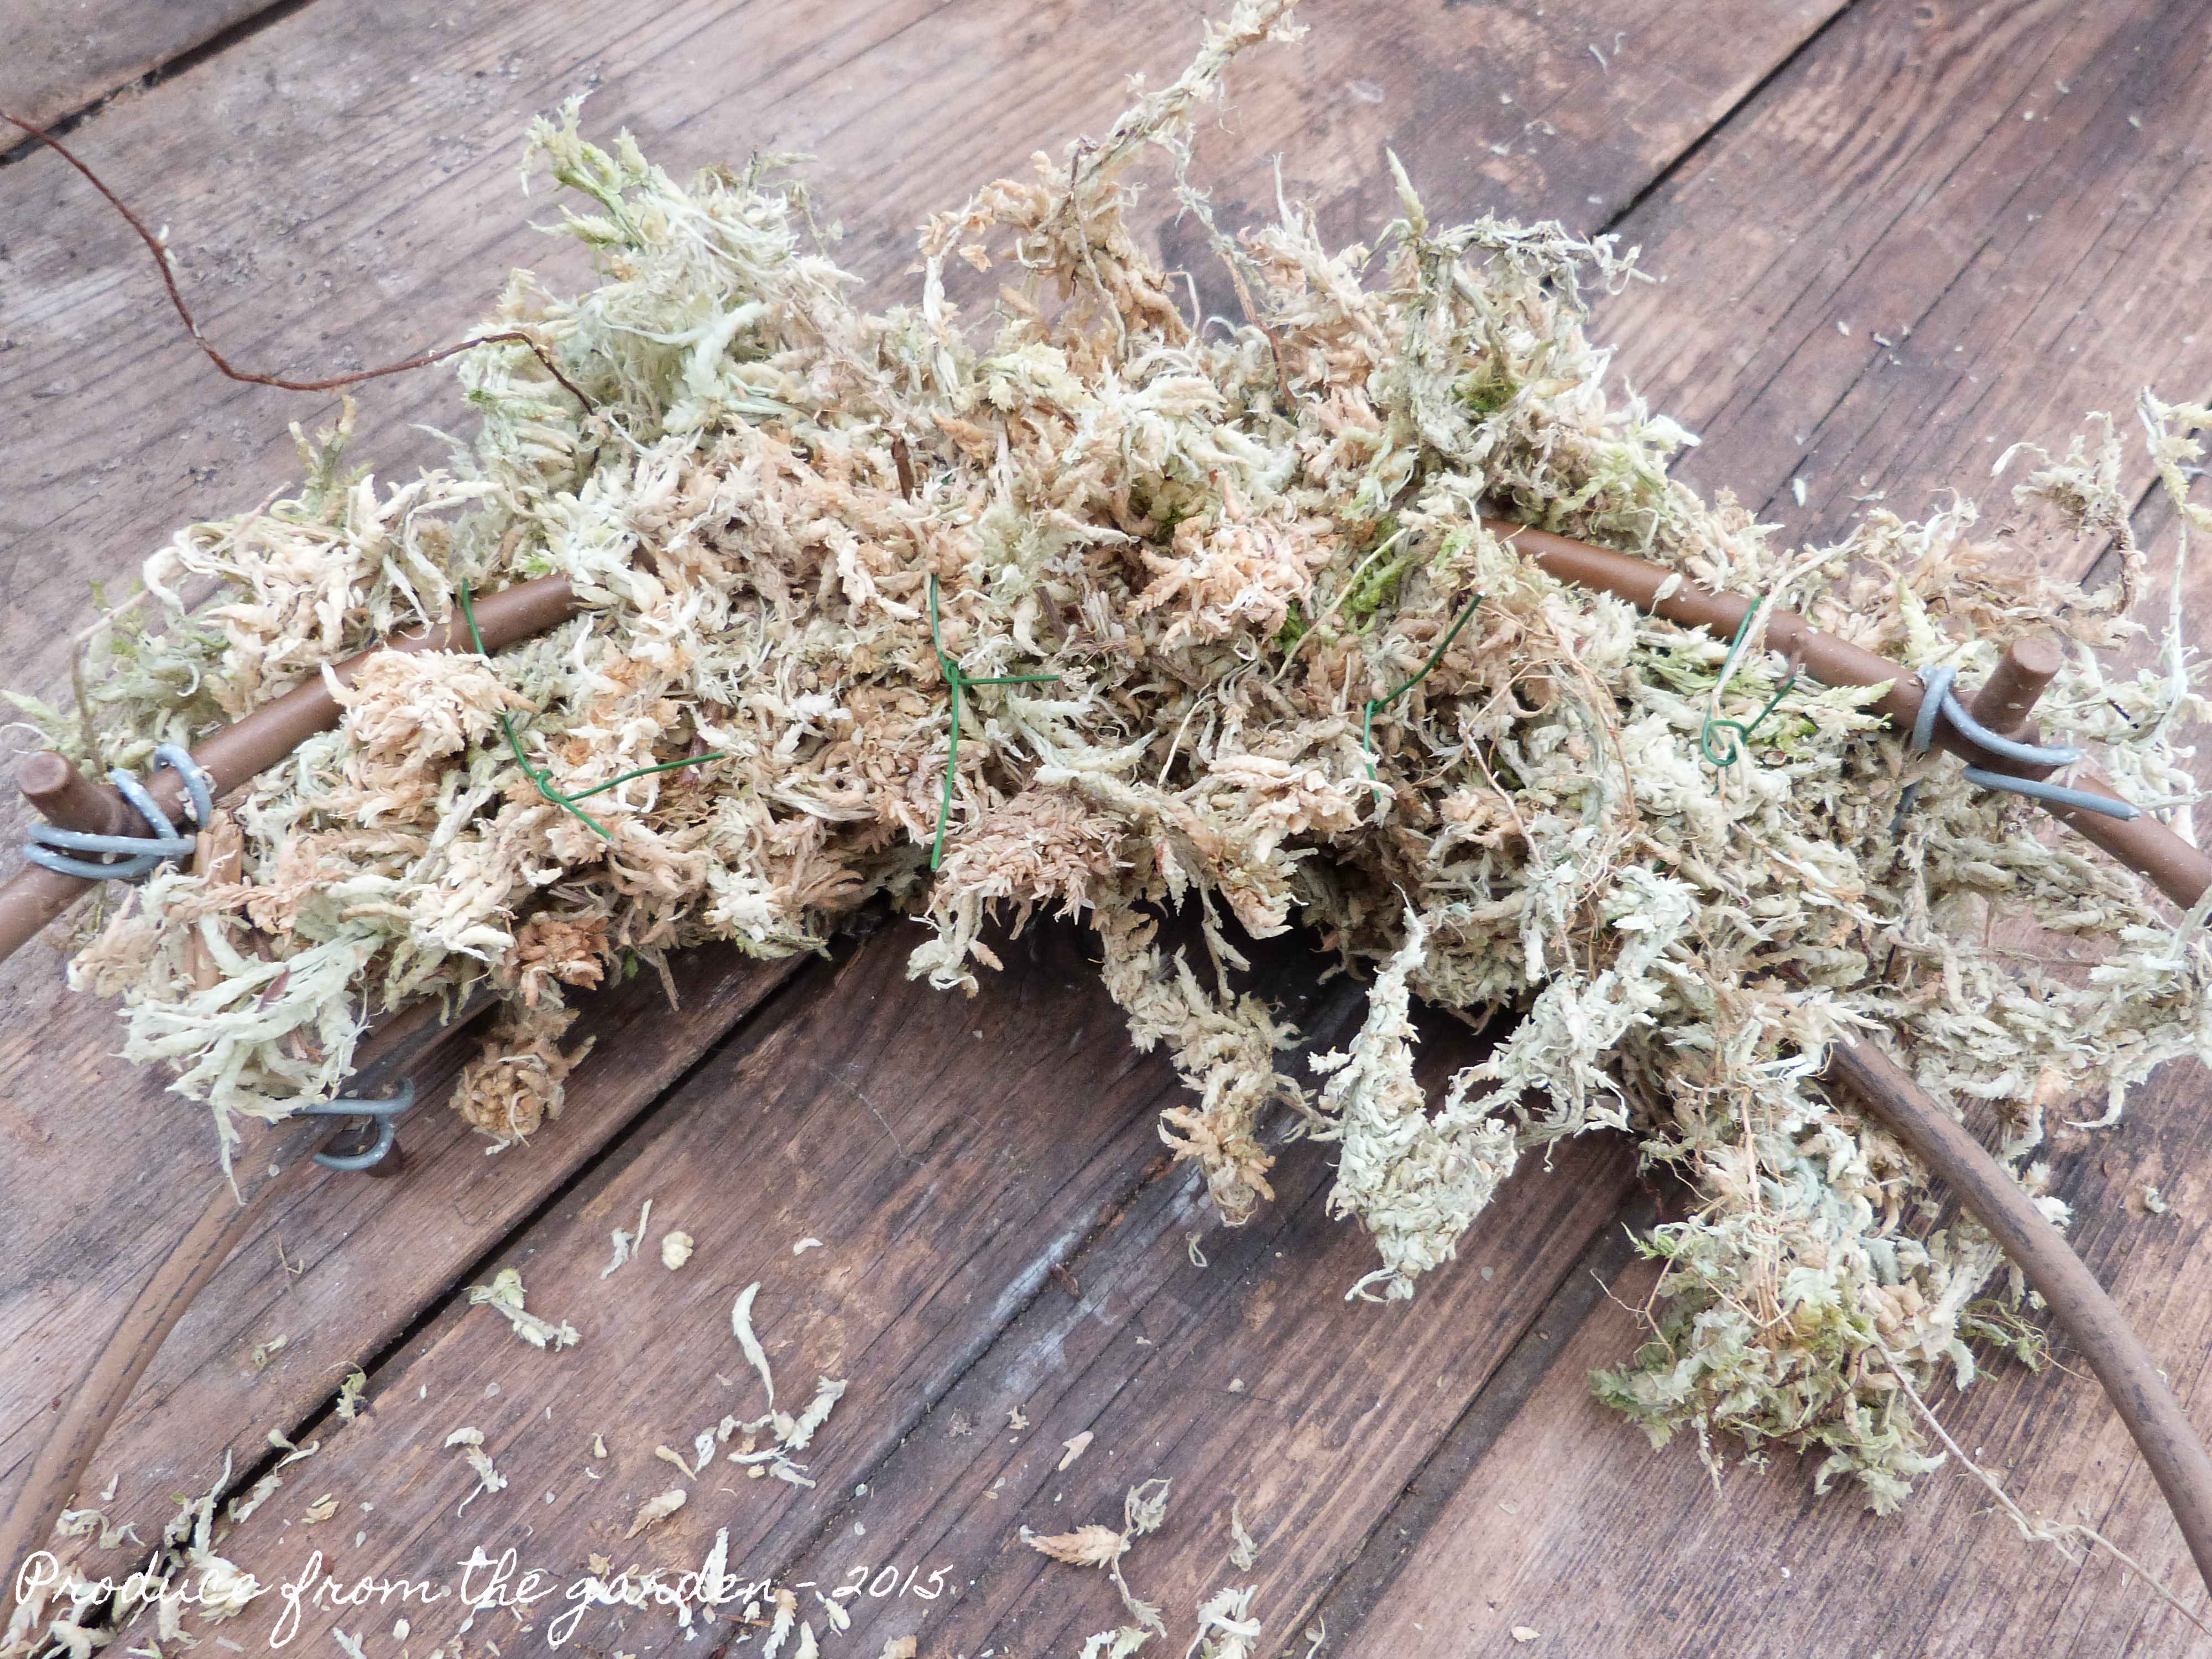
3. Tightly wire good sized chunks of damp sphagnum moss (easily sourced from garden centres and florists) to the wire frame, this becomes the base of your wreath. The moss needs to be reasonably dense as it will need to hold the wreaths material firmly as they’re inserted into the moss base.

Wiring moss to the ring
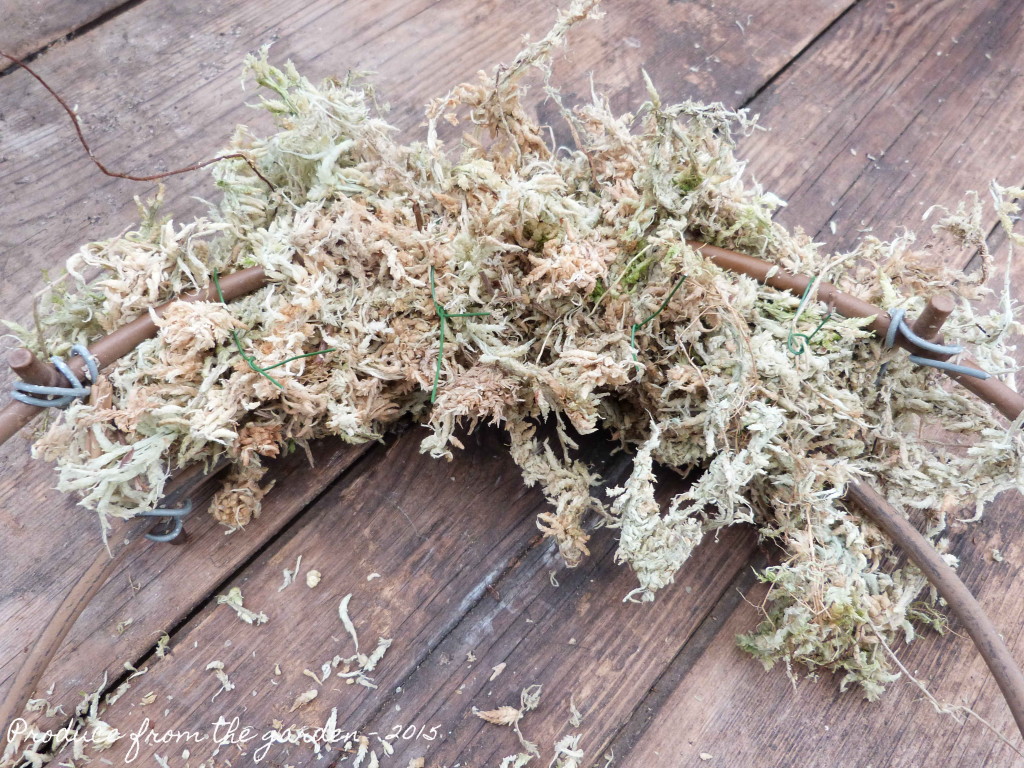
The sphagnum moss being tightly wired to the wreath frame

The moss wreath base
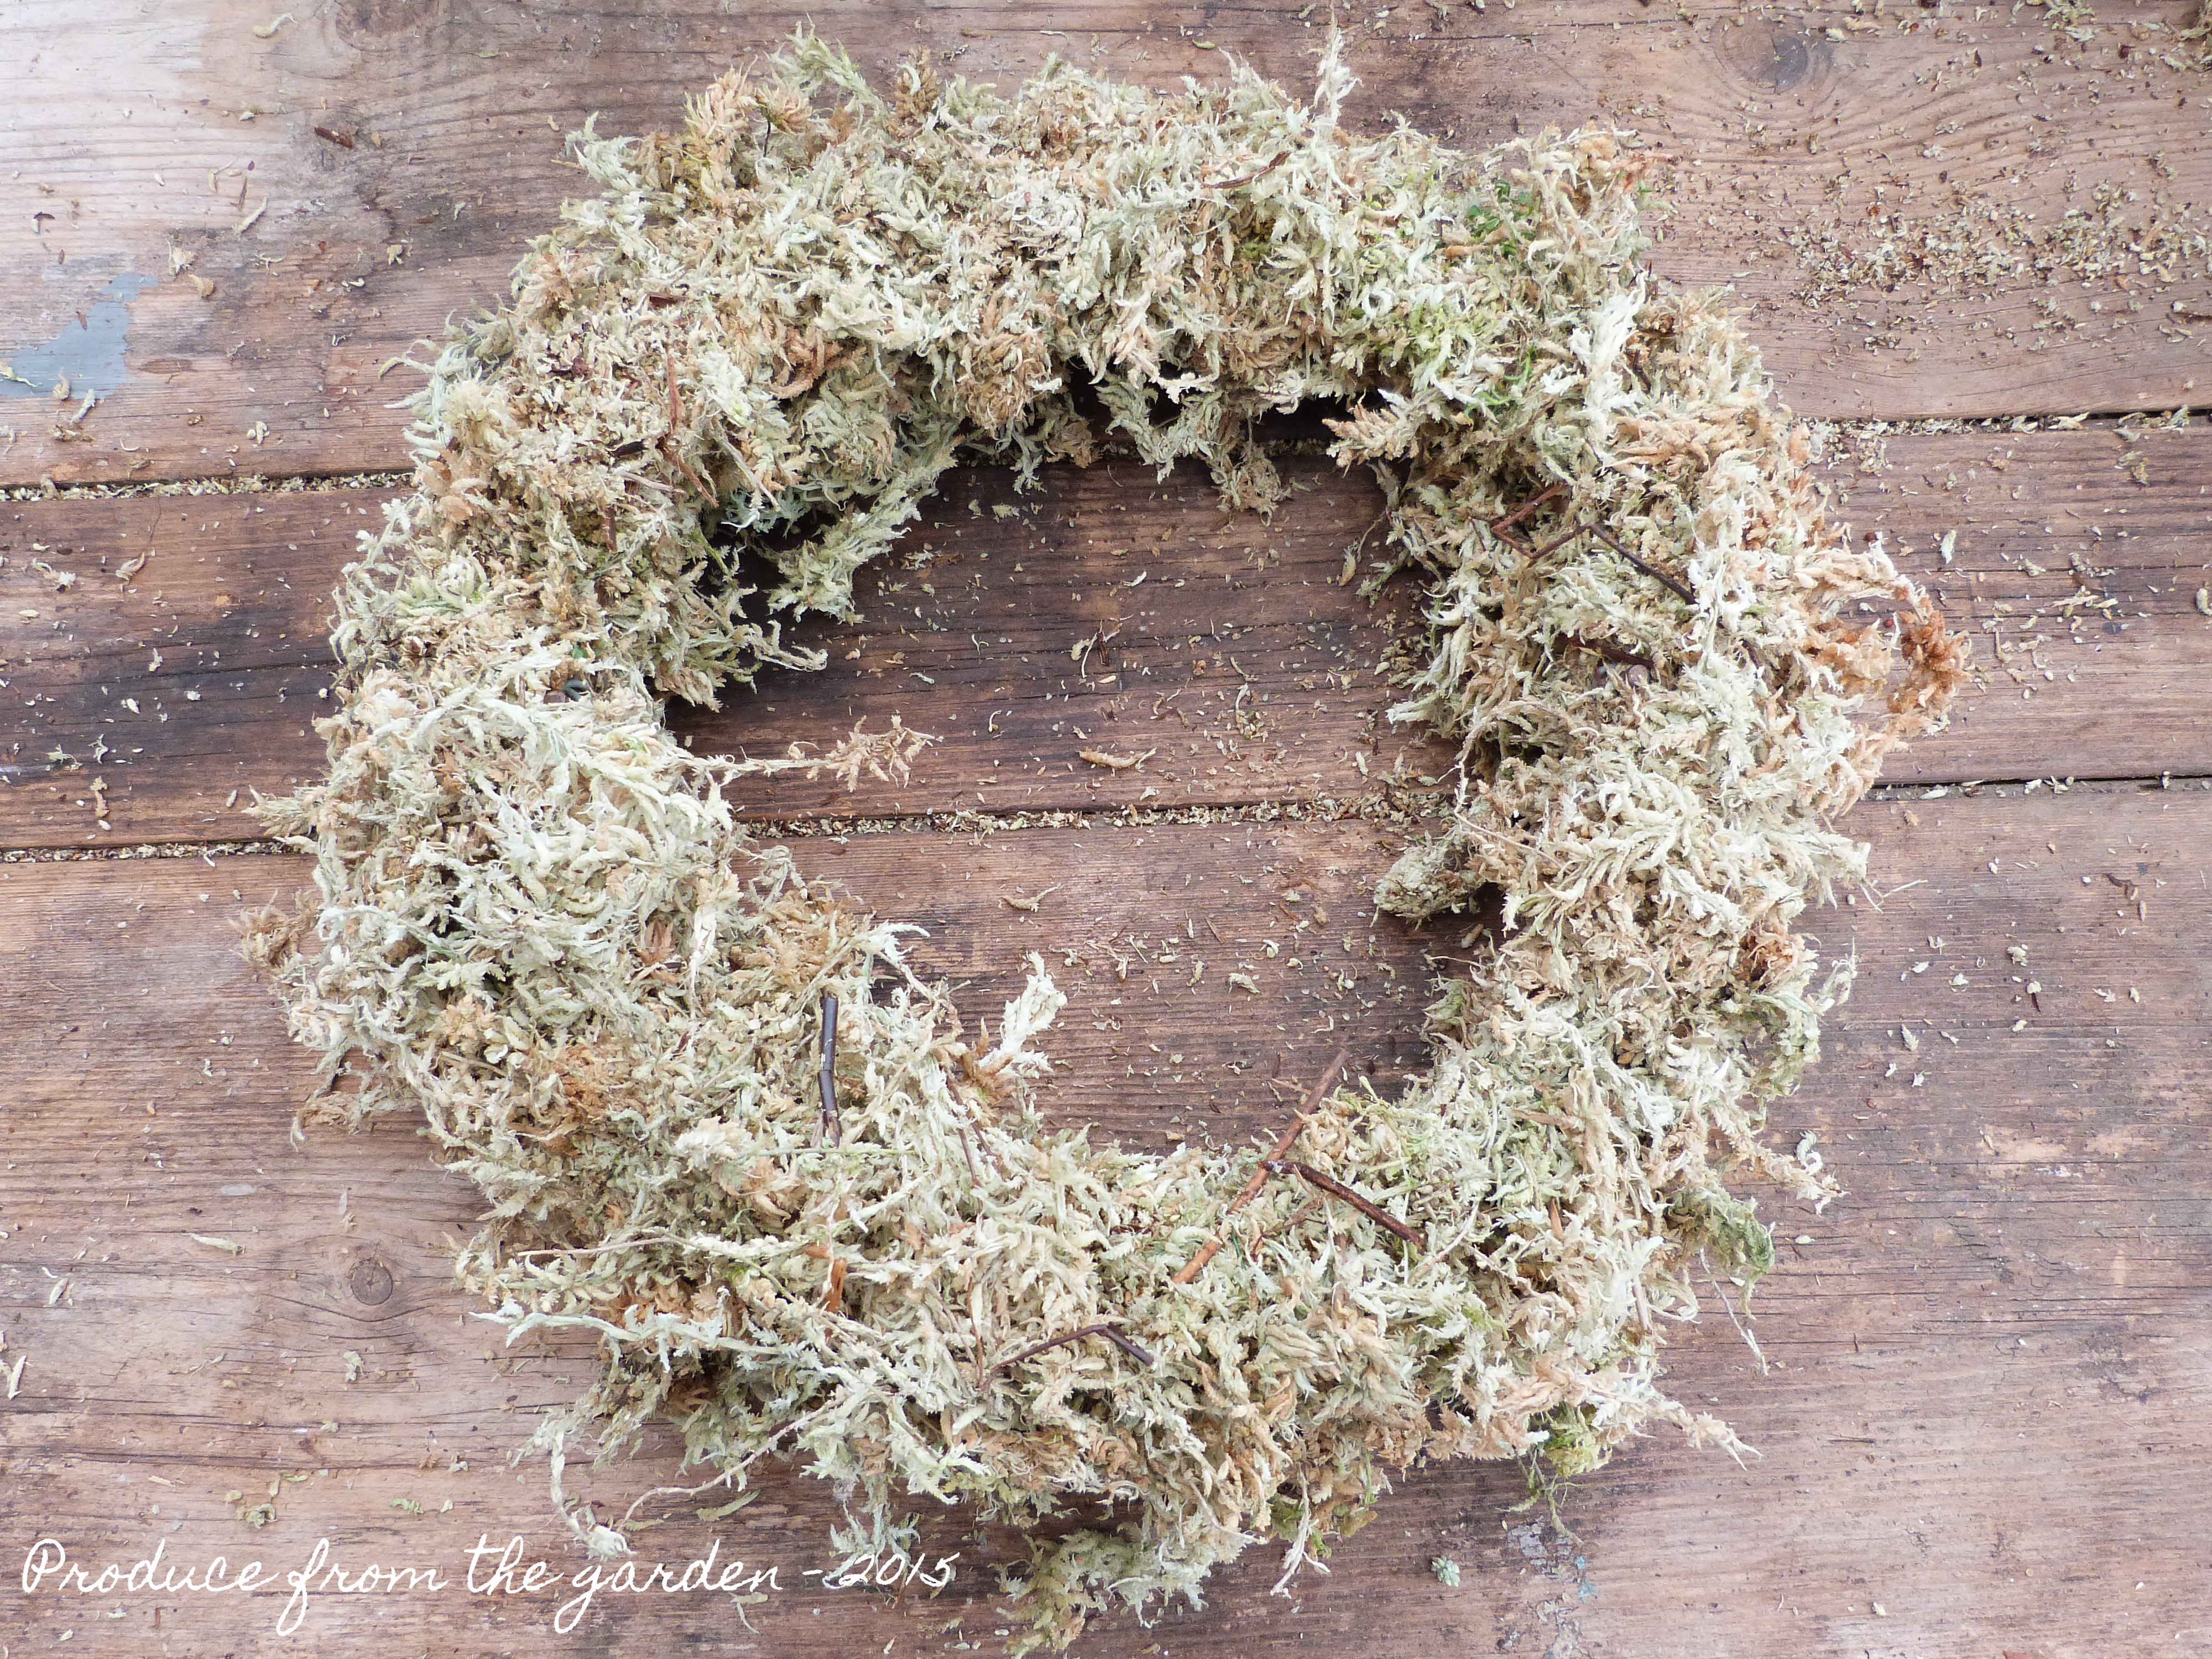
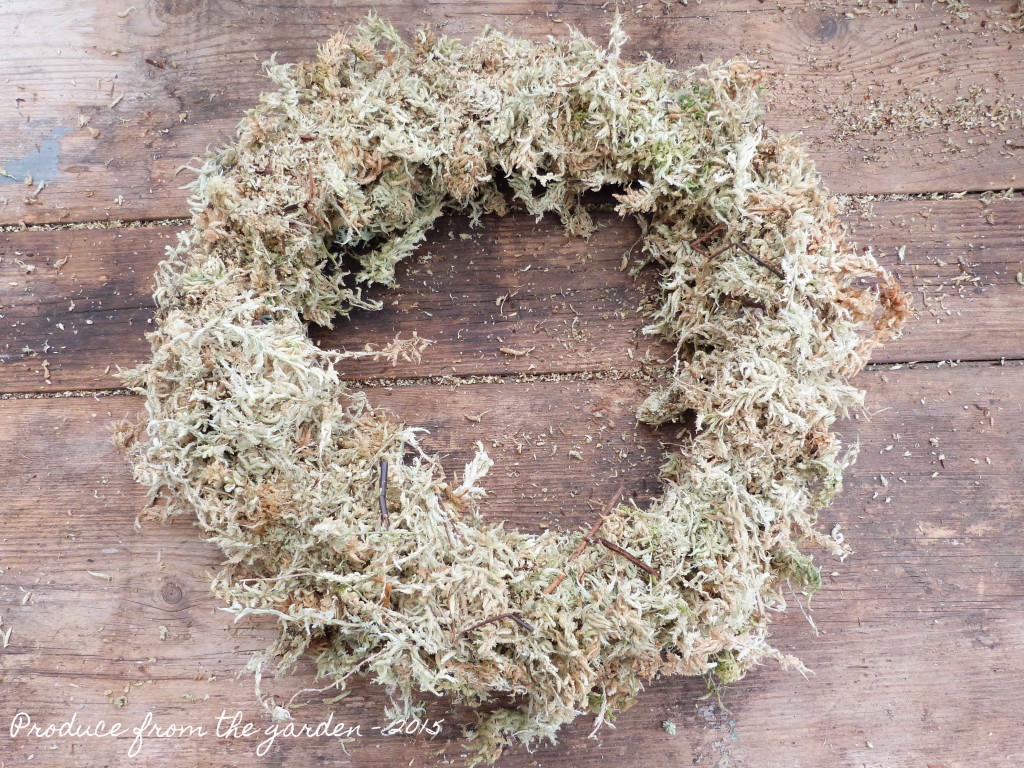
The completed sphagnum moss base

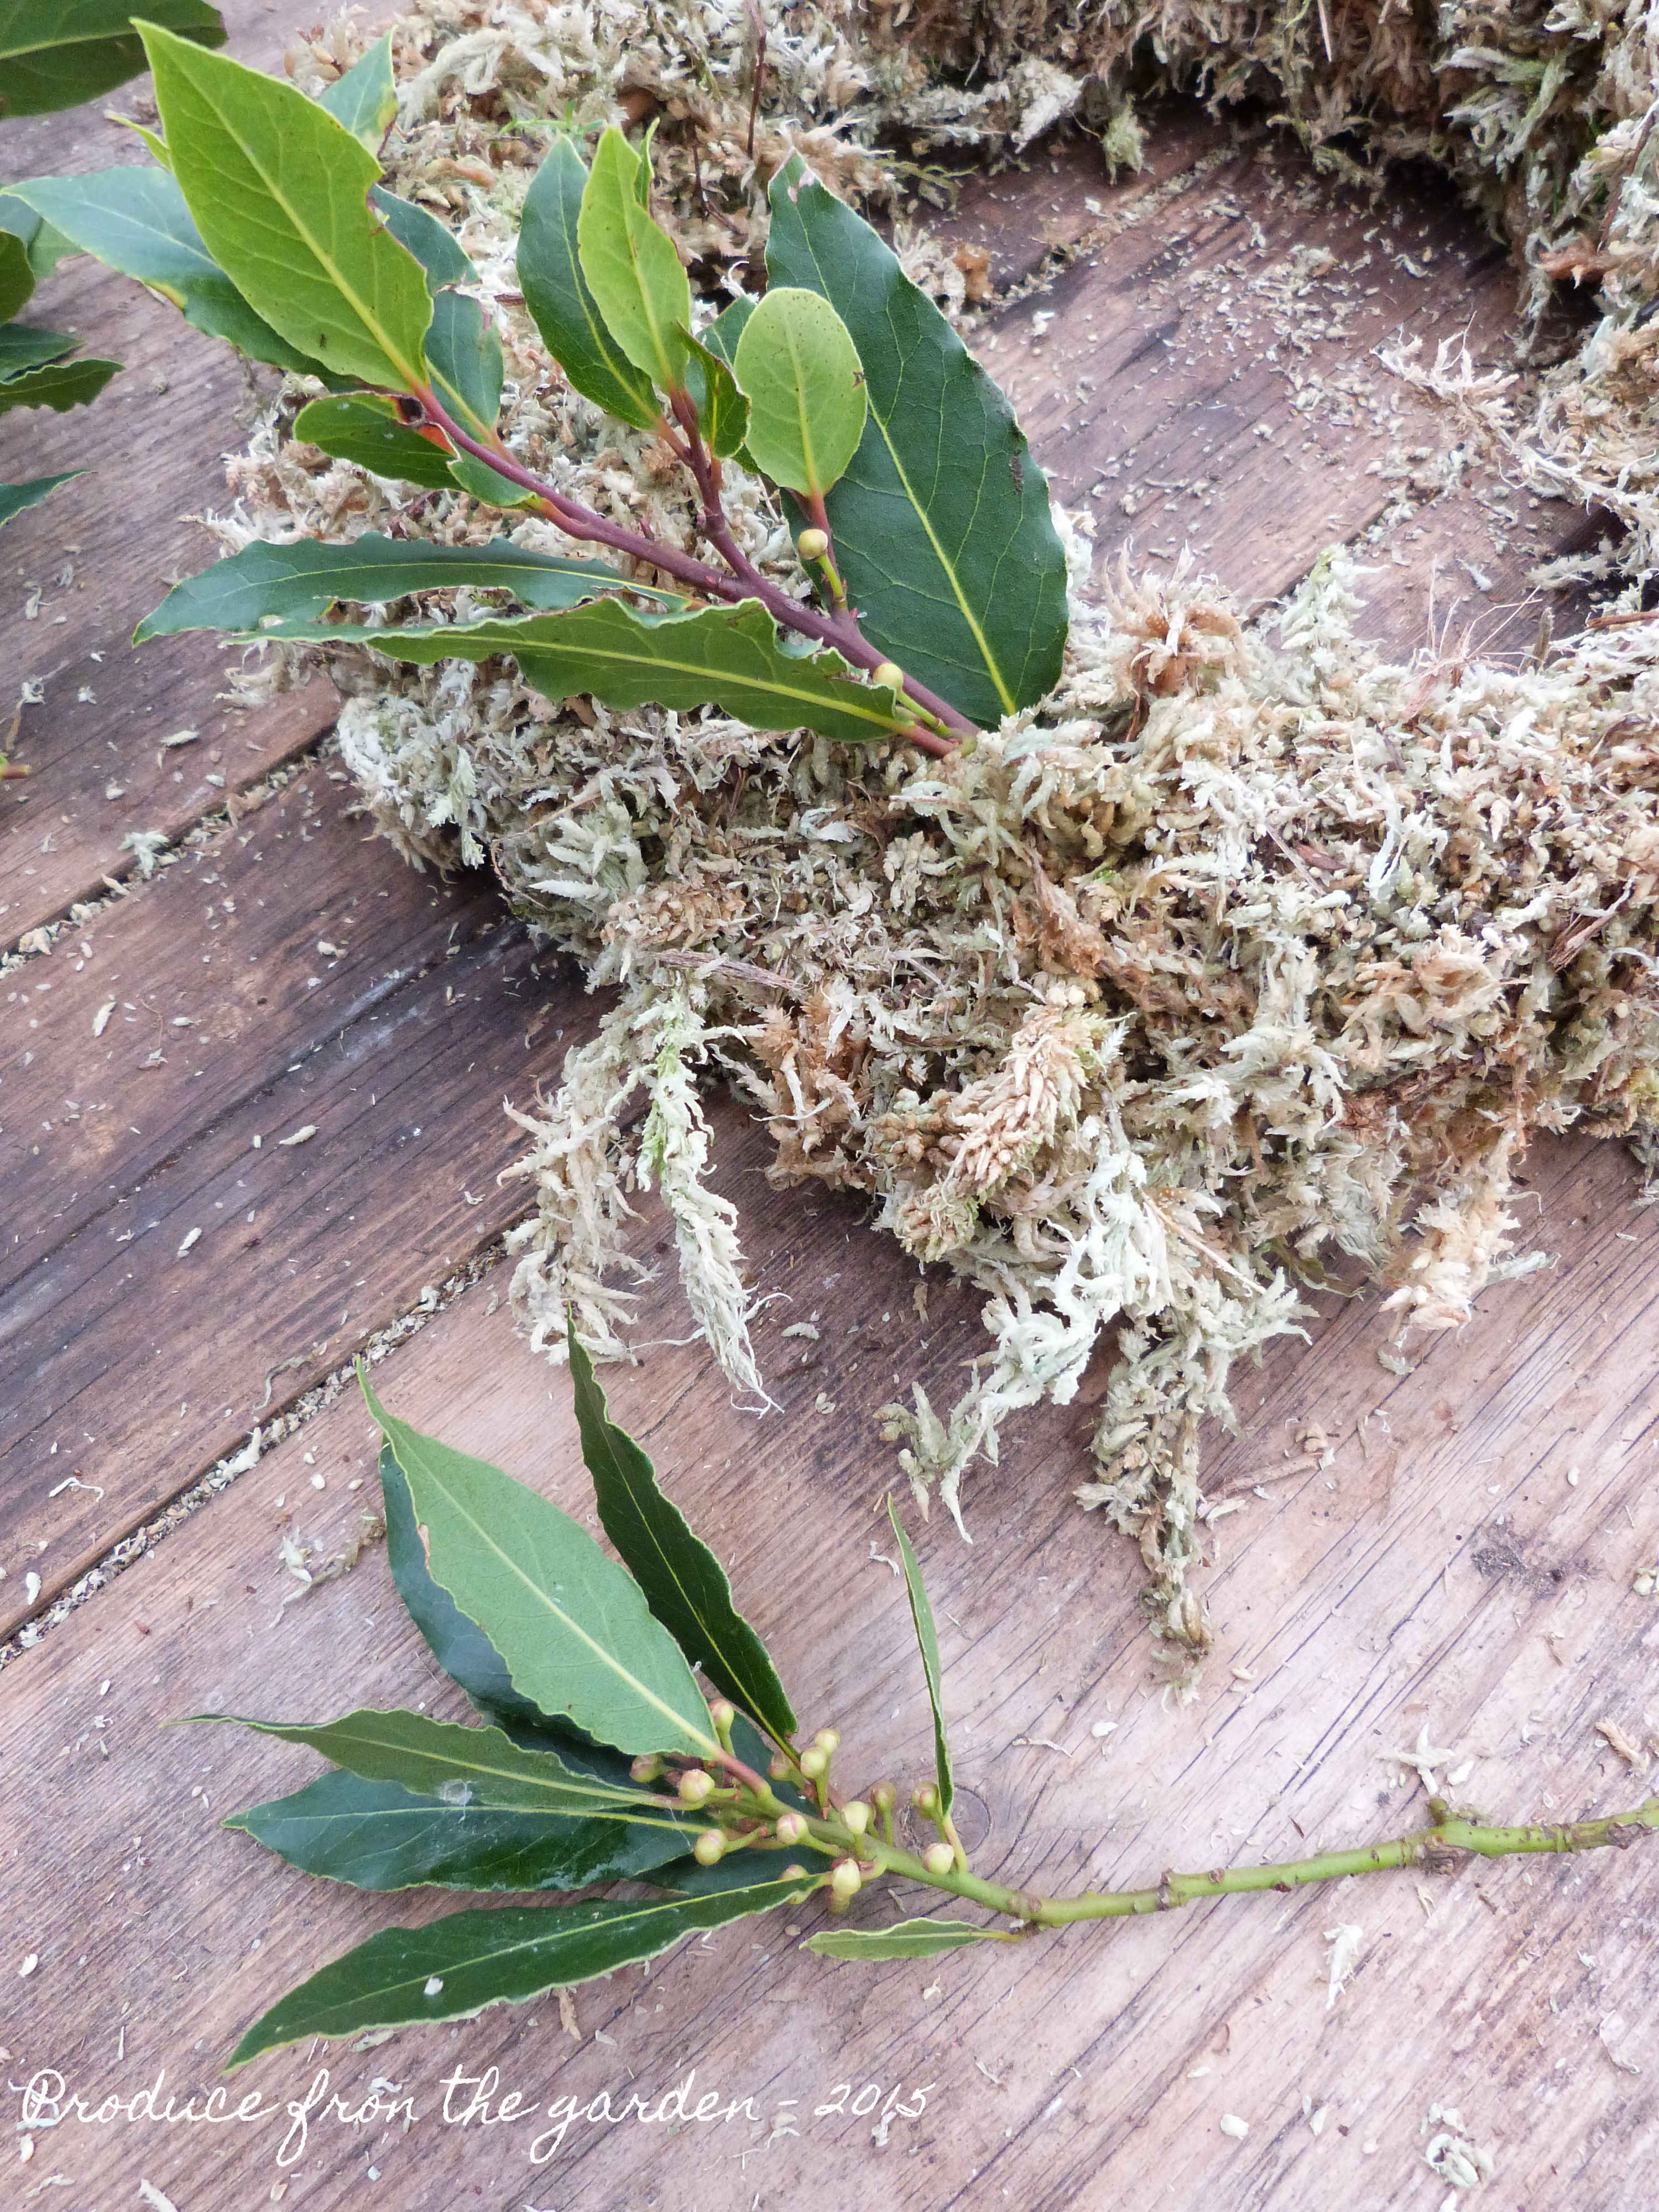
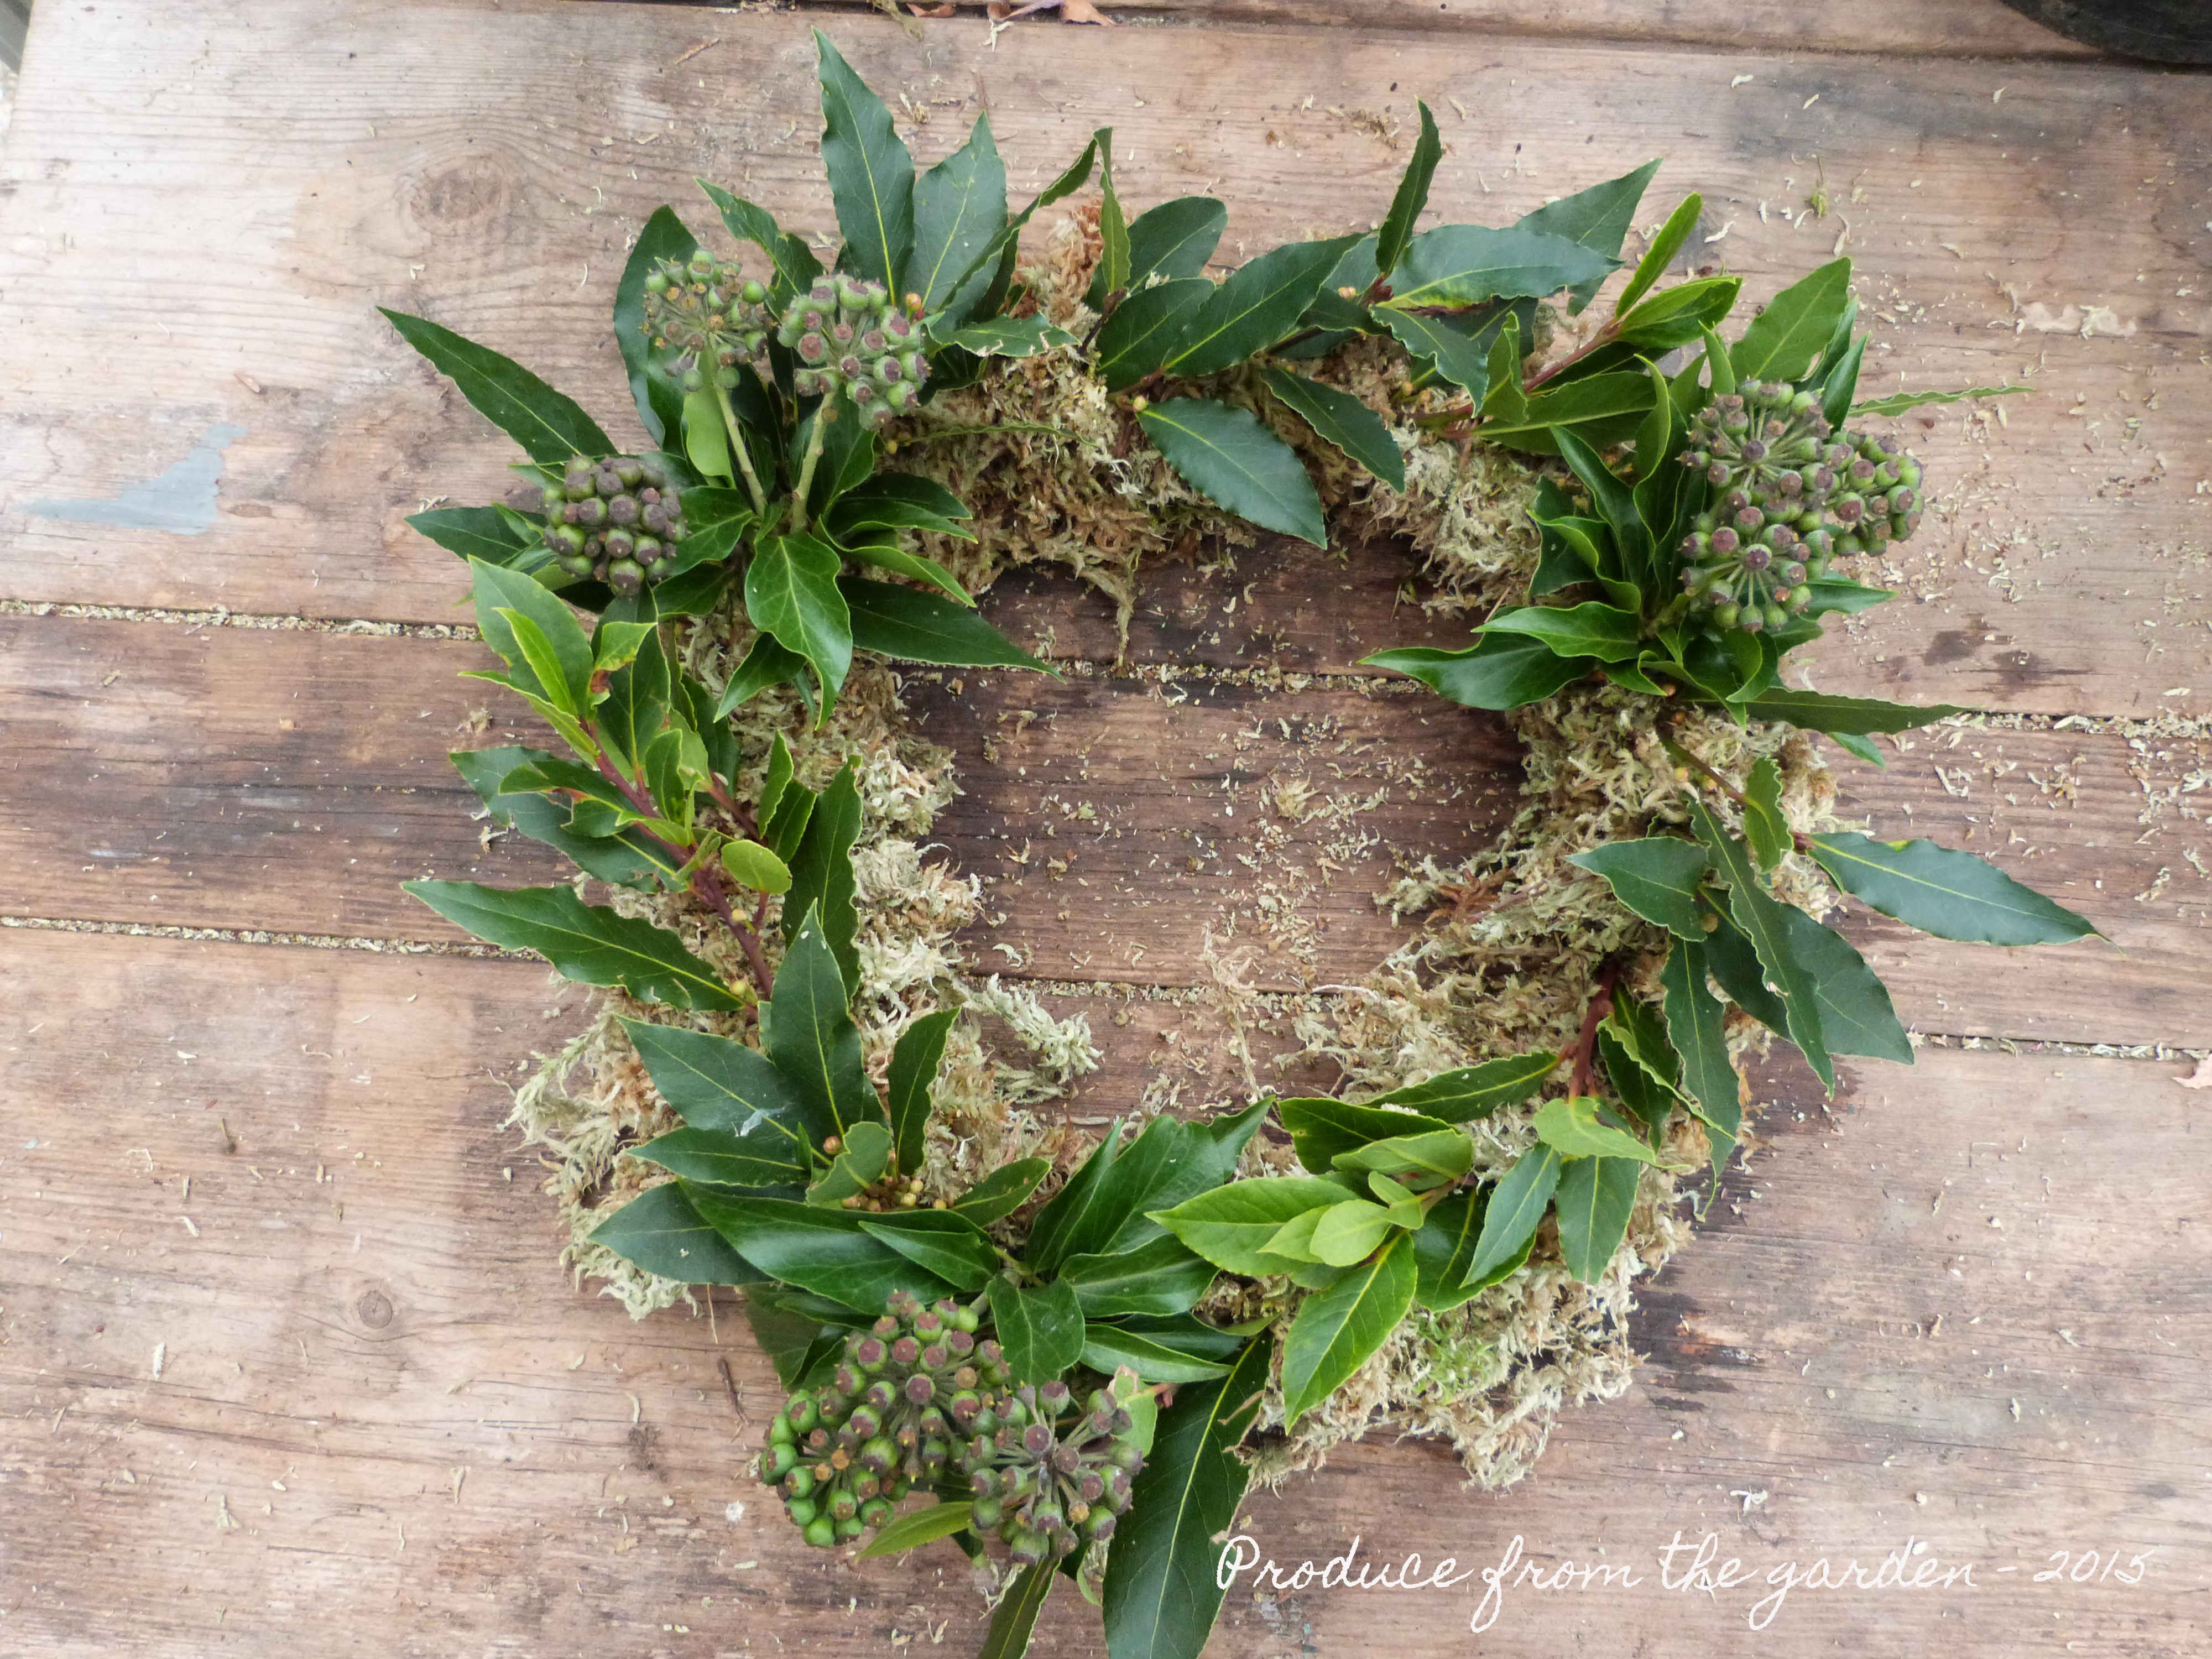
4. Create a background to the wreath using a dark evergreen leaf. I have used bay as I love the deep matt green as a base colour and texture.

Bay on the wreath
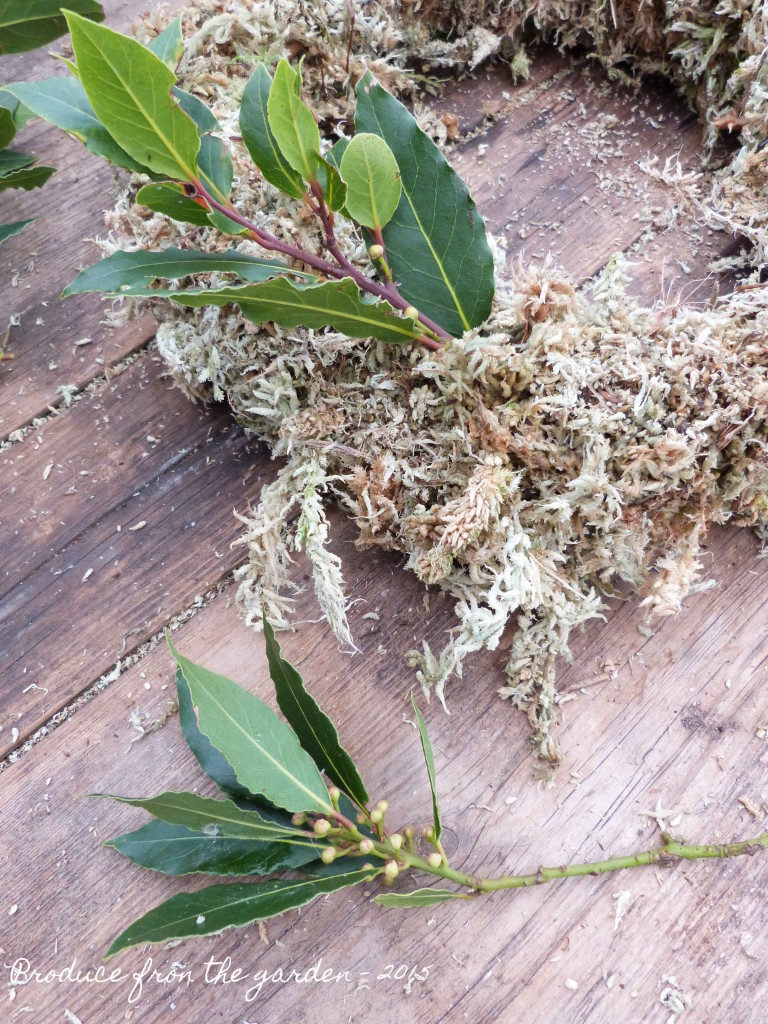
Sprigs of bay start to be inserted into the wreath

bay on the wreath
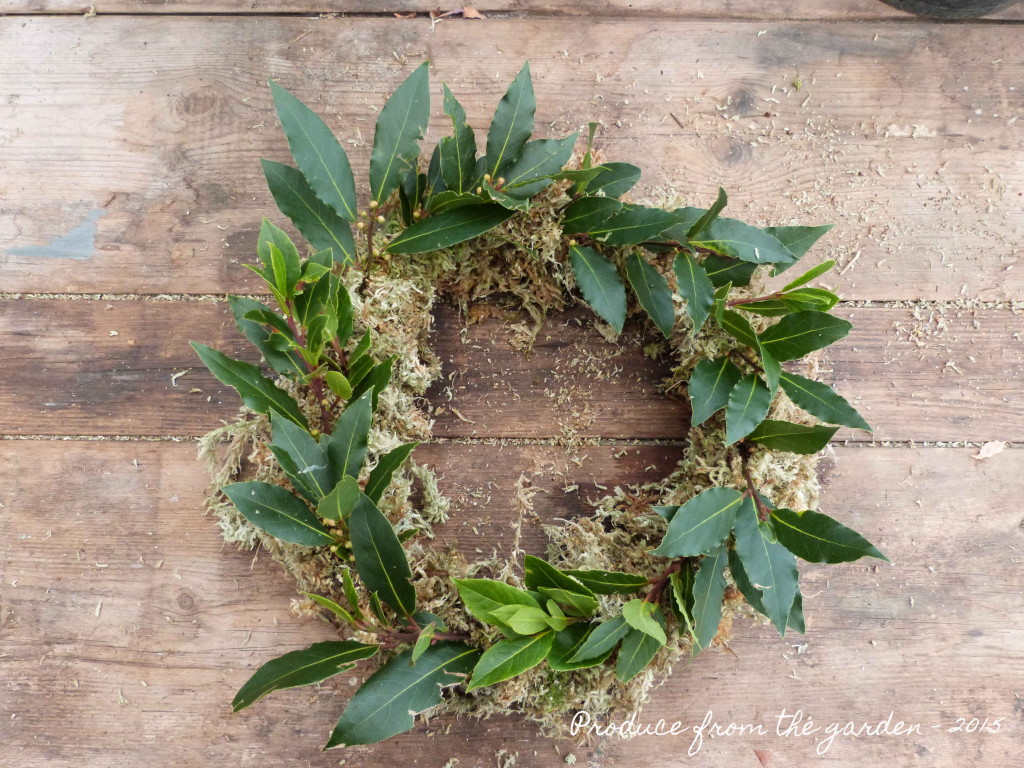
The bay leaf back ground is added to the wreath

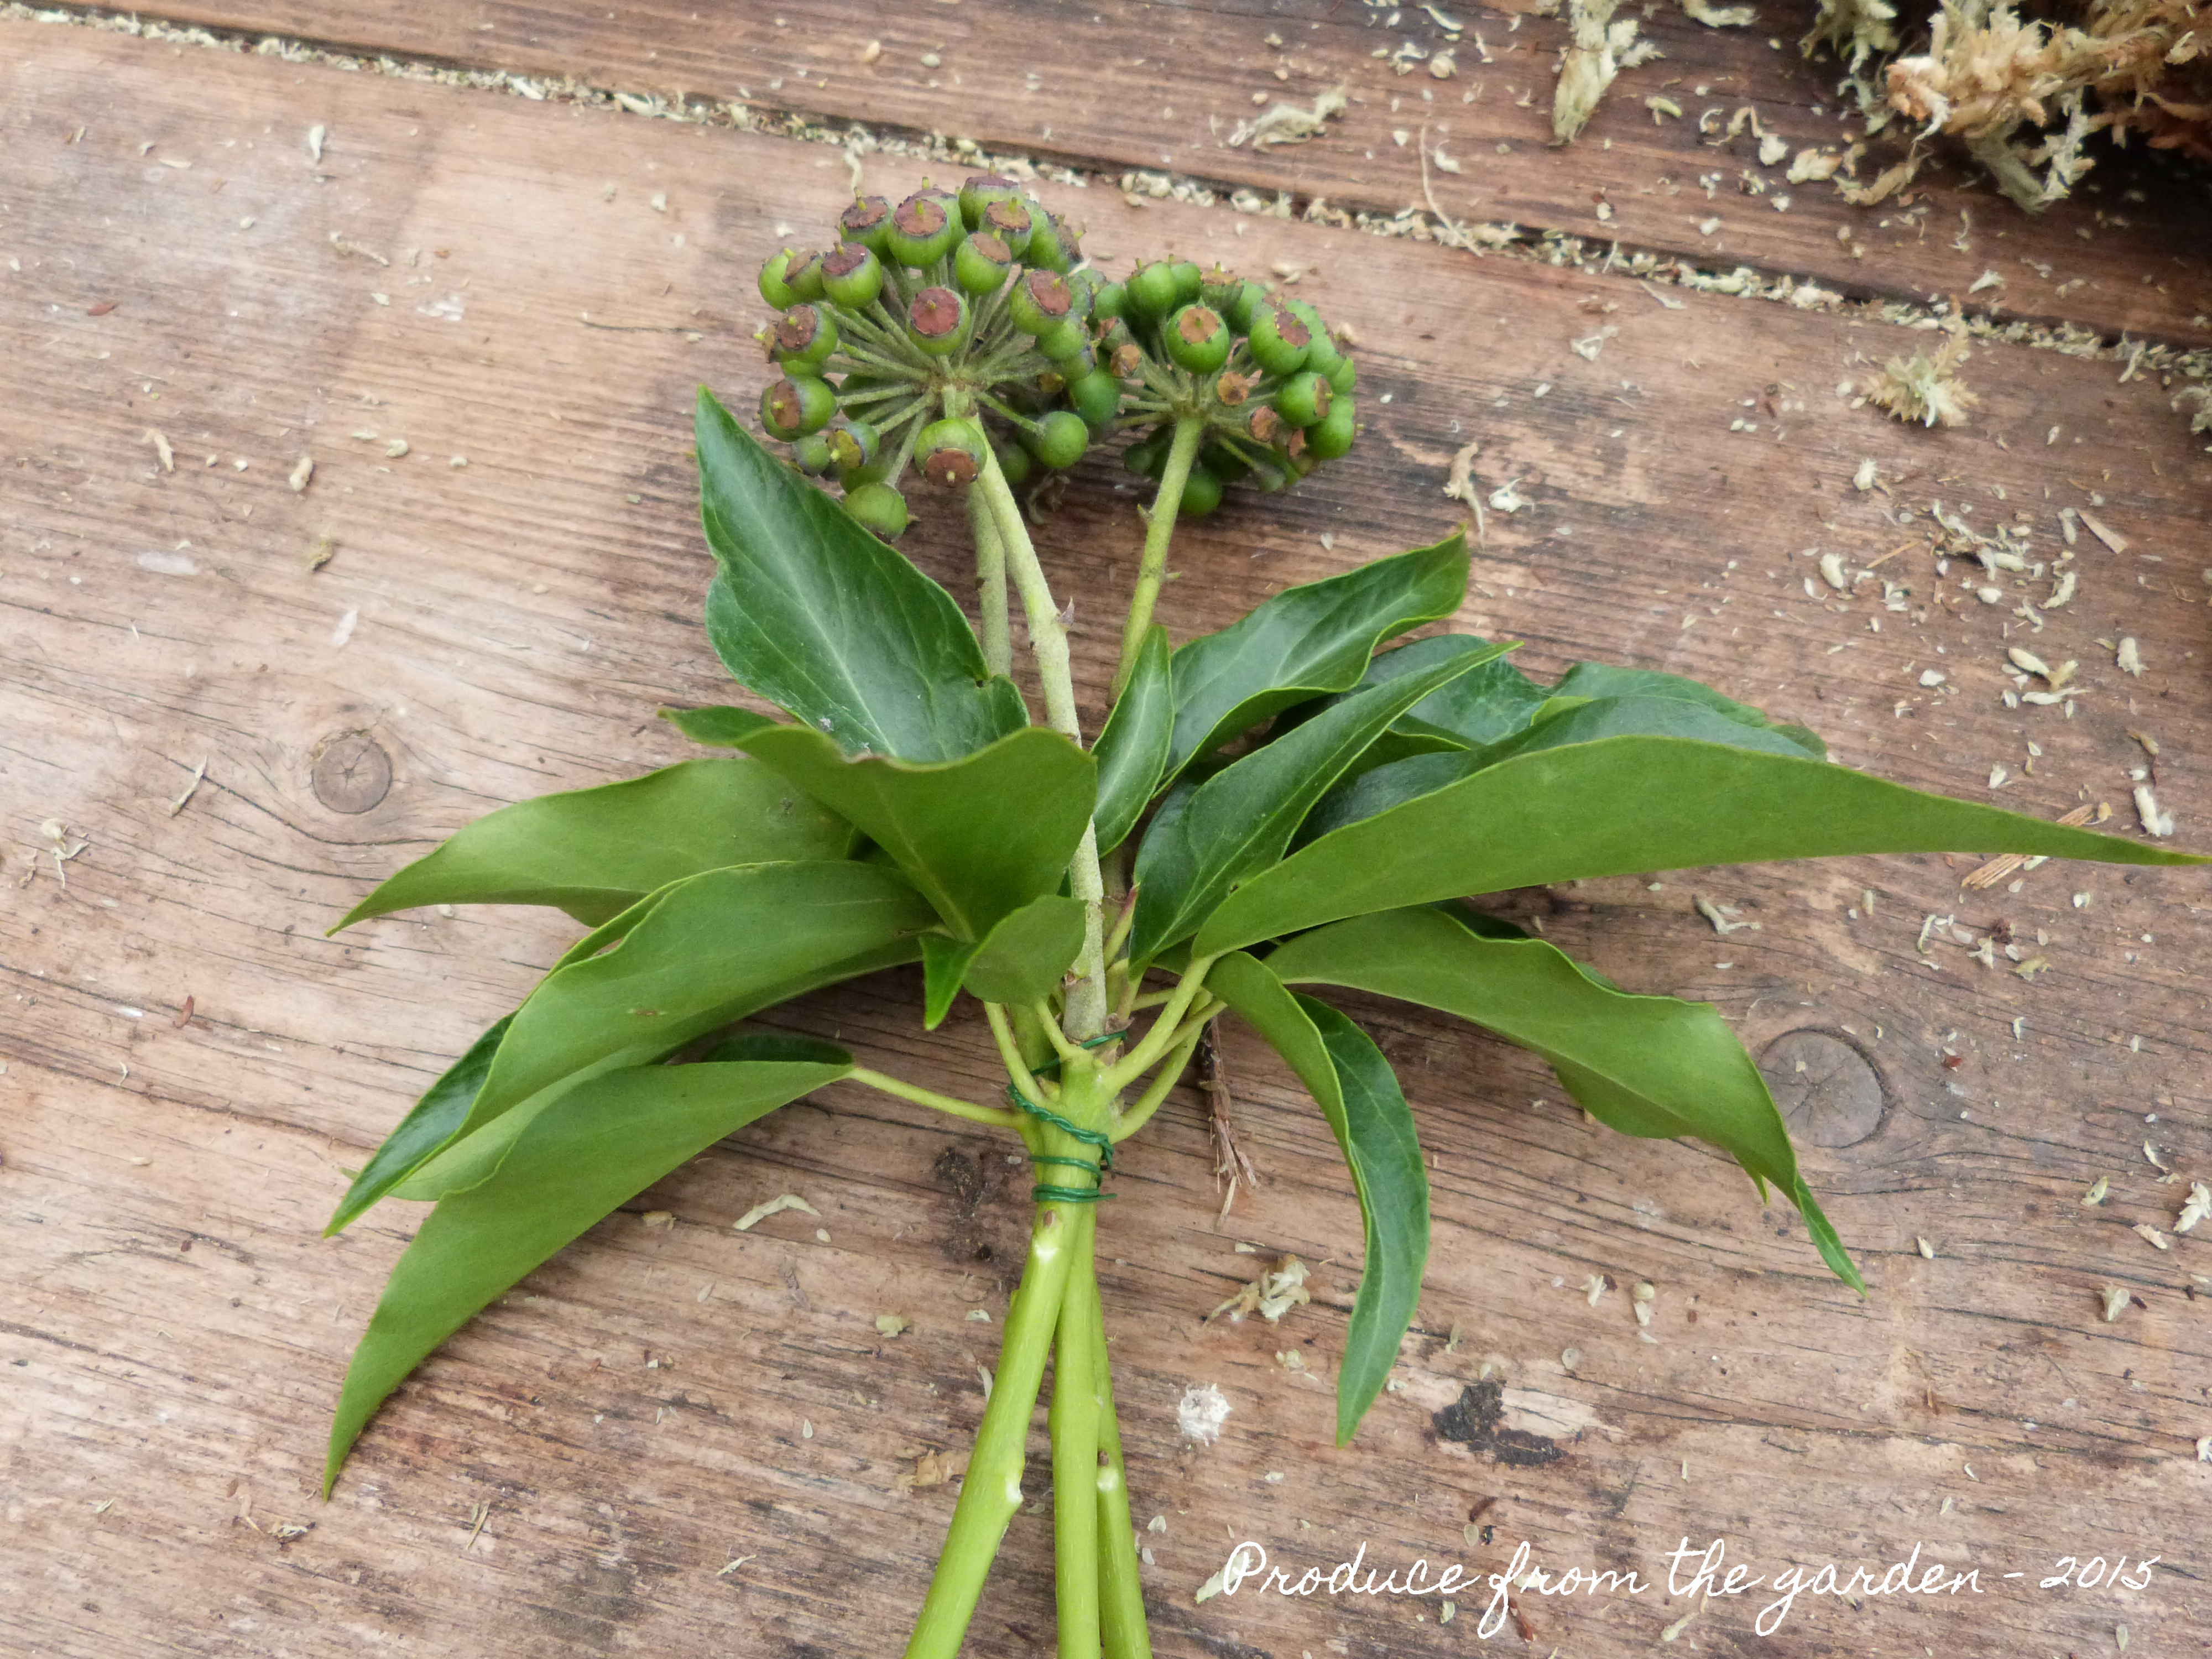
  1. Now I have the background of the wreath I start to build the wreath arrangement, always working in threes or fives evenly distributed around the wreath. I have started by binding together with florist wire, three ivy berry stems, repeating until I have three bunches.

Ivy bundle for wreath
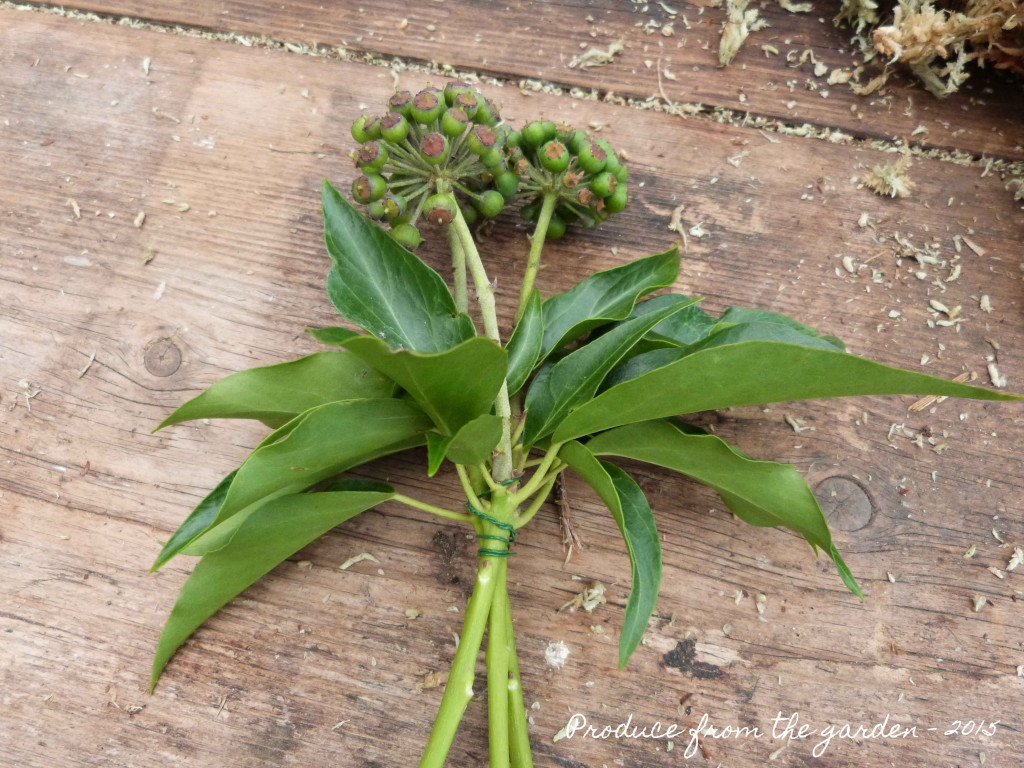
A bunch of Ivy berry stems bound with florist wire

Ivy on wreathThe three Ivy berry bunches place into the wreath base

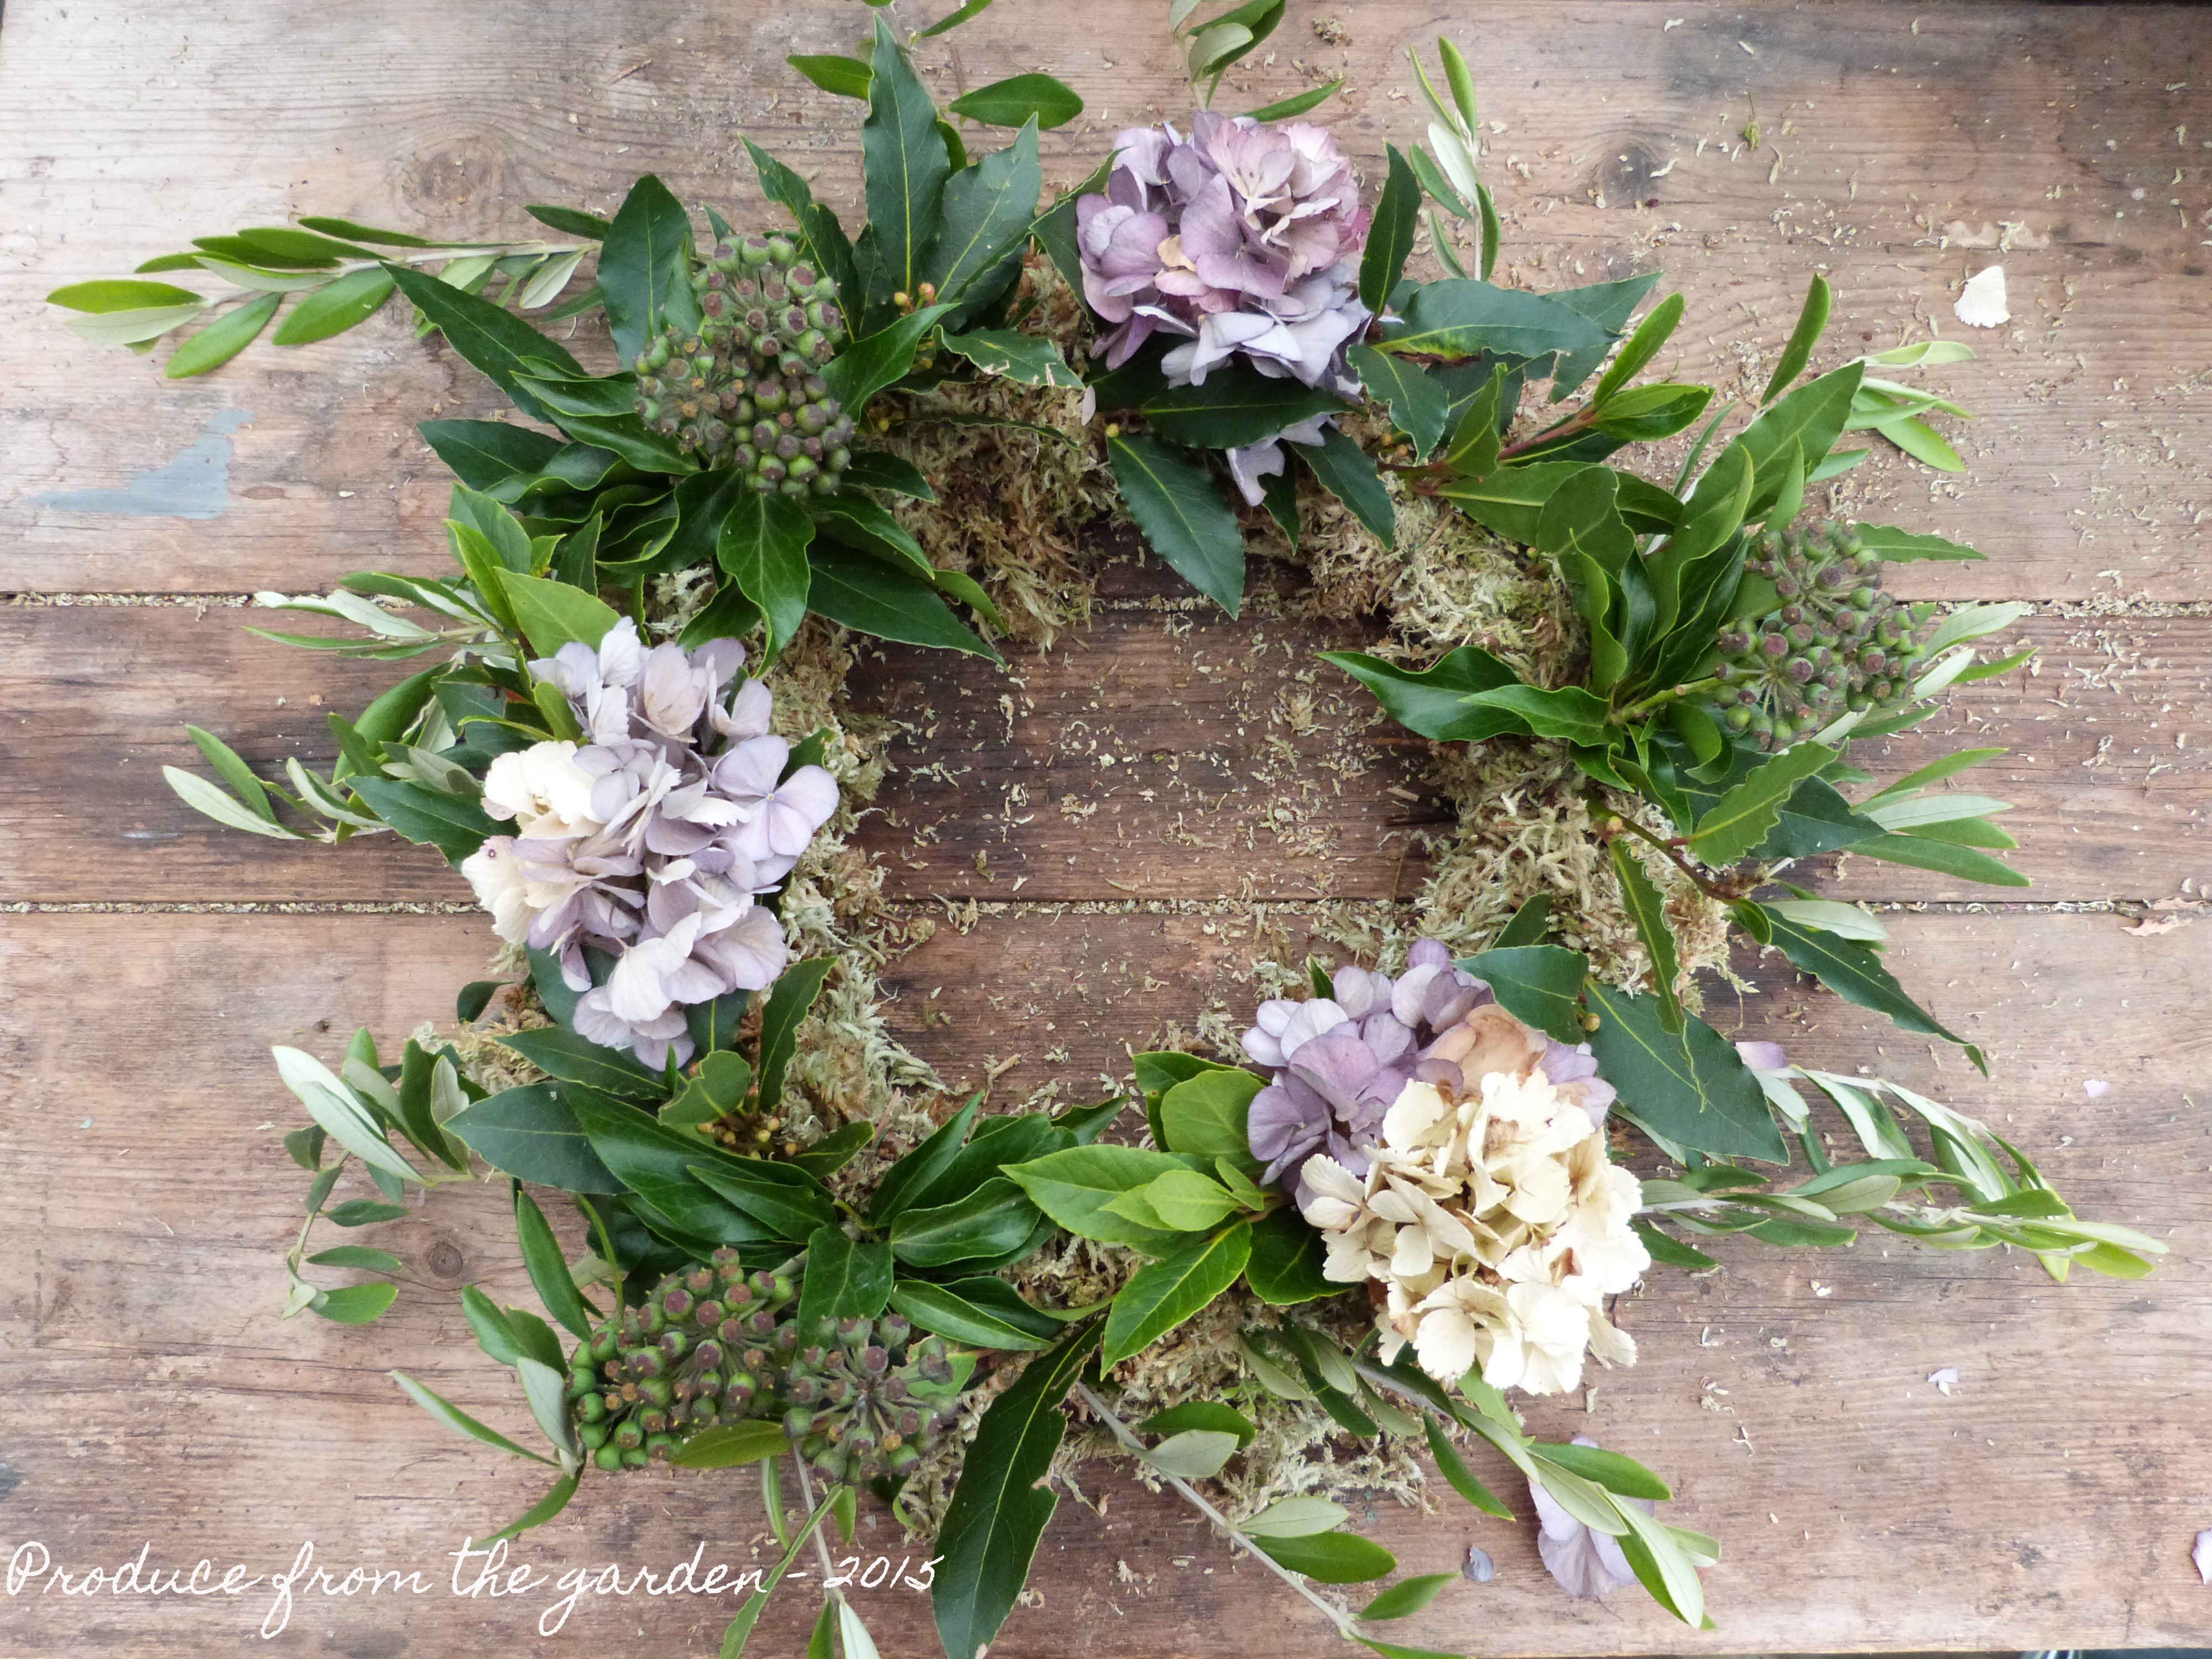
6. My hydrangea flowers are quite small so like the Ivy I have bound a few together making three bunches to be inserted into the moss base of the wreath.

hydrangea bundle
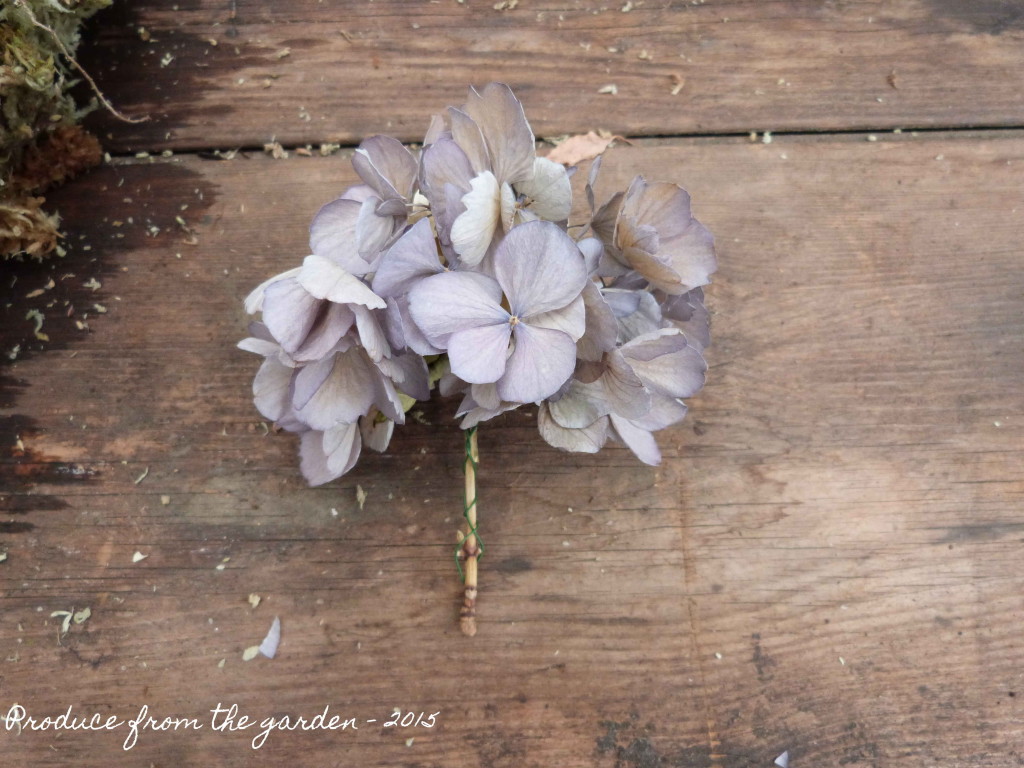
A wired hydrangea bunch

Hydrangea on the wreath
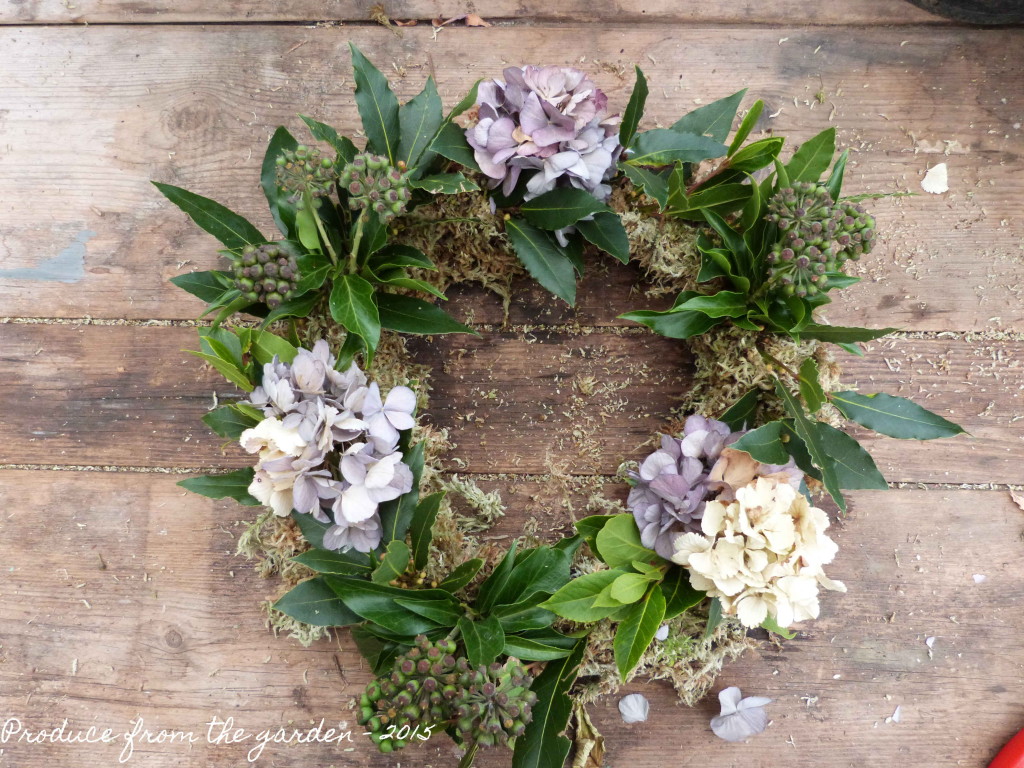
The Hydrangea inserted into the wreath

7.  I like to add long stems of olive or silver birch twigs in a clockwise direction around the edge of the wreath to give it a little extra dimension.

Olive on the wreathOlive stems inserted around the perimeter of the wreath

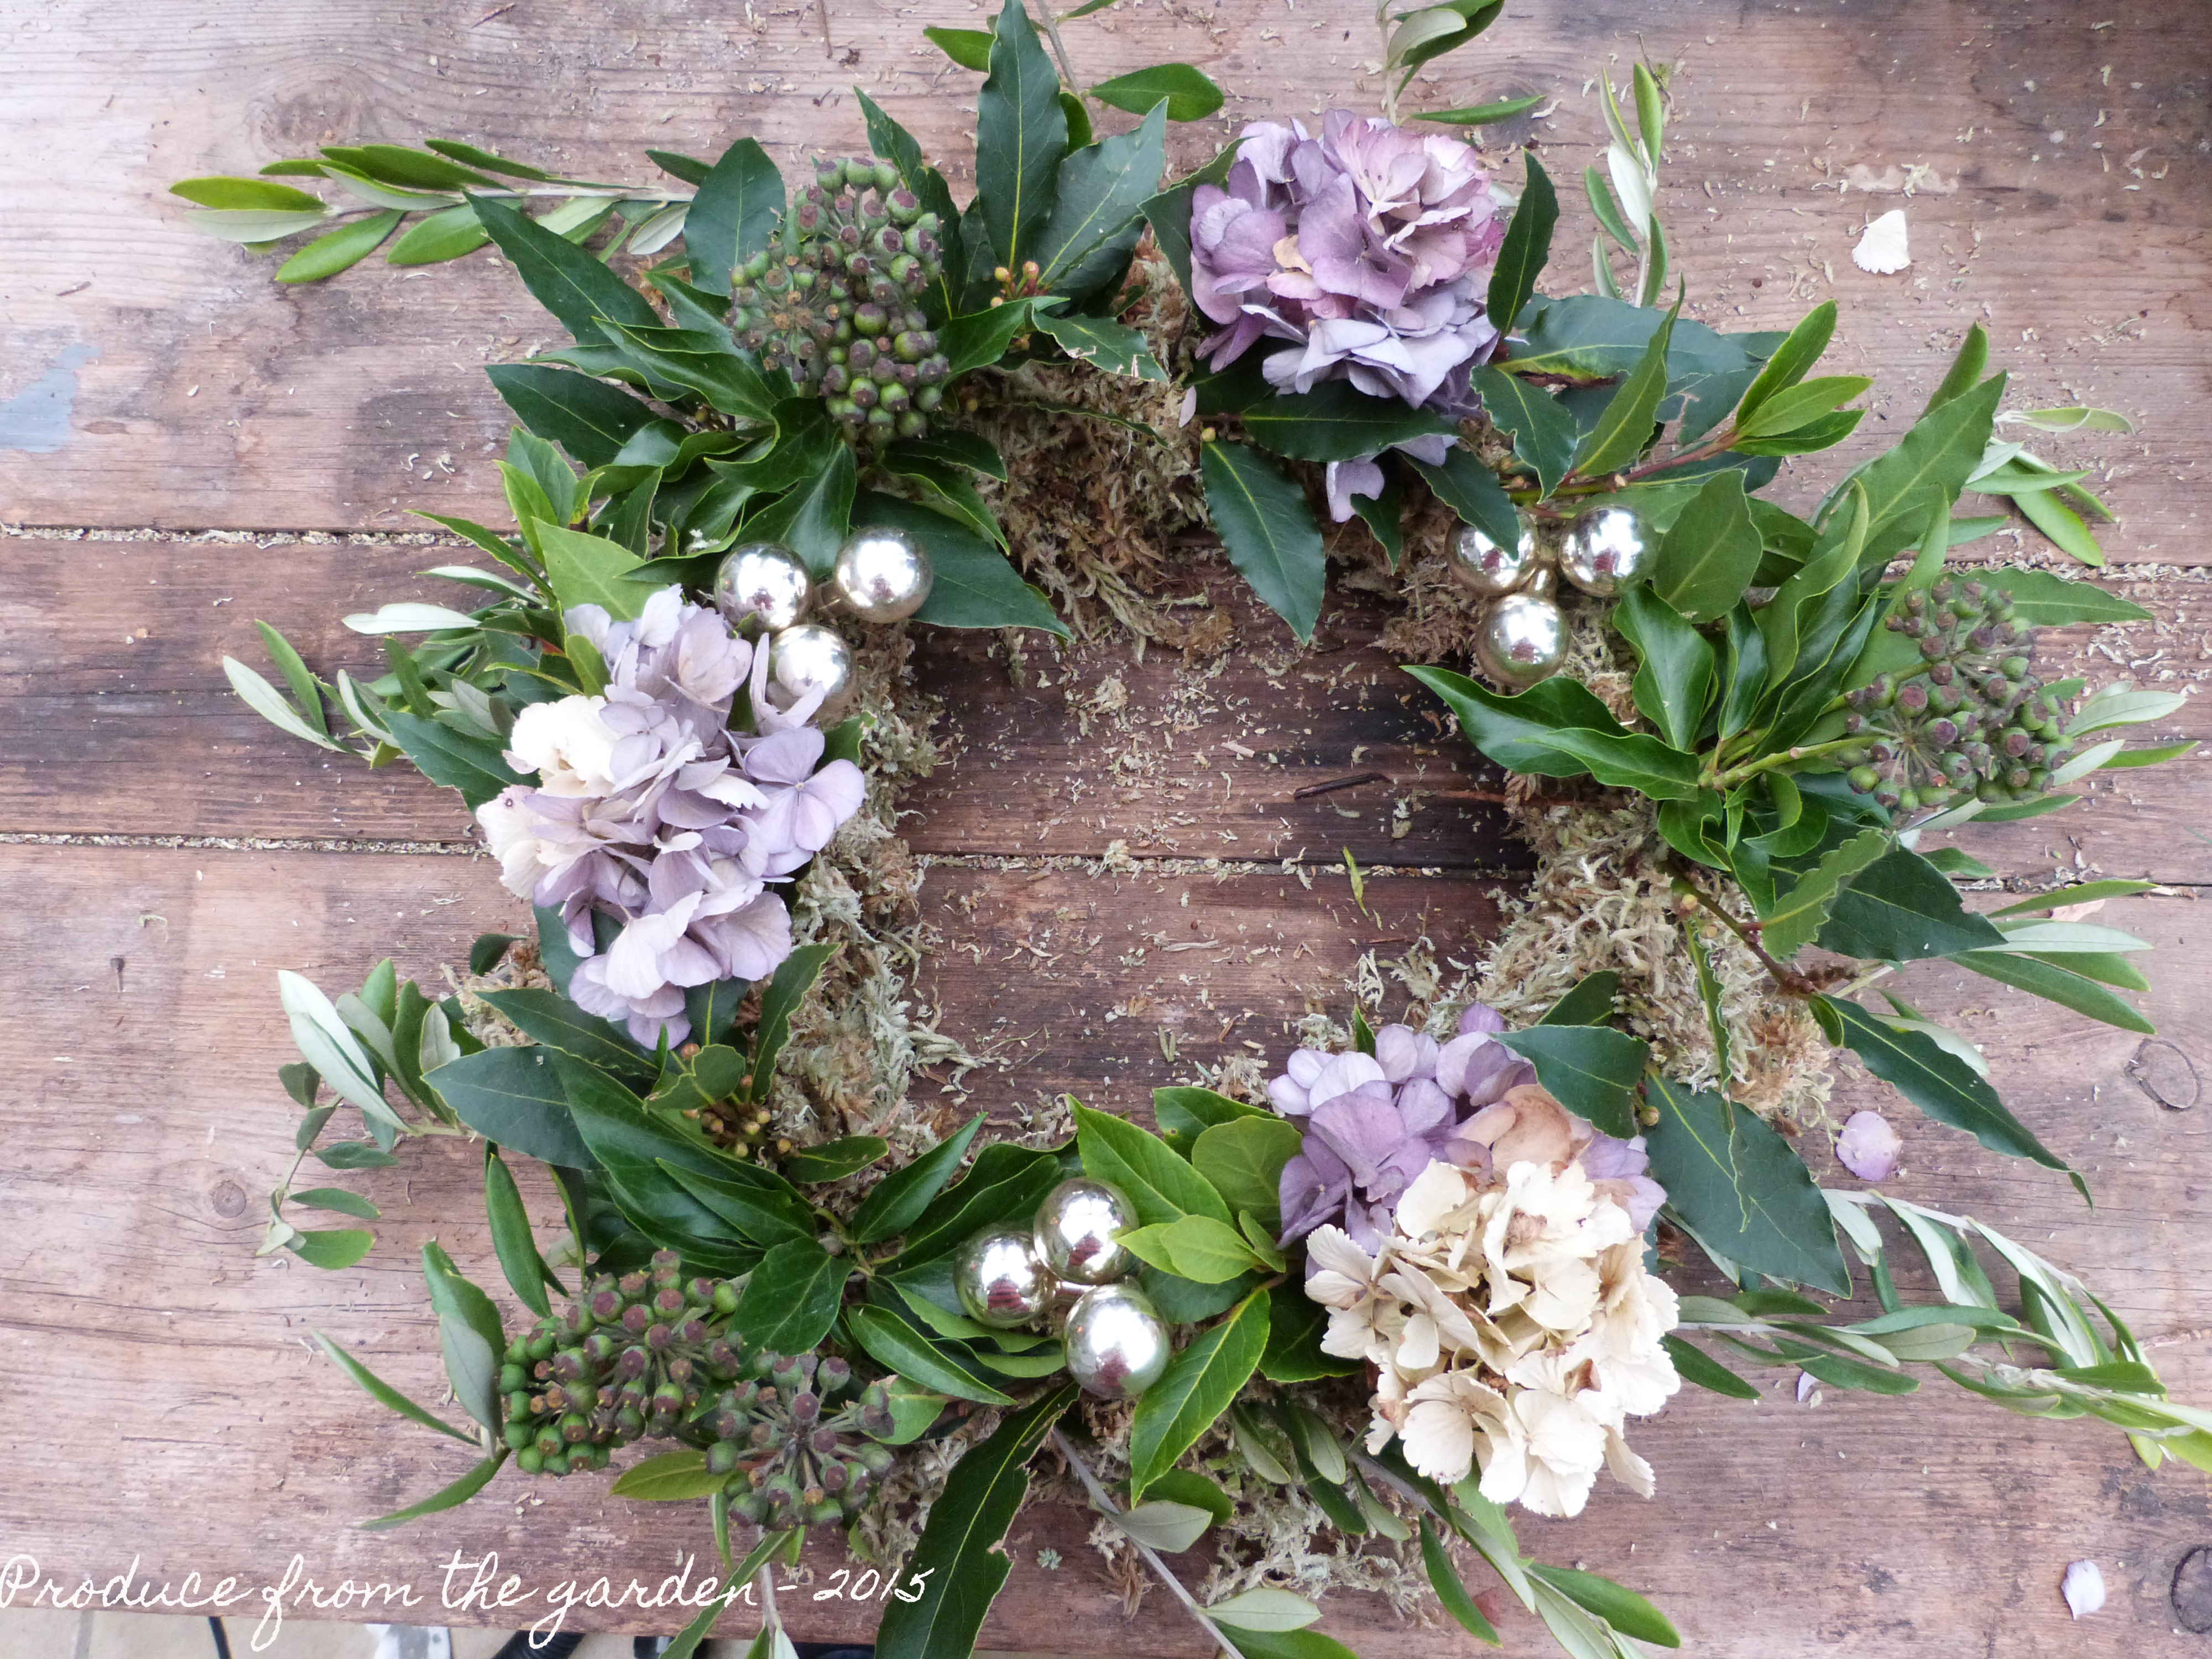
8. Again in groups and bunches of three, I add a bit of sparkle and festive glam with wired baubles. These are small glass baubles with an antique silver finish that come wired specifically for Christmas arrangements.

Baubles on the wreathChristmas baubles added to the wreath

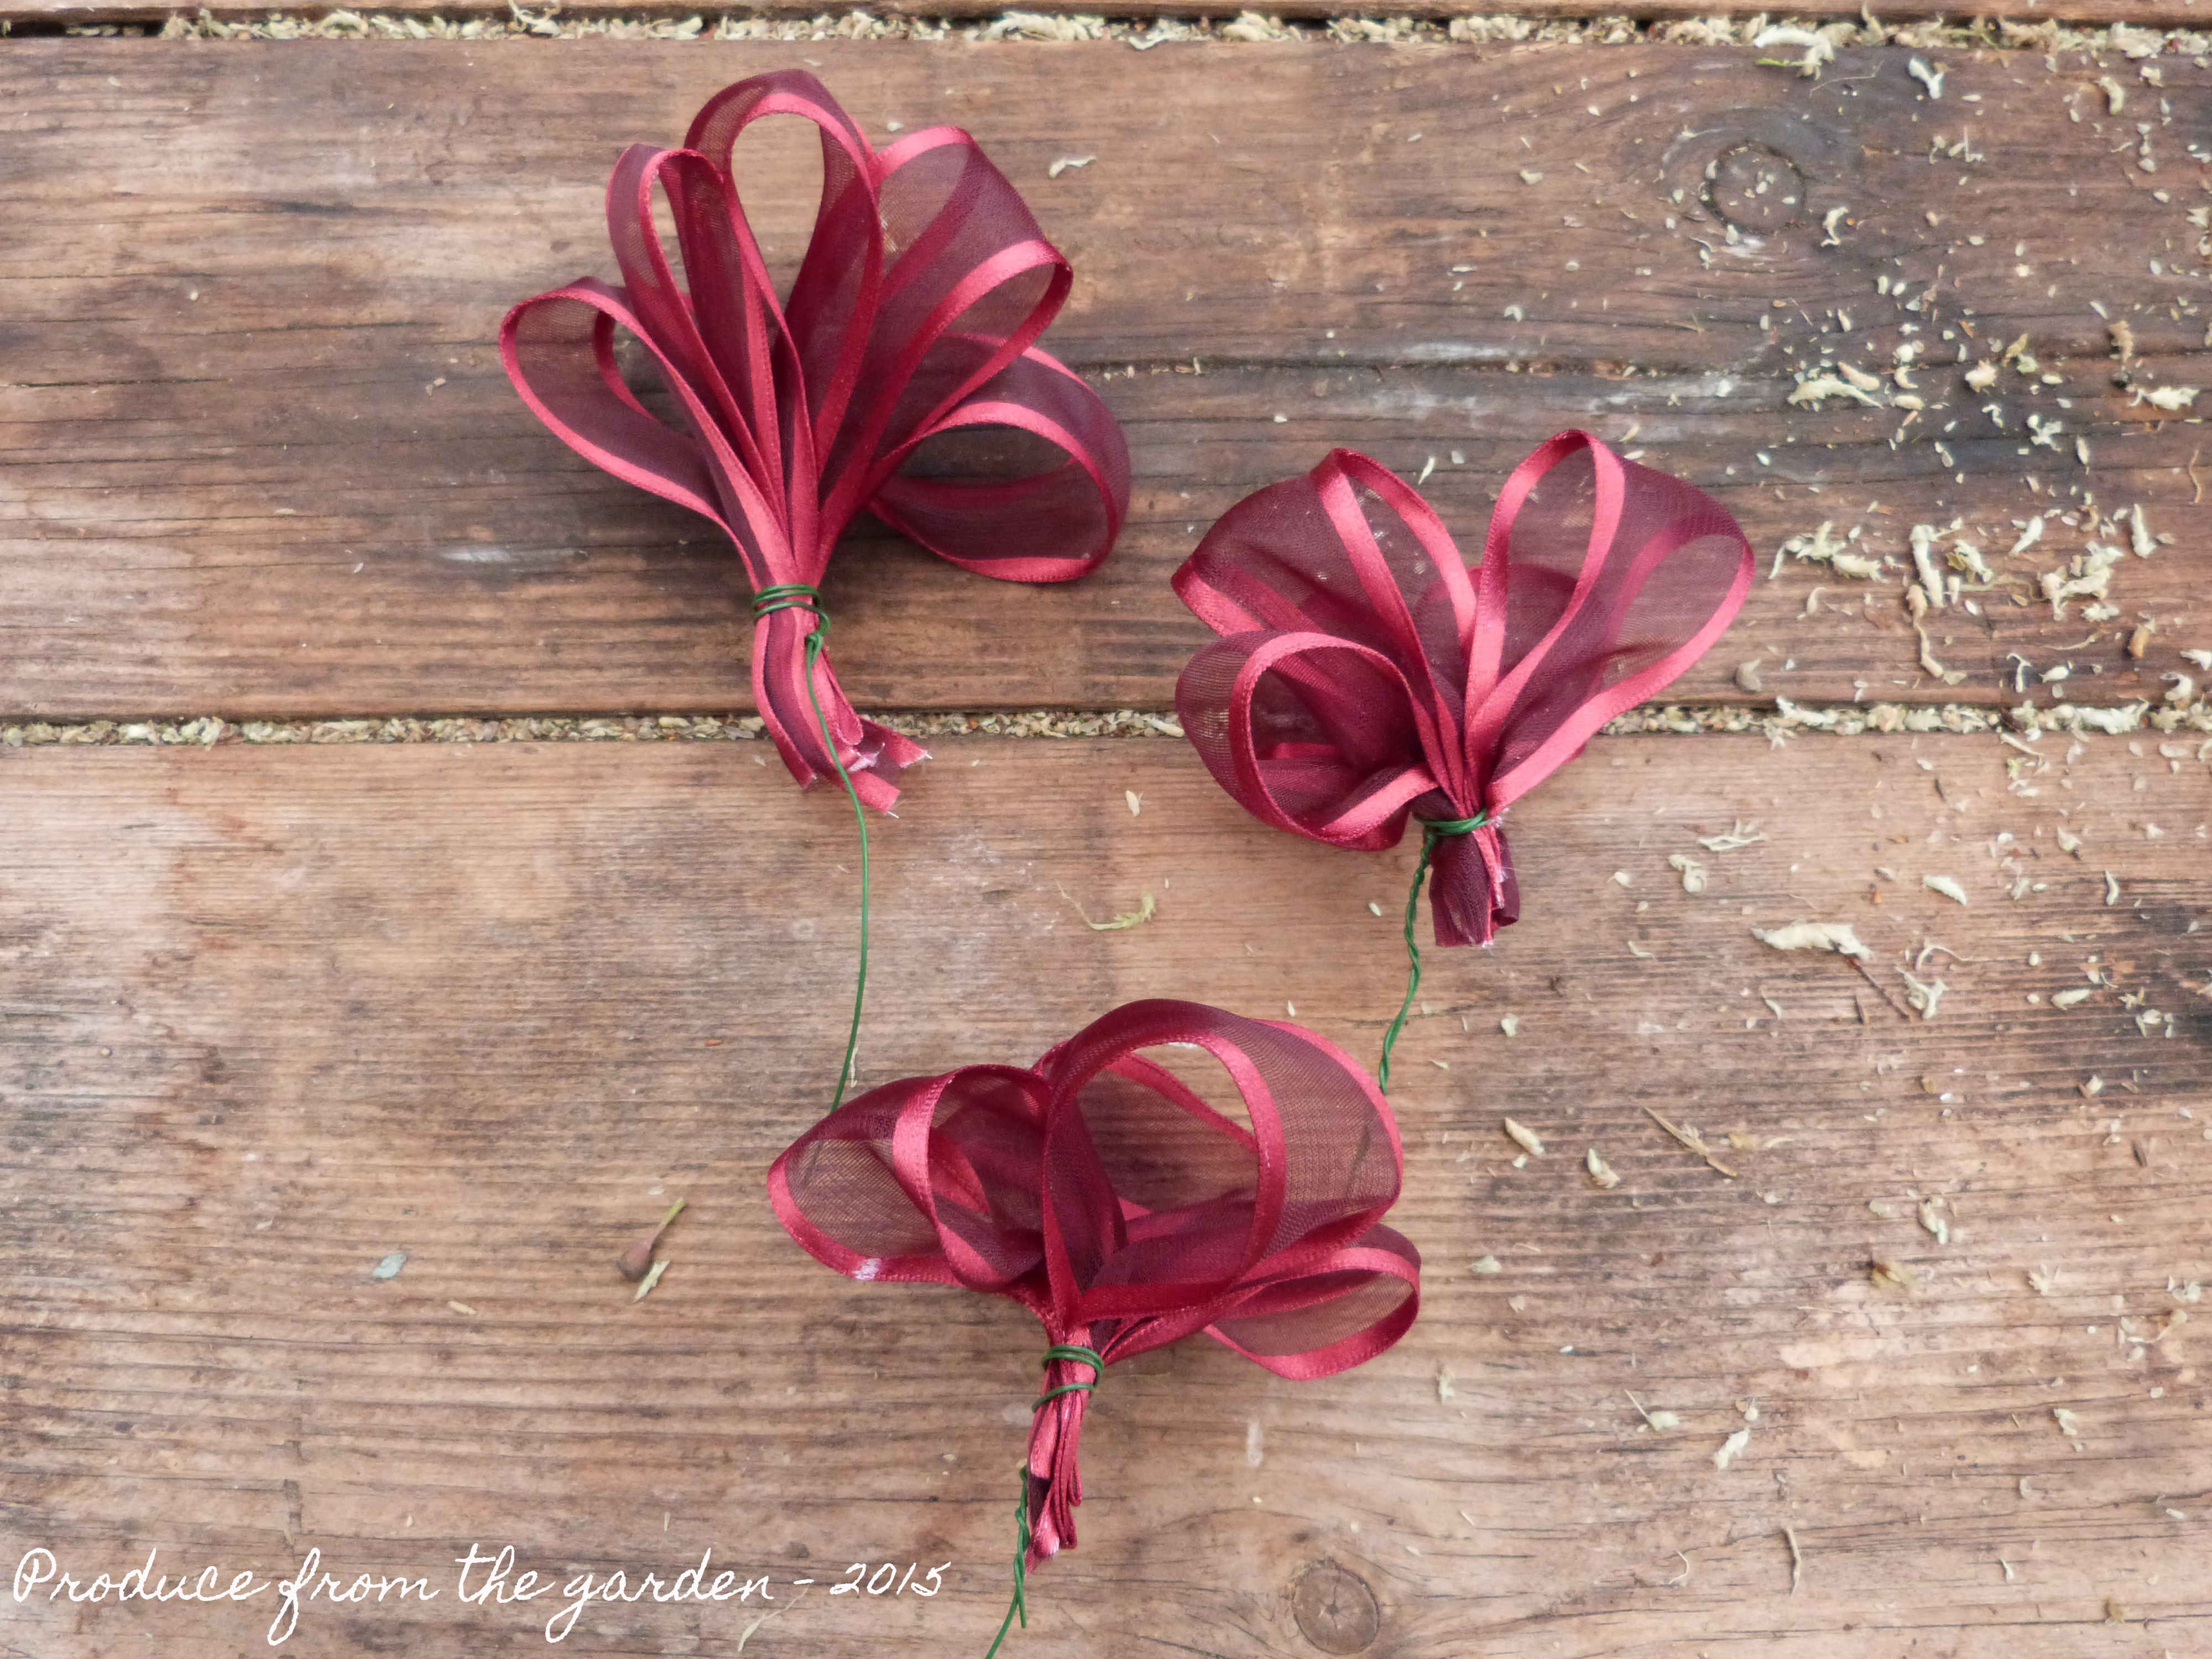
9. I am very good at getting myself into a messy tangle when trying to tie ribbon into pretty bows, so now I cheat by folding the ribbon and tying it with wire at one end. Again I make three bows to be place evenly on the wreath.

RibbonThree ribbons for the wreath

Ribbon on the wreathThe ribbons placed on the wreath. I like how the pinkey red complements the light pink of the dried hydrangeas.

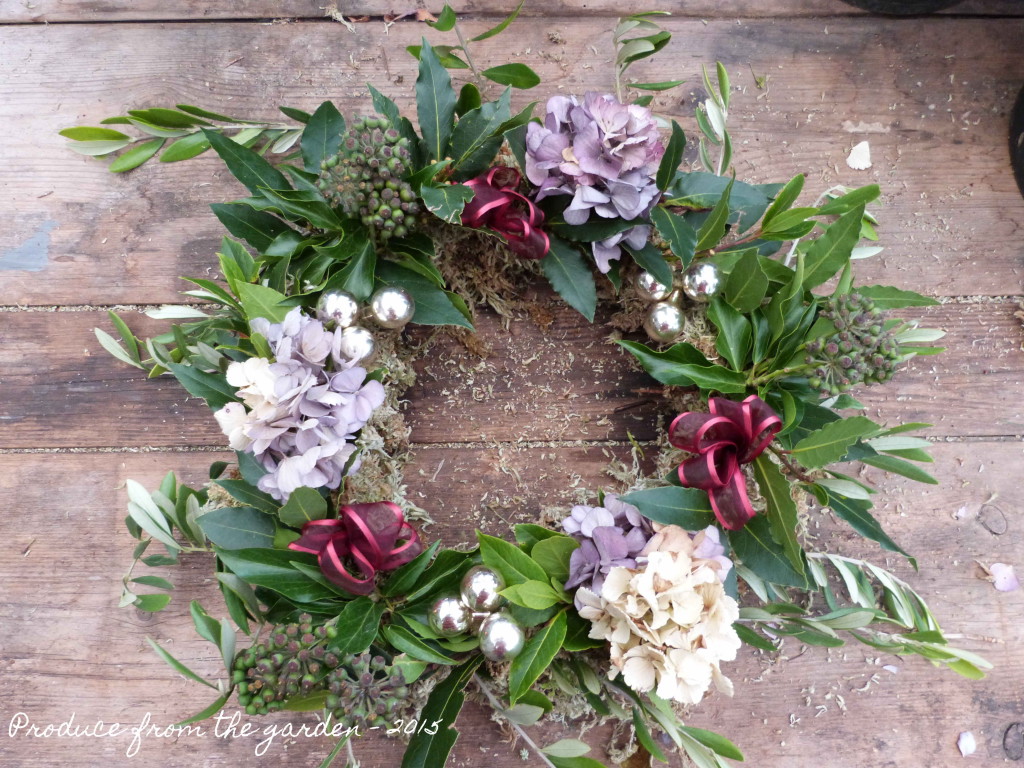
10. To finish the wreath I add viburnum tinus flowers to the wreath, I have plenty in the garden so will replace them as they start to wilt, the damp moss will keep them fresh for a good week.

Viburnam Tinus on the wreath
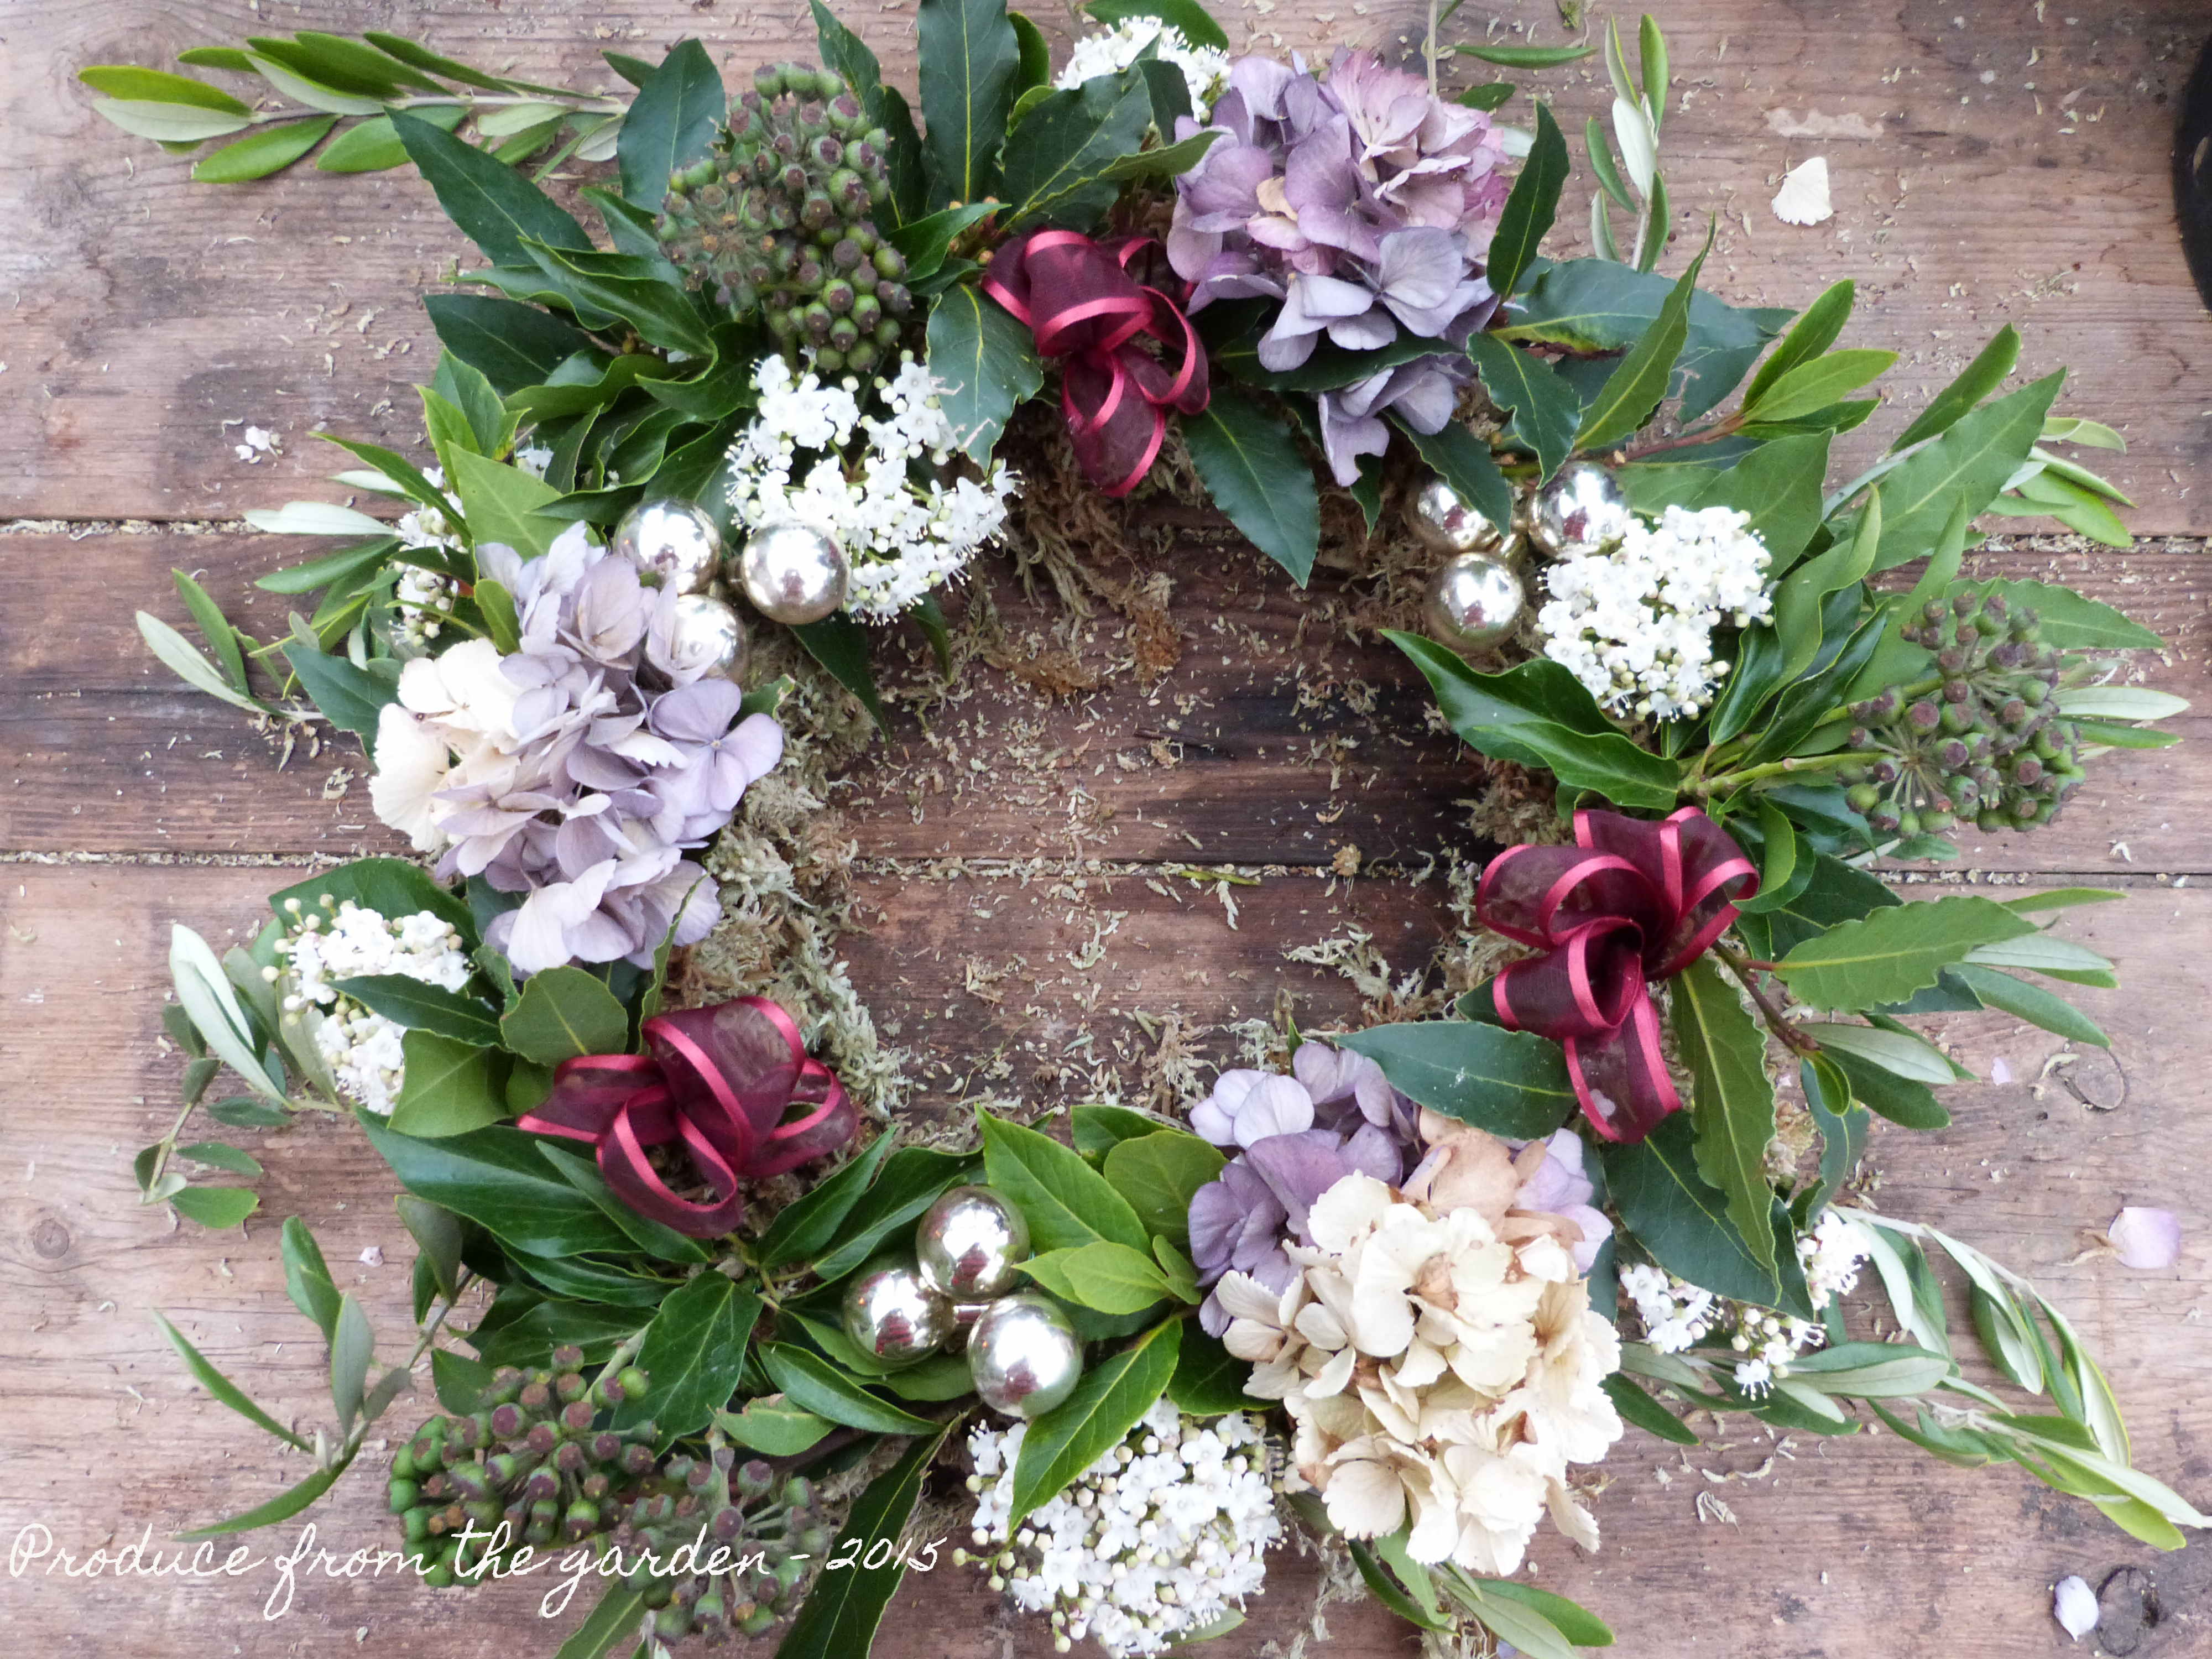
The completed wreath

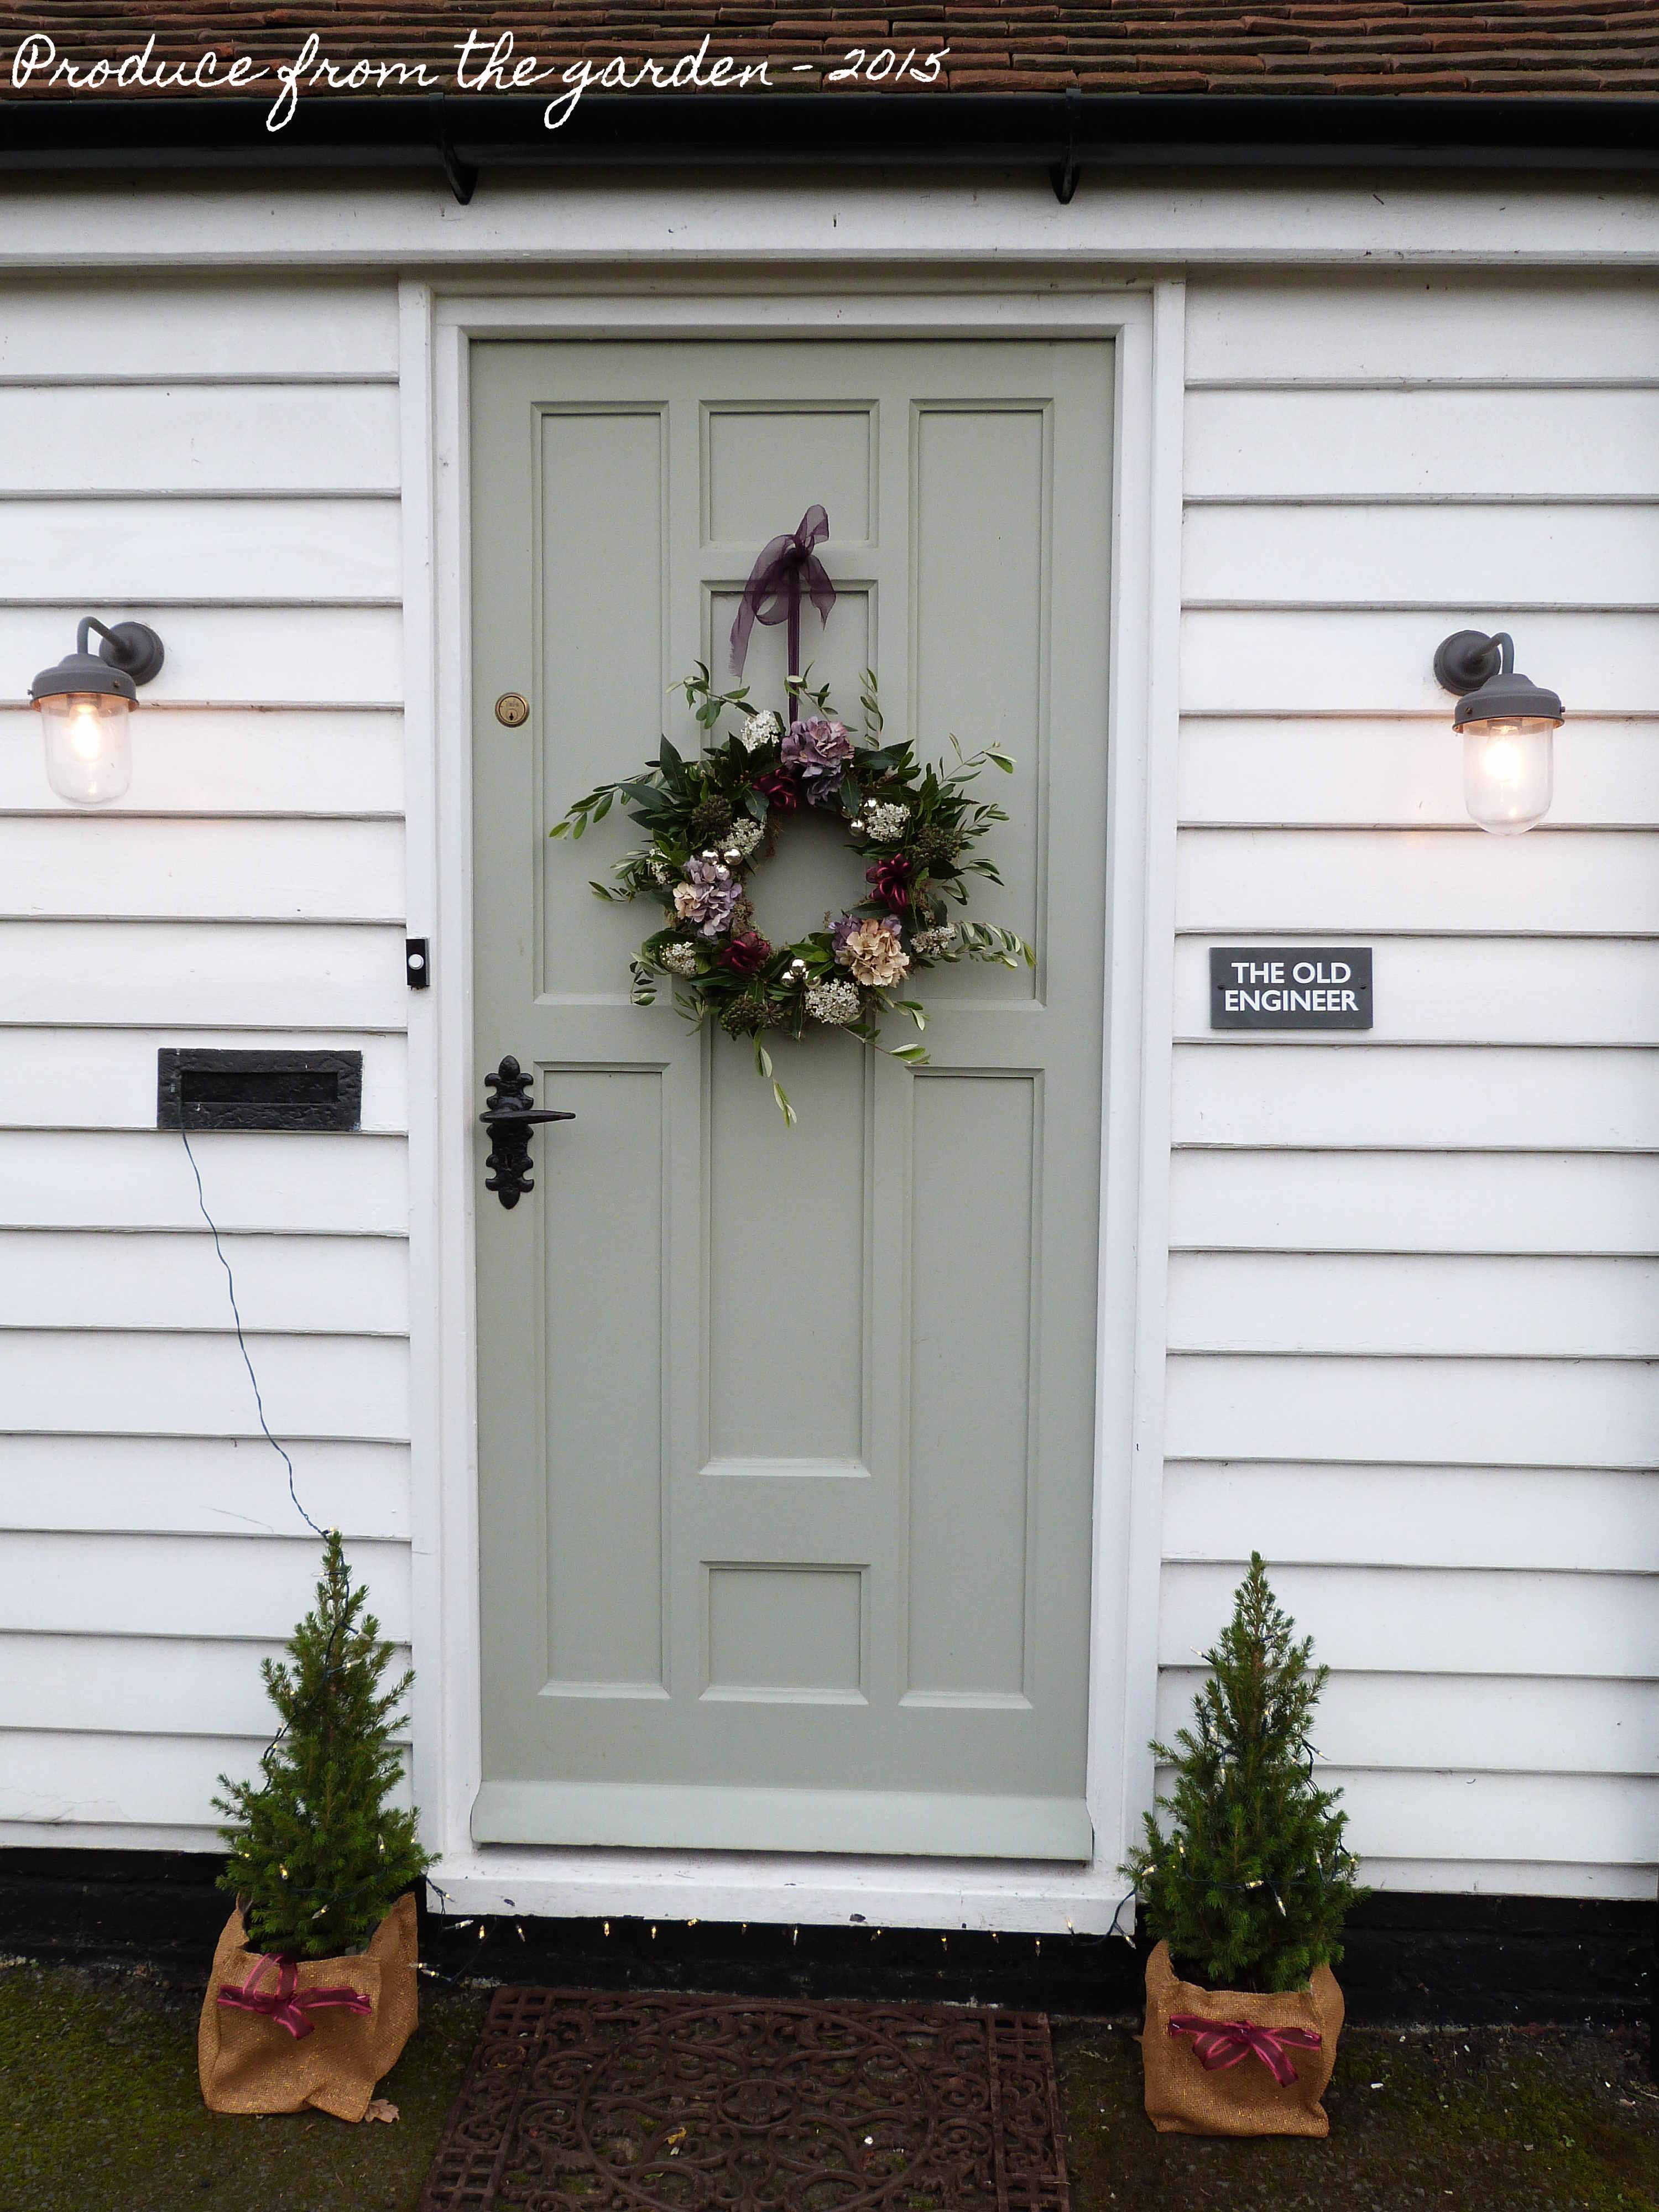
11. Finally I tie a ribbon around the wreath and hang it to the front door. Every week I will spray the back of the wreath with water just to give it longevity over the whole festive season.

Christmas front door
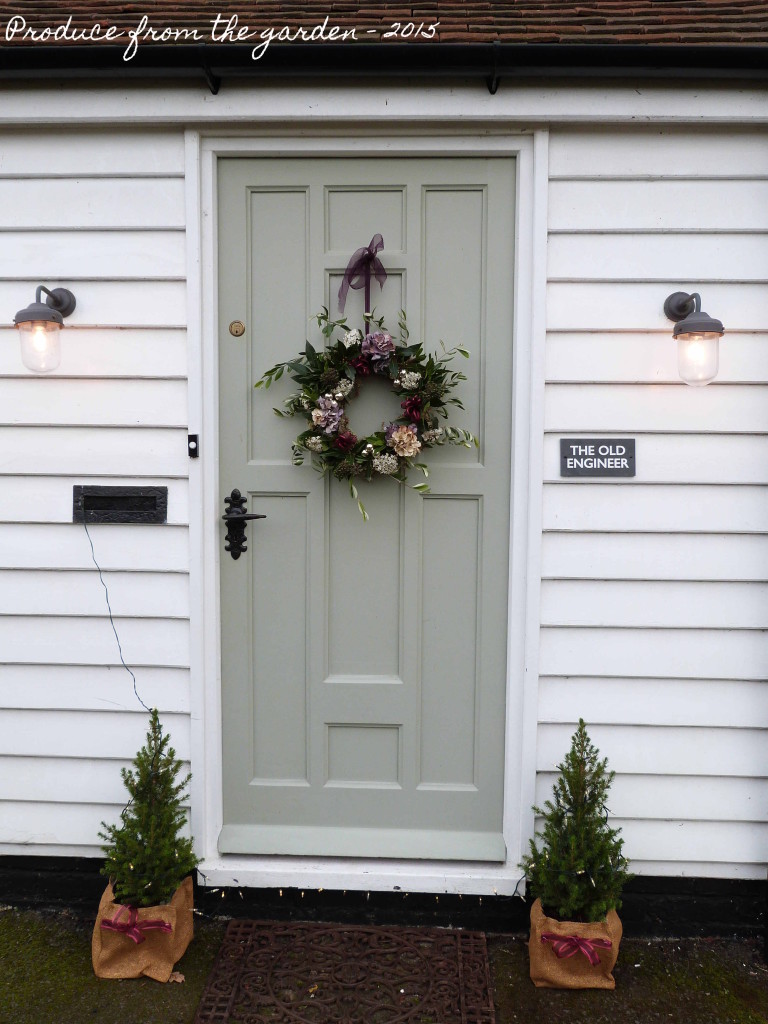
The wreath in pride of place at our front door, ready to welcome guests

Christmas wreath working in groups of 5
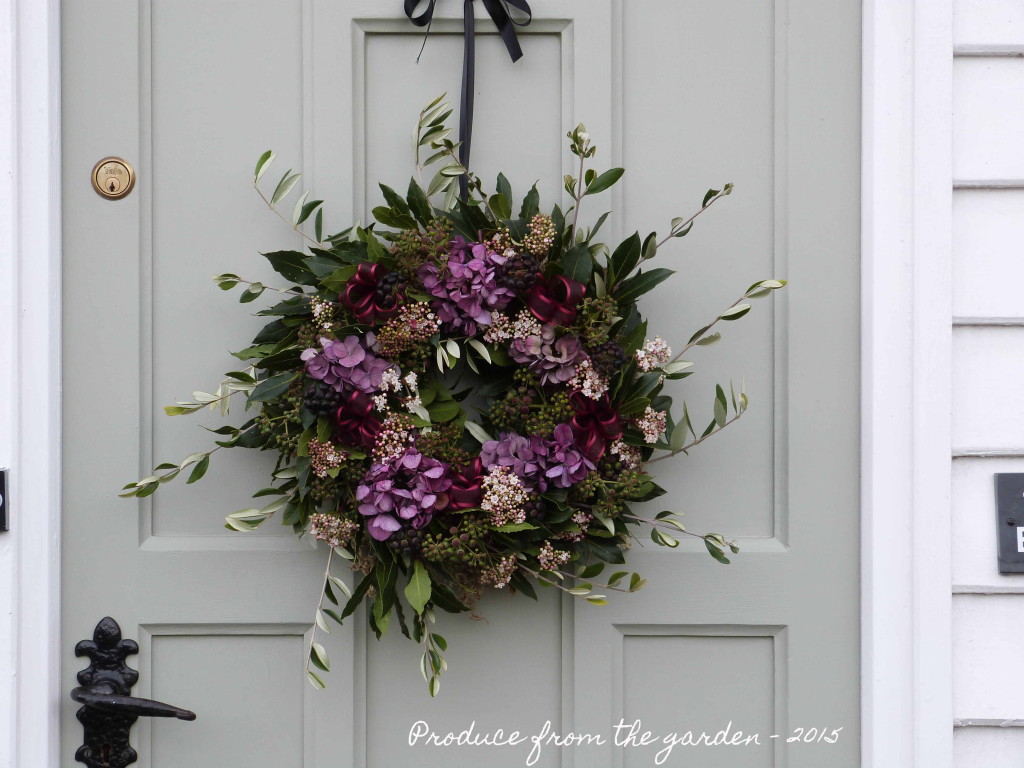
Another similar wreath I’ve made working in groups of five, giving a fuller effect