Constructing the cutting garden raised bed

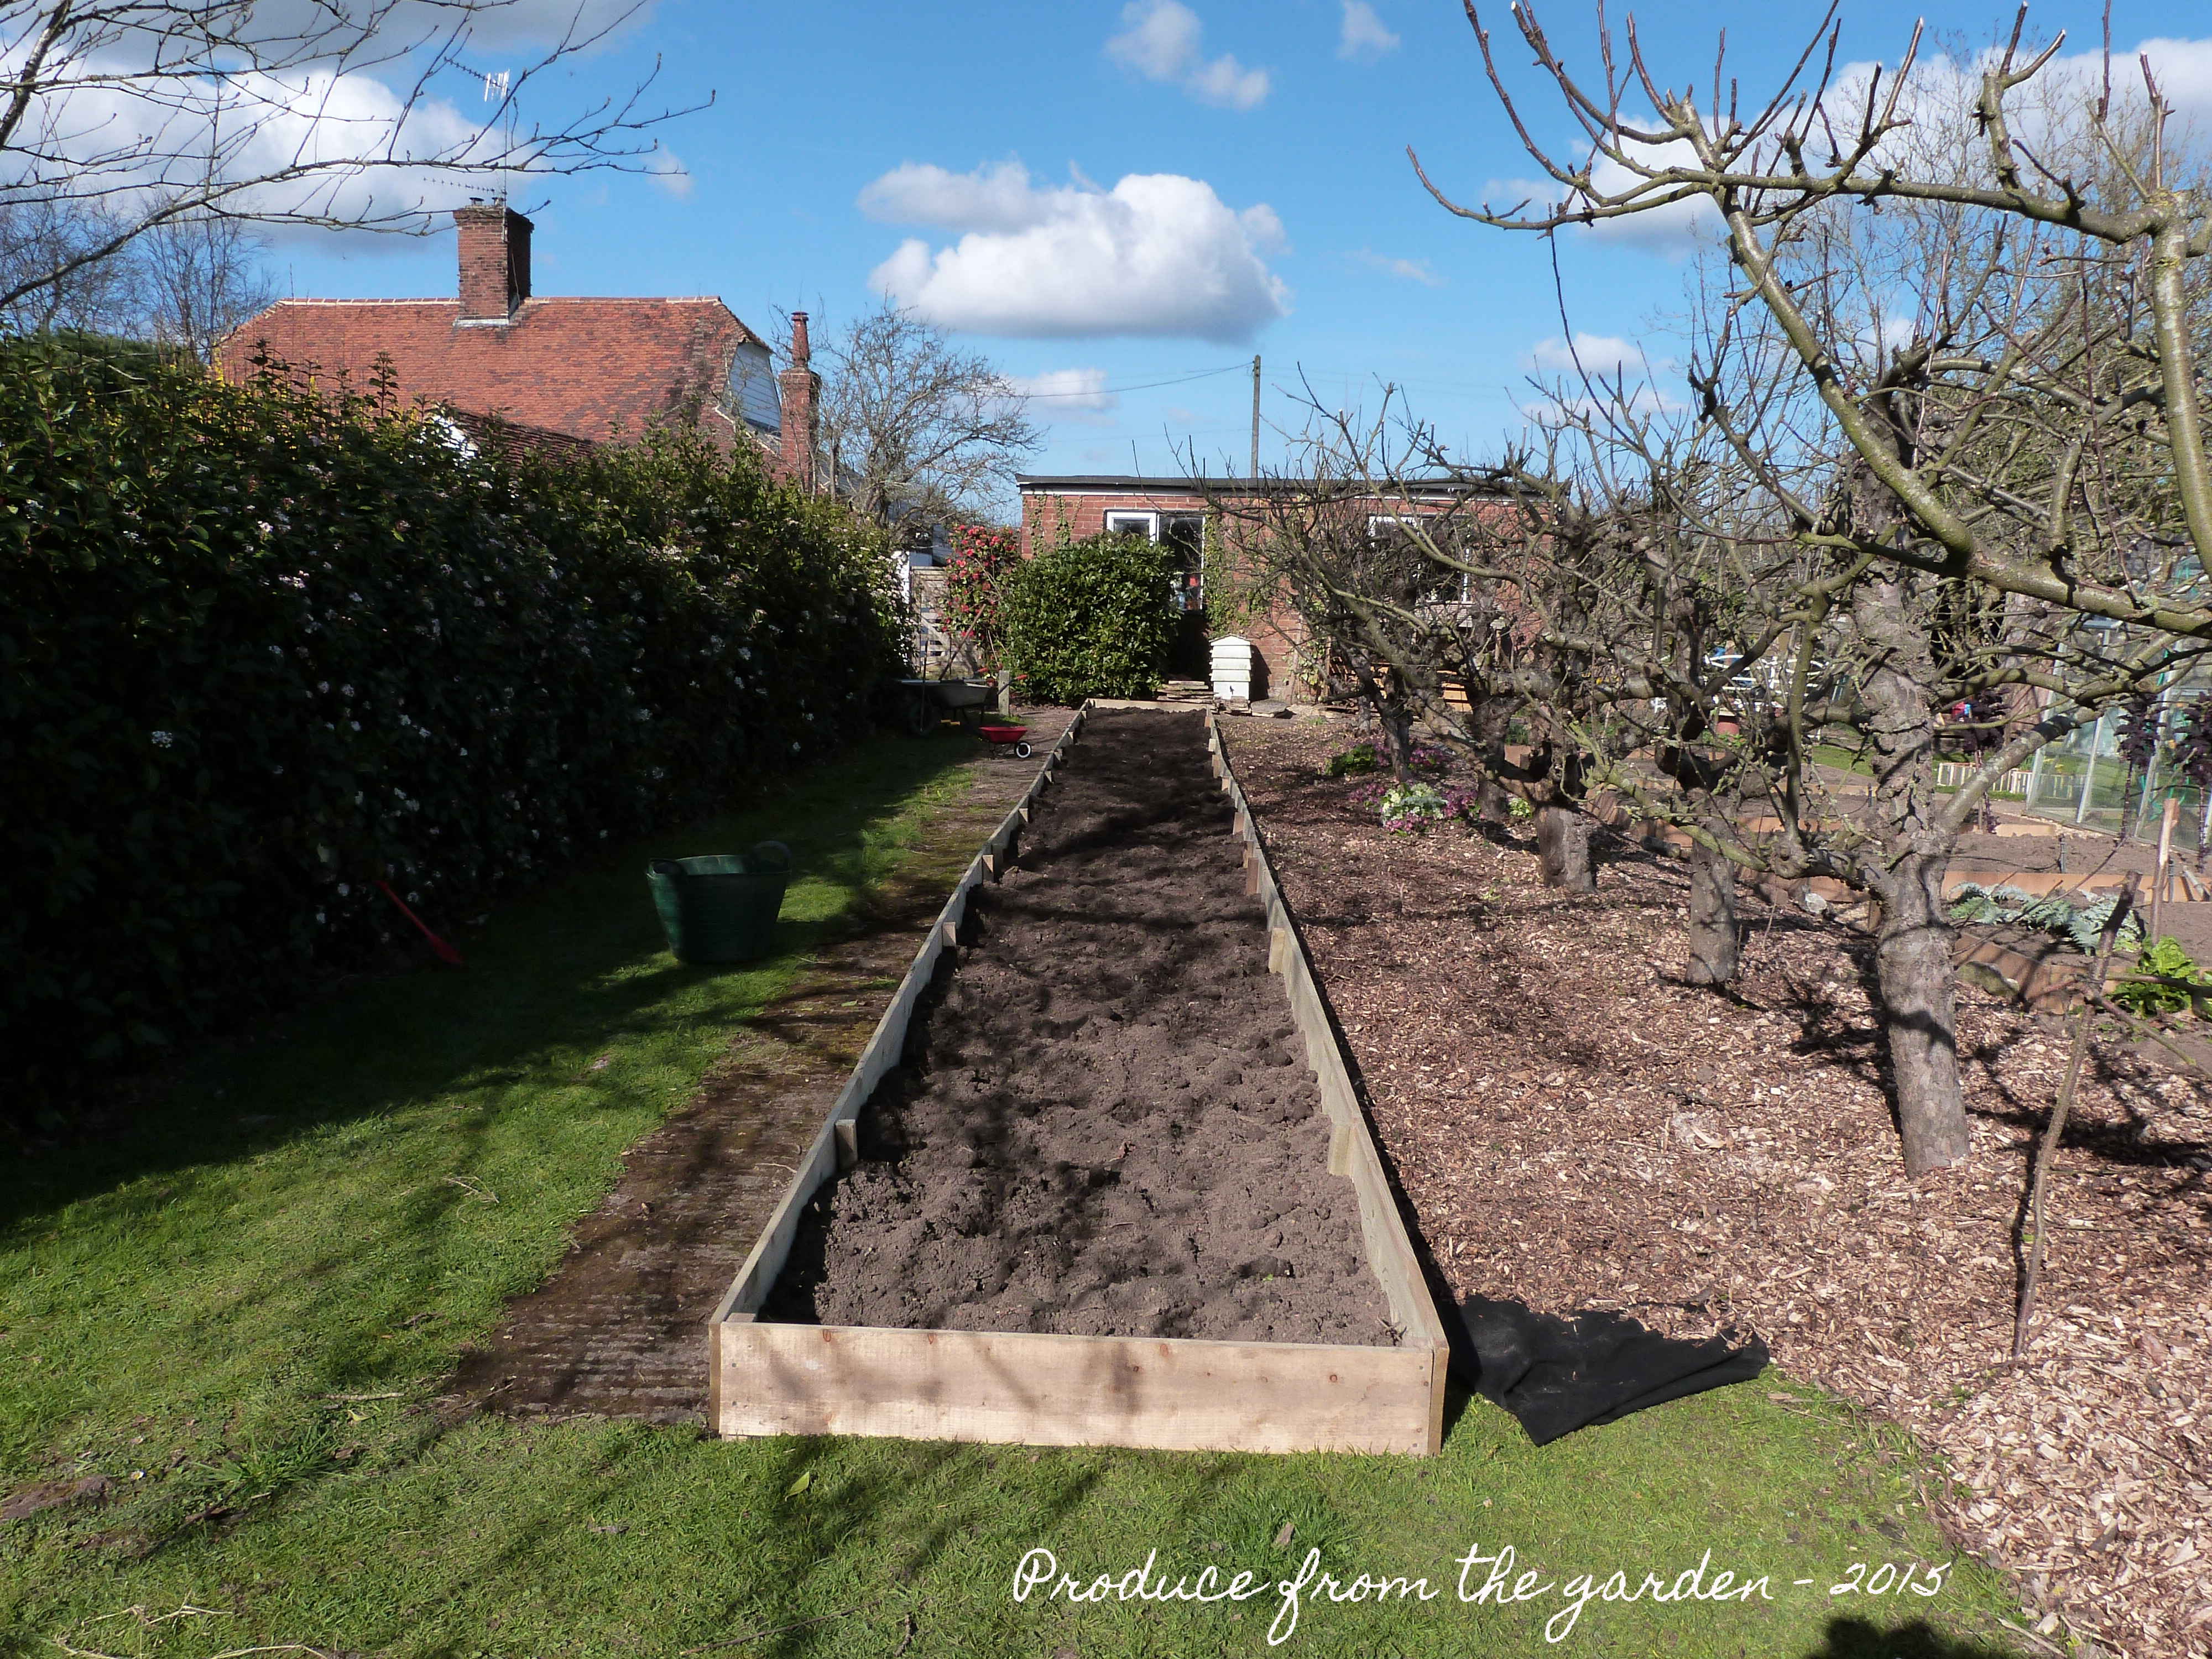
On a cold, windy and damp Easter Saturday morning (not even my hardy youngest child lasted long outside), I constructed the raised cutting border frame. It was a quick and trouble free process, I think I’ve got the hang of making raised beds now, about time, it is my sixth this year! Whilst hammering stakes into the ground and fixing the planks of wood, I felt quite festive as the bleats of the new lambs carried on the wind from a few fields away. Filling the bed would have to wait a day, my children and I had a Simnel cake to make.
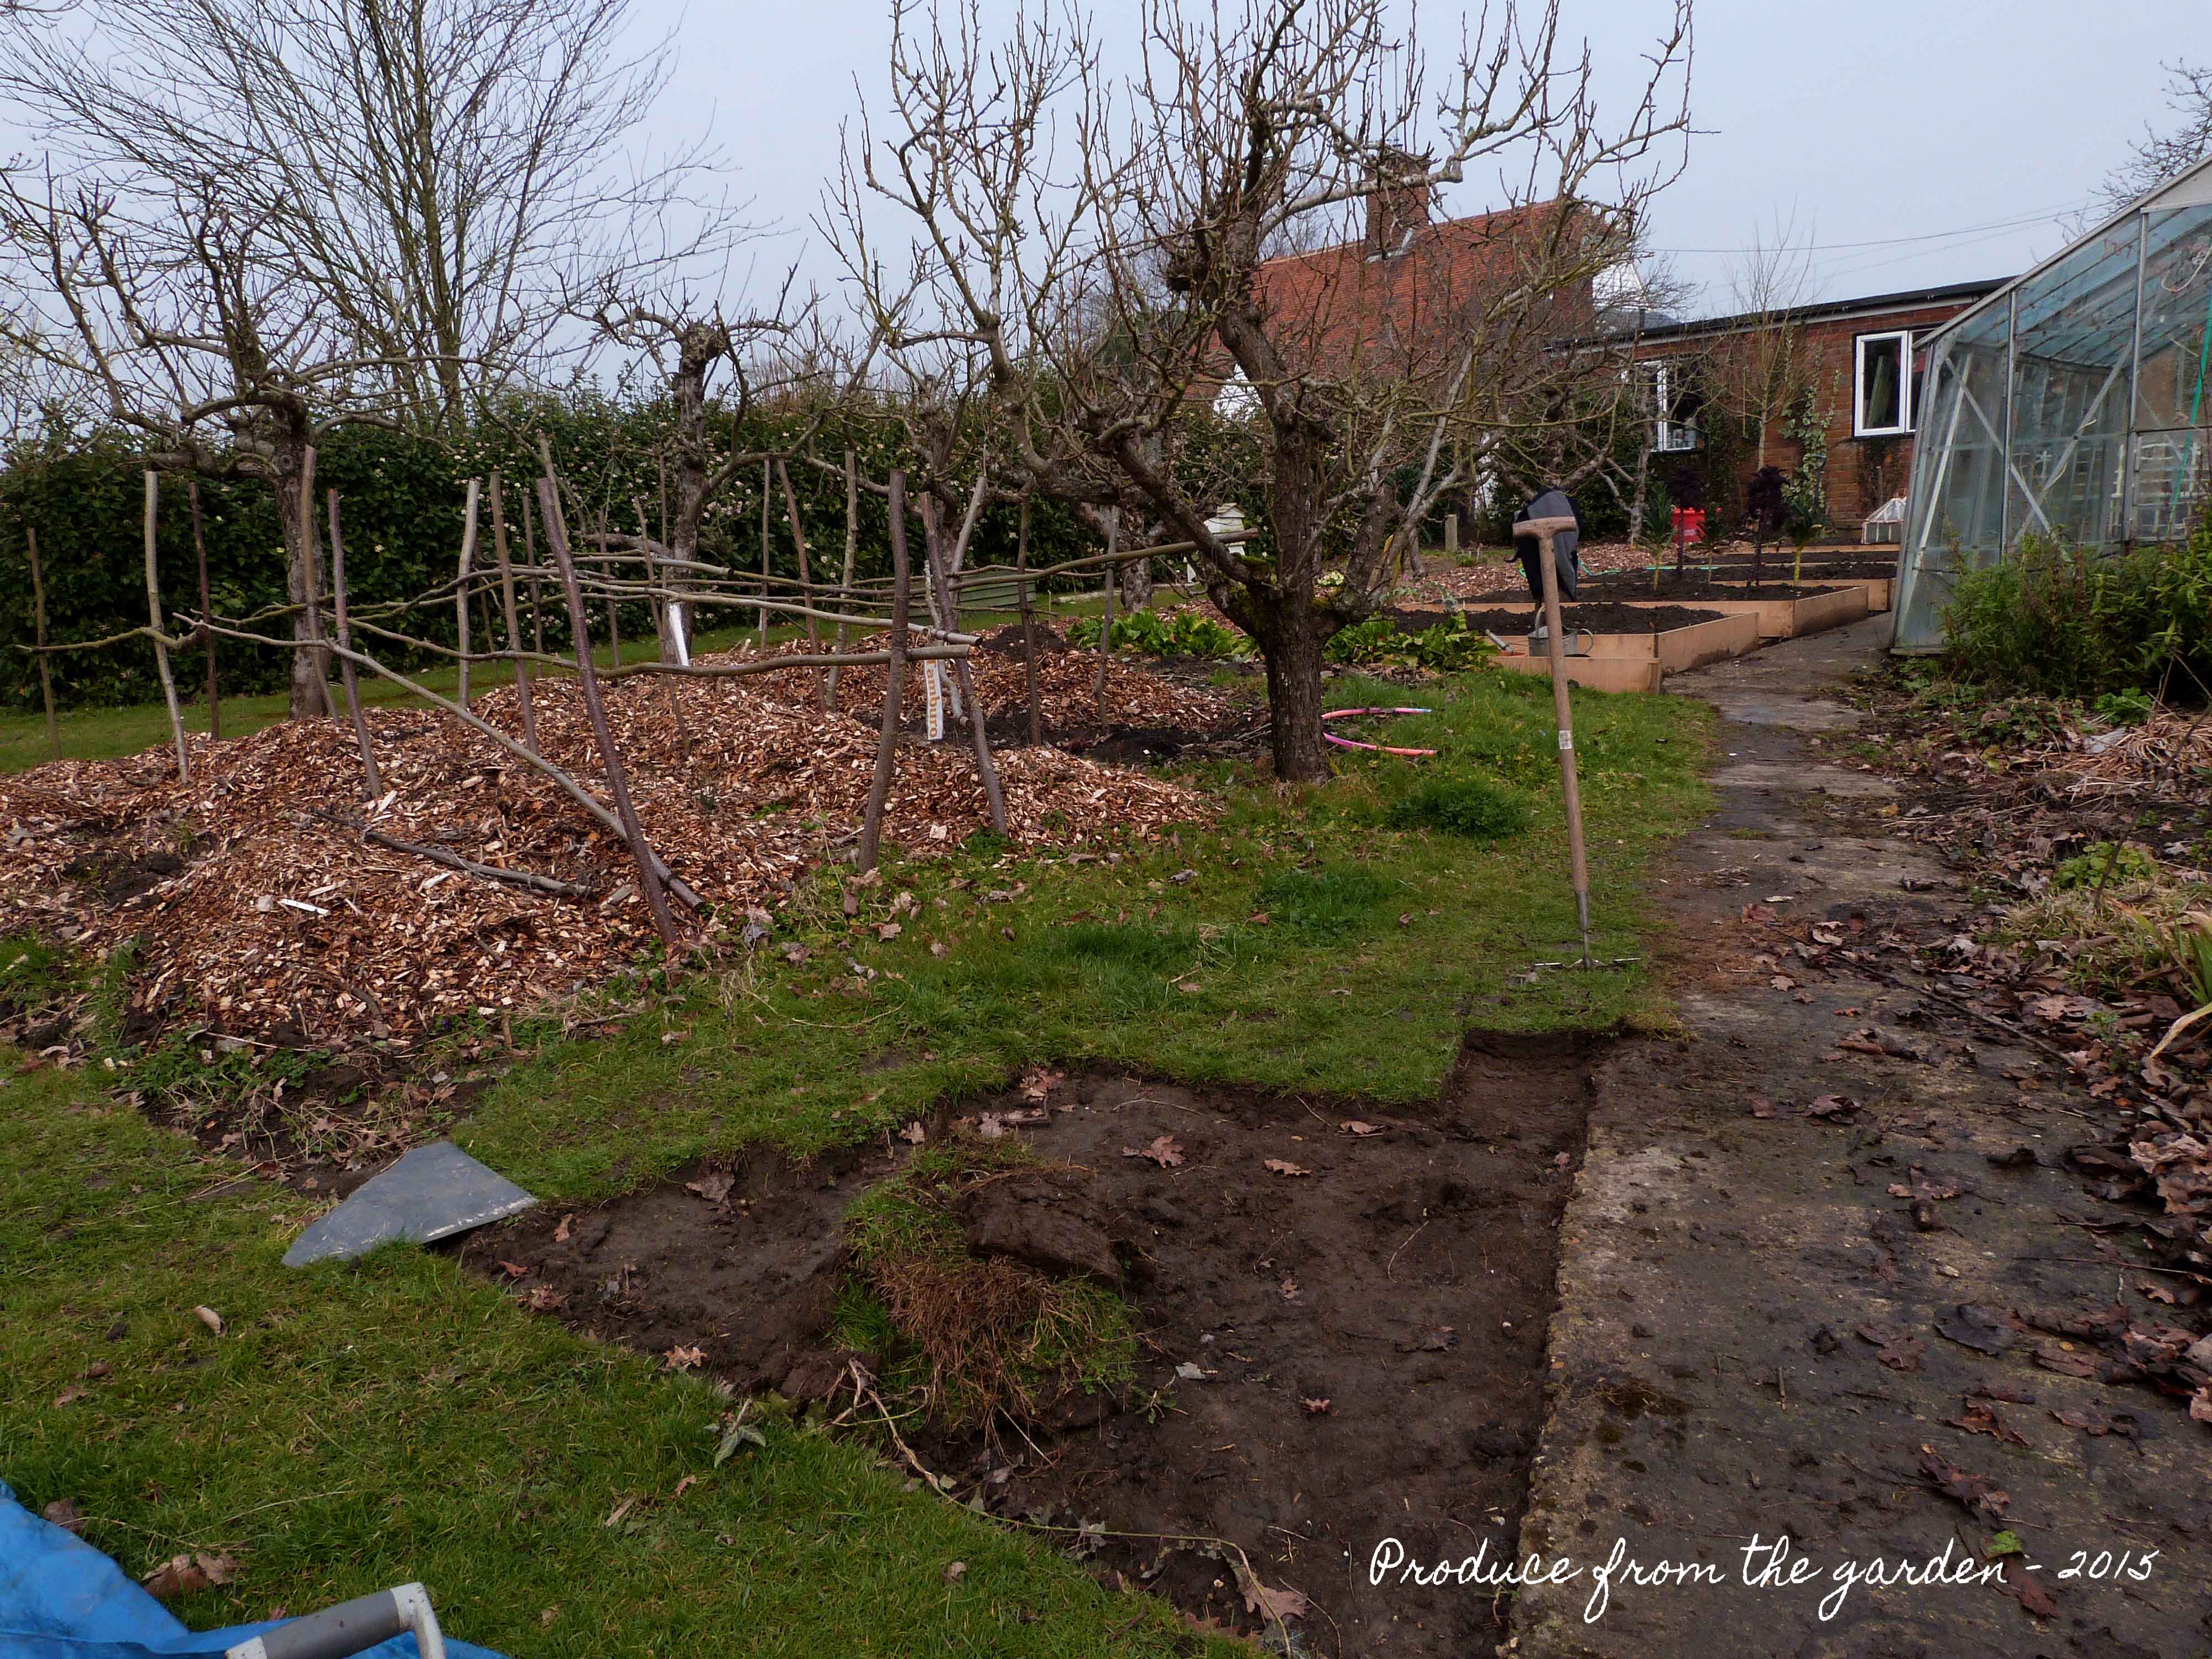
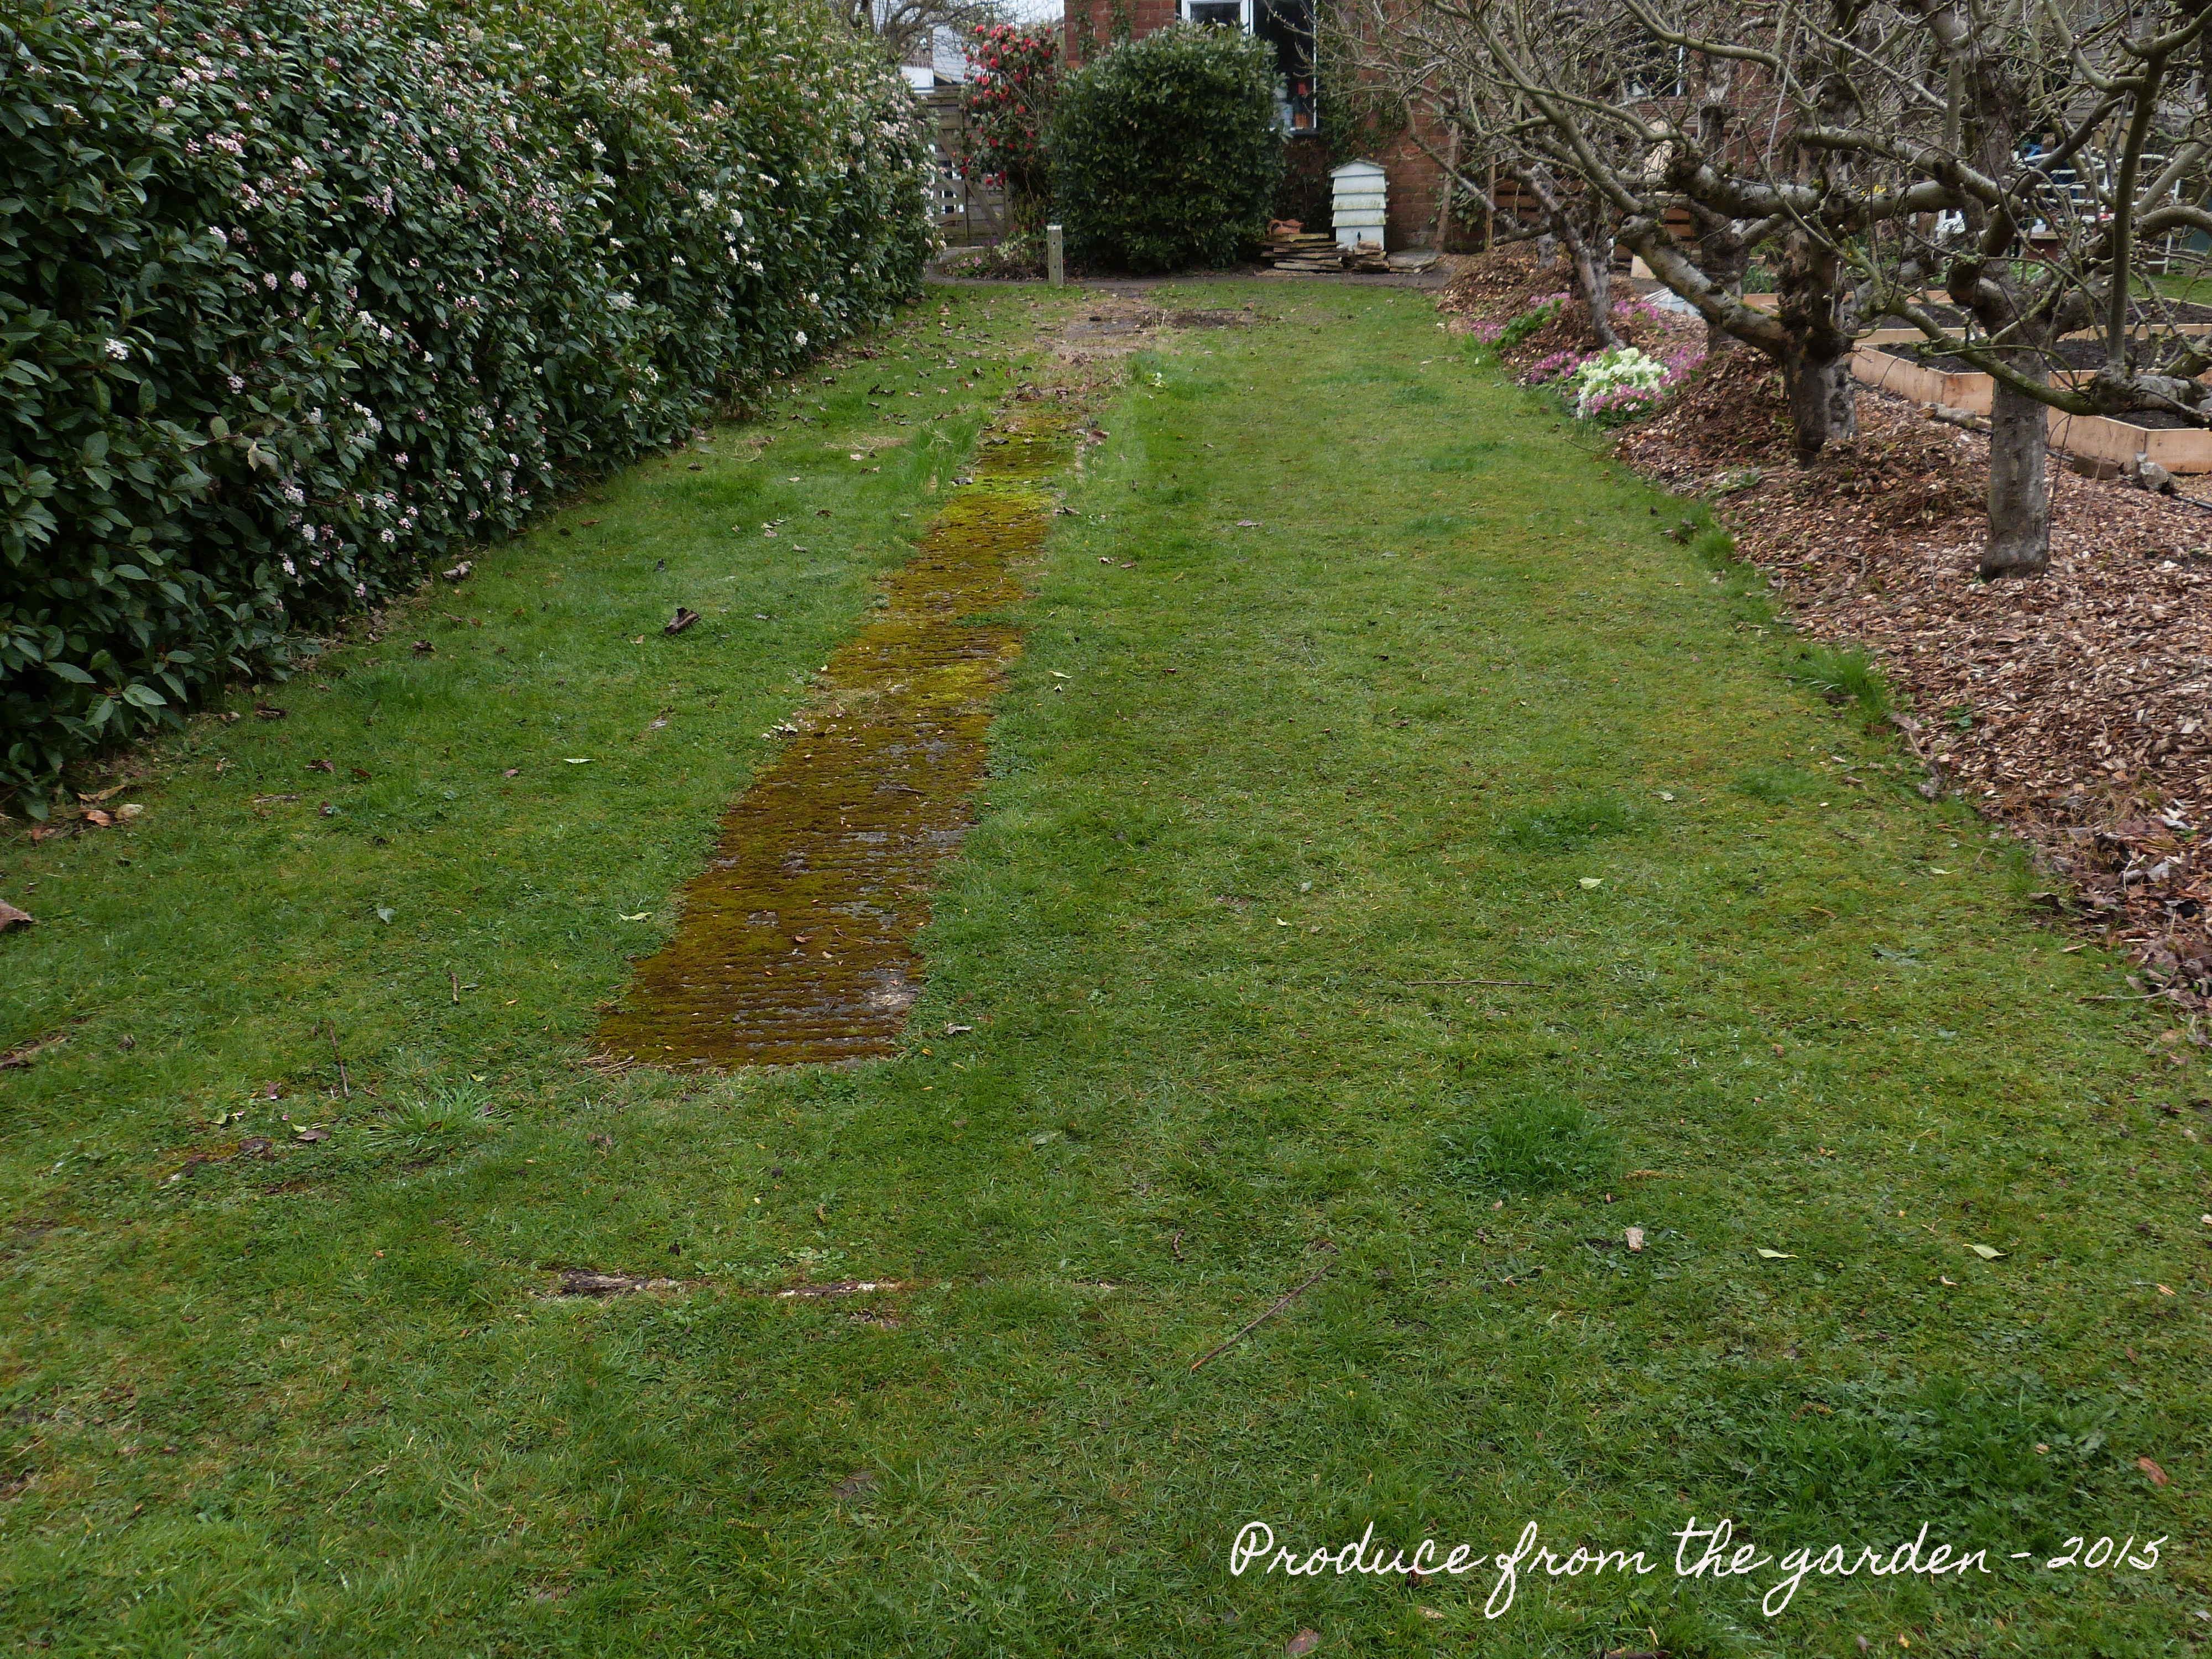
Cutting garden border before shotThe Before shot

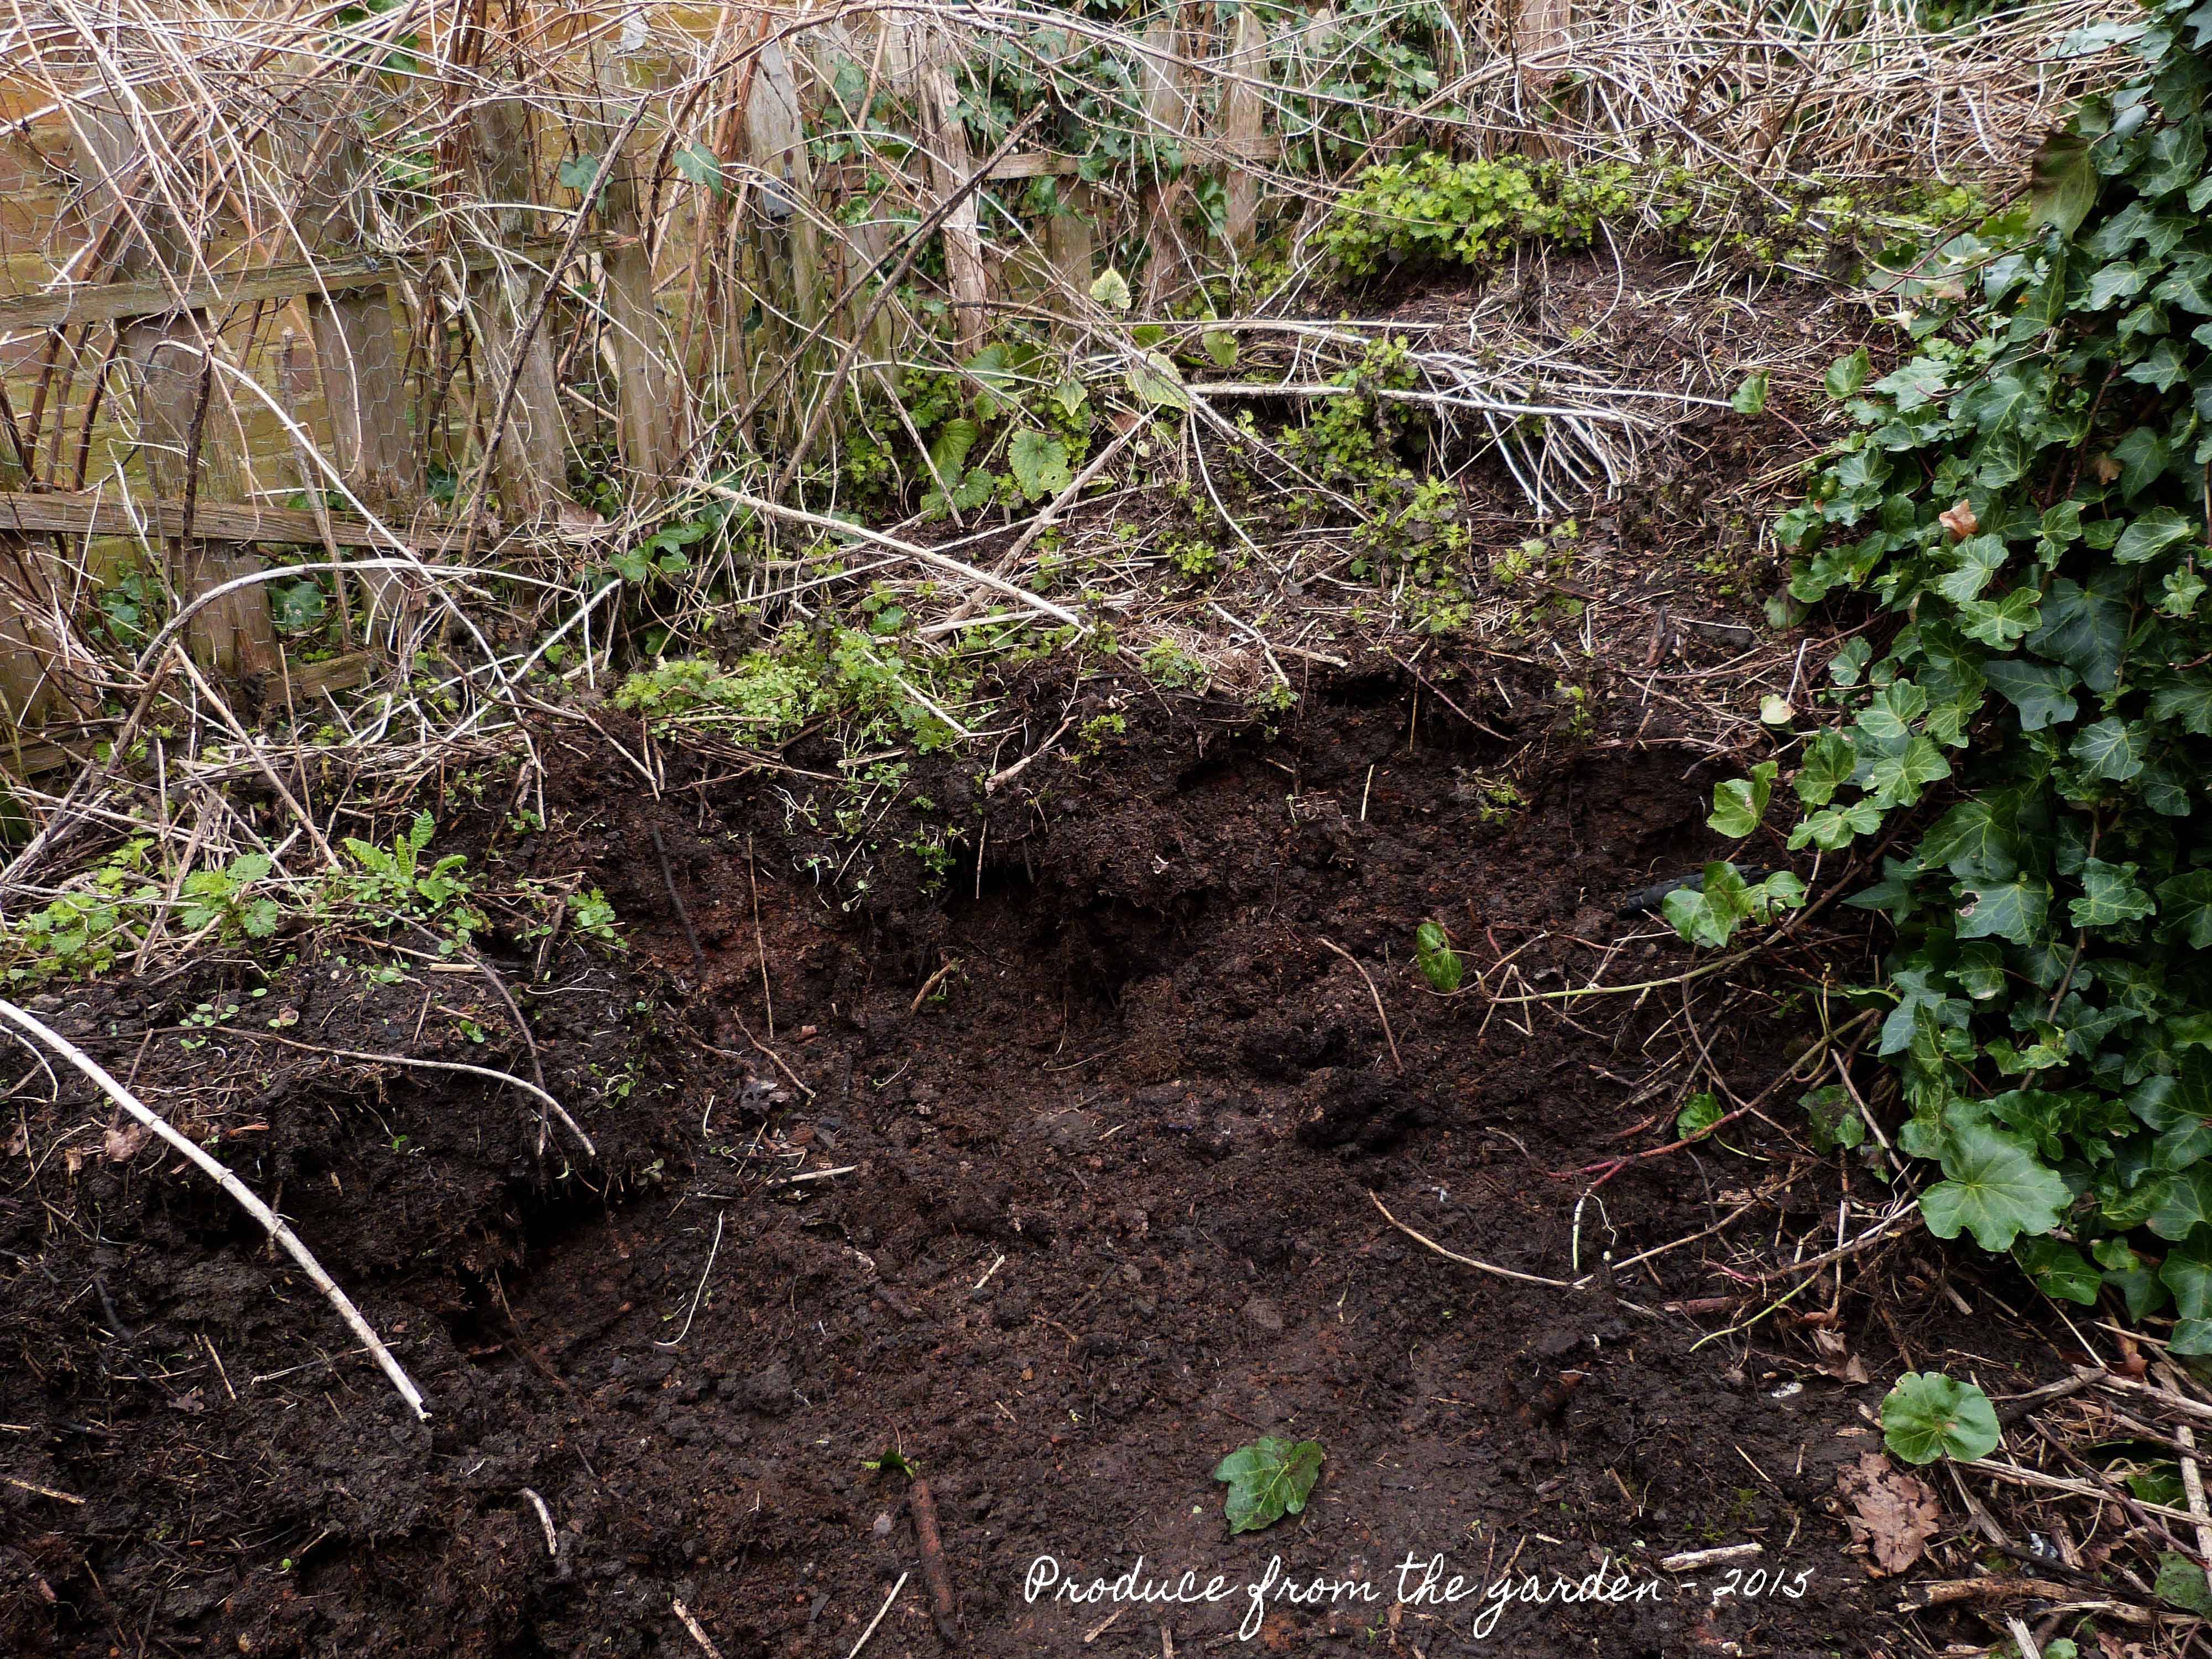
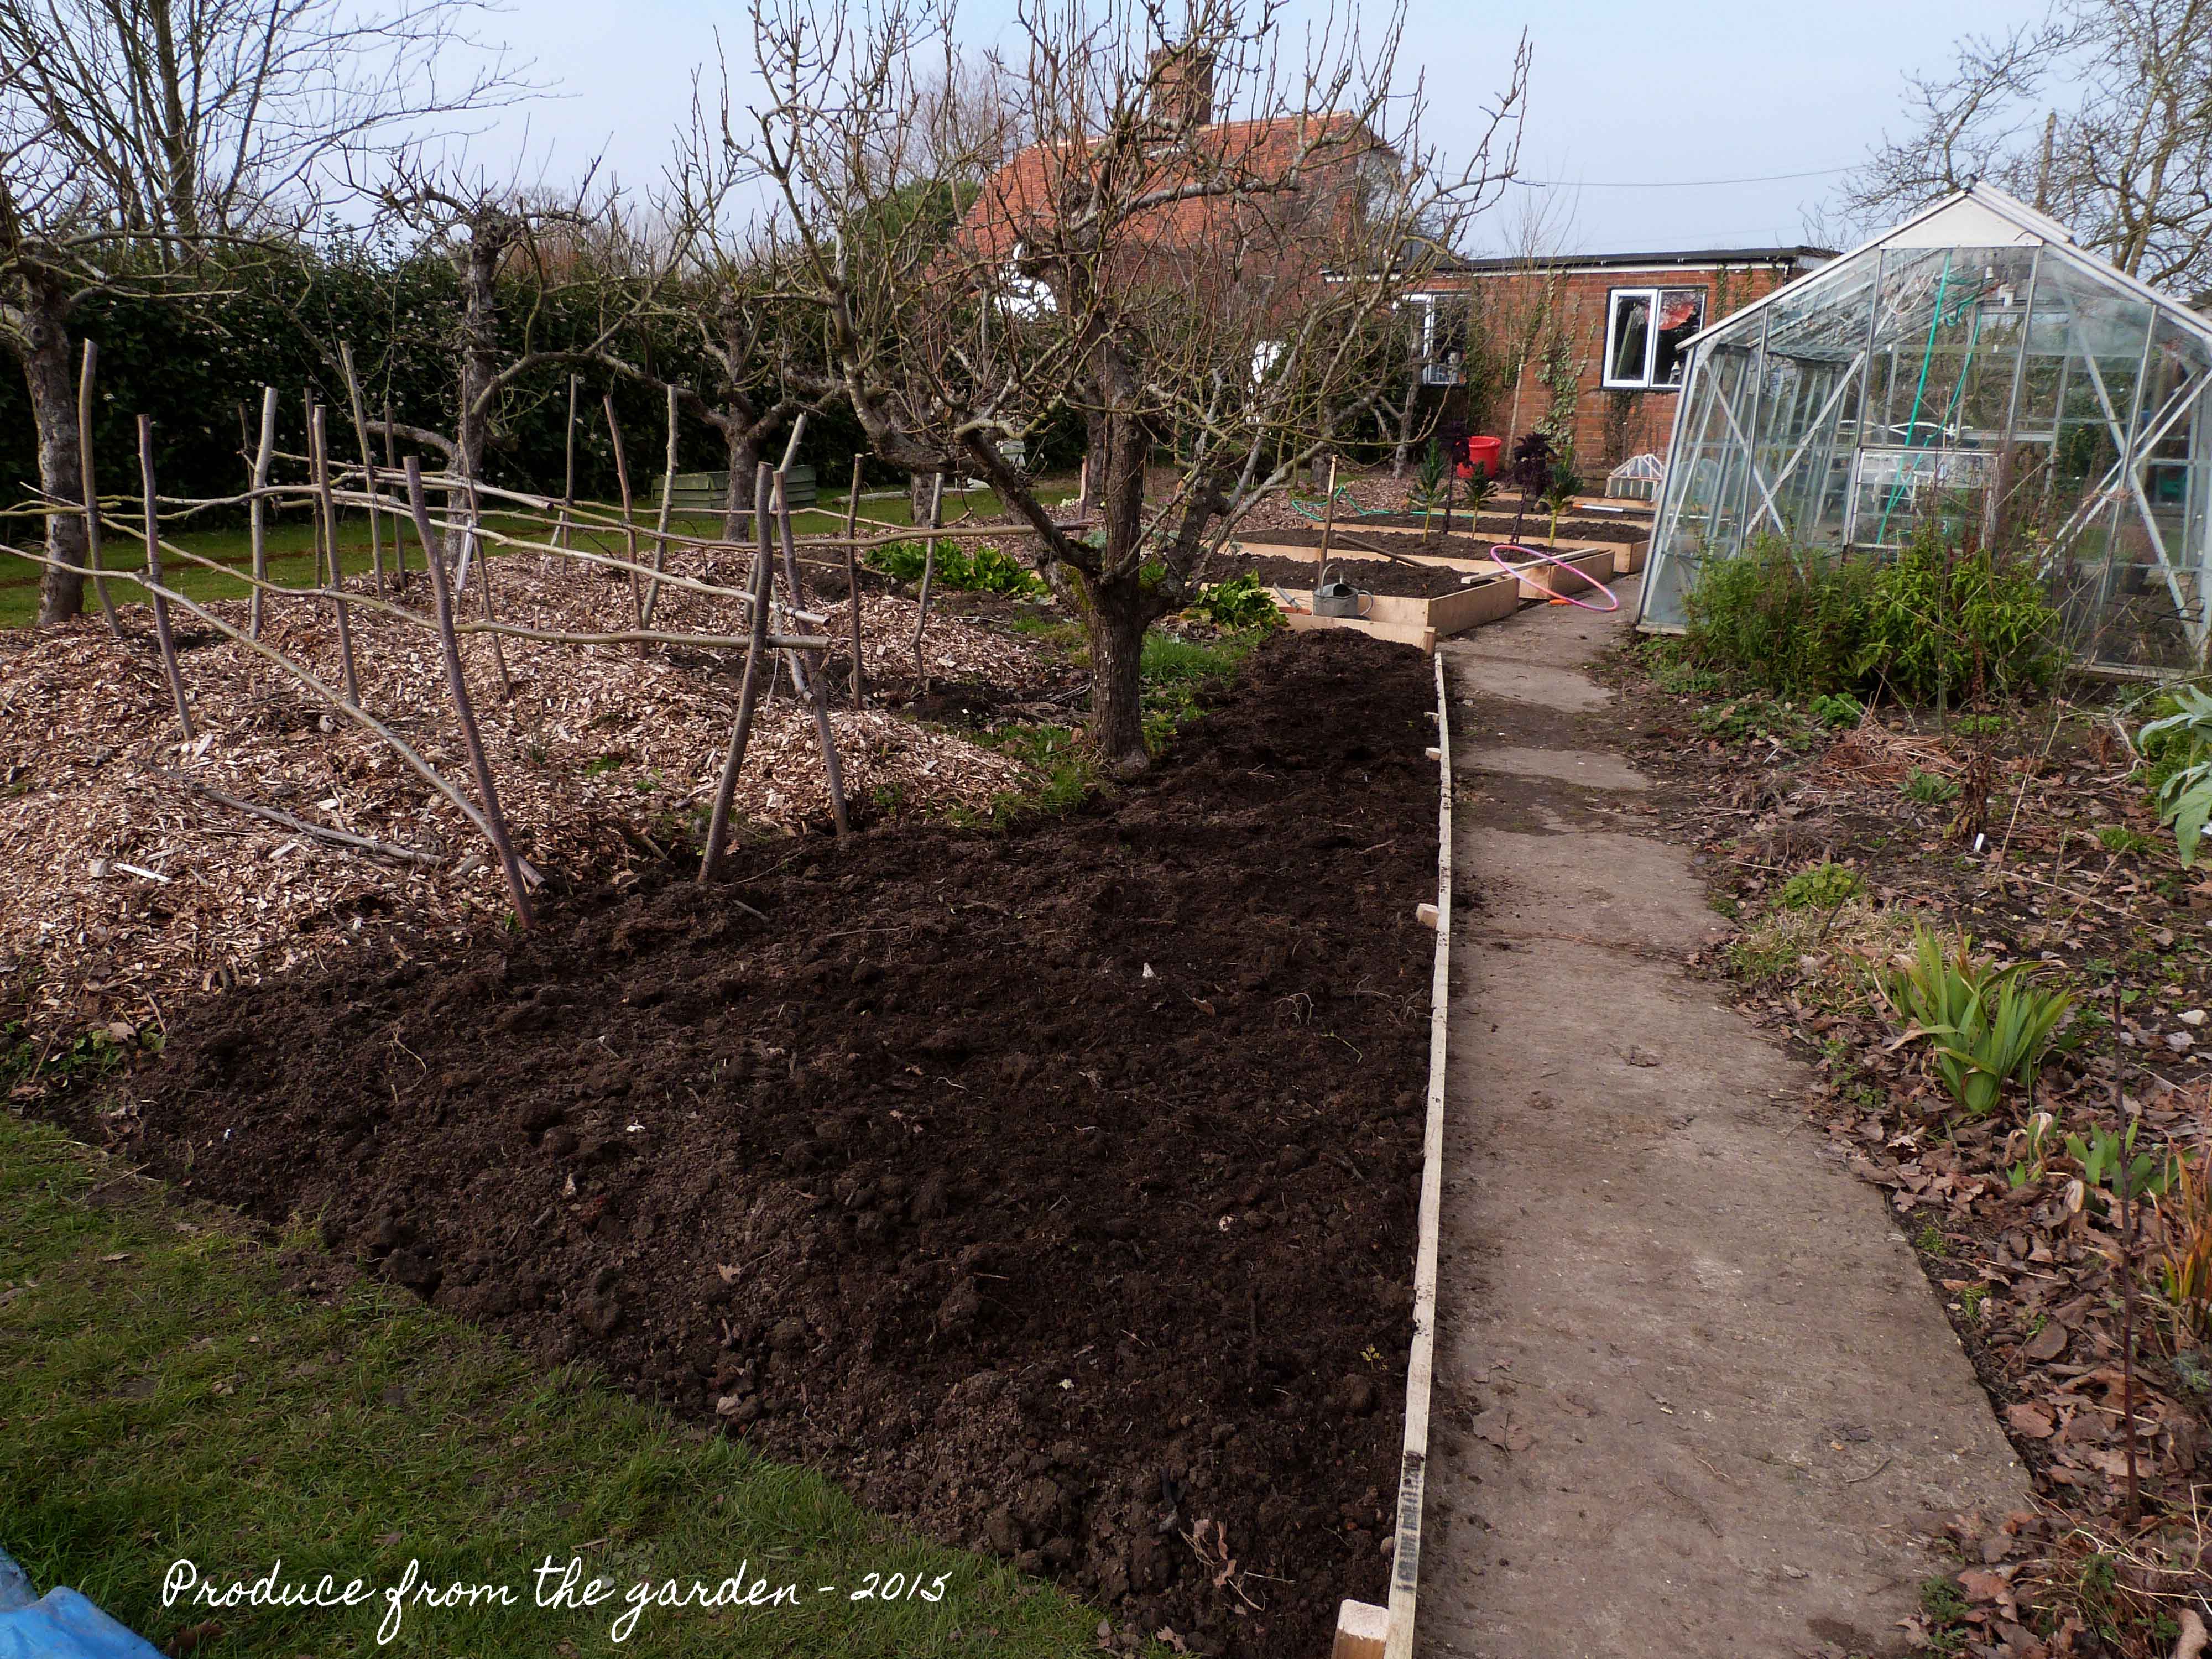
After our Easter lunch and Egg hunt, where I distressingly found mole hills, I settled into an afternoon of filling the new raised bed frame. 14 metres is a very long way. 14m x 1.2m is the size of my new cutting garden border. Sitting in my study surrounded by seed packets and planting plans, 14 metres was a fabulous idea. When it came to transporting soil and garden compost , 14 metres became a very long way. However, it was a beautiful sunny afternoon and all three of the kids turned up to help with their various garden accoutrements. I filled the bottom of the border with top soil left over from digging out the original veg patch, I then dusted this layer with fish blood and bone and quickly covered it with a layer of garden compost. Rolo my faithful hound loves fish blood and bone and if left alone will attempt to hoover it all up, resulting in a muddy mouth and in turn a muddy carpet indoors! In the coming days I will then sprinkle further fish, blood and bone (the more fertiliser my flowers get the better) over the compost and finish off with a layer of top soil.

The cutting garden border in progessThe border with the first layer of soil

cutting garden border, layers of top soil and compost
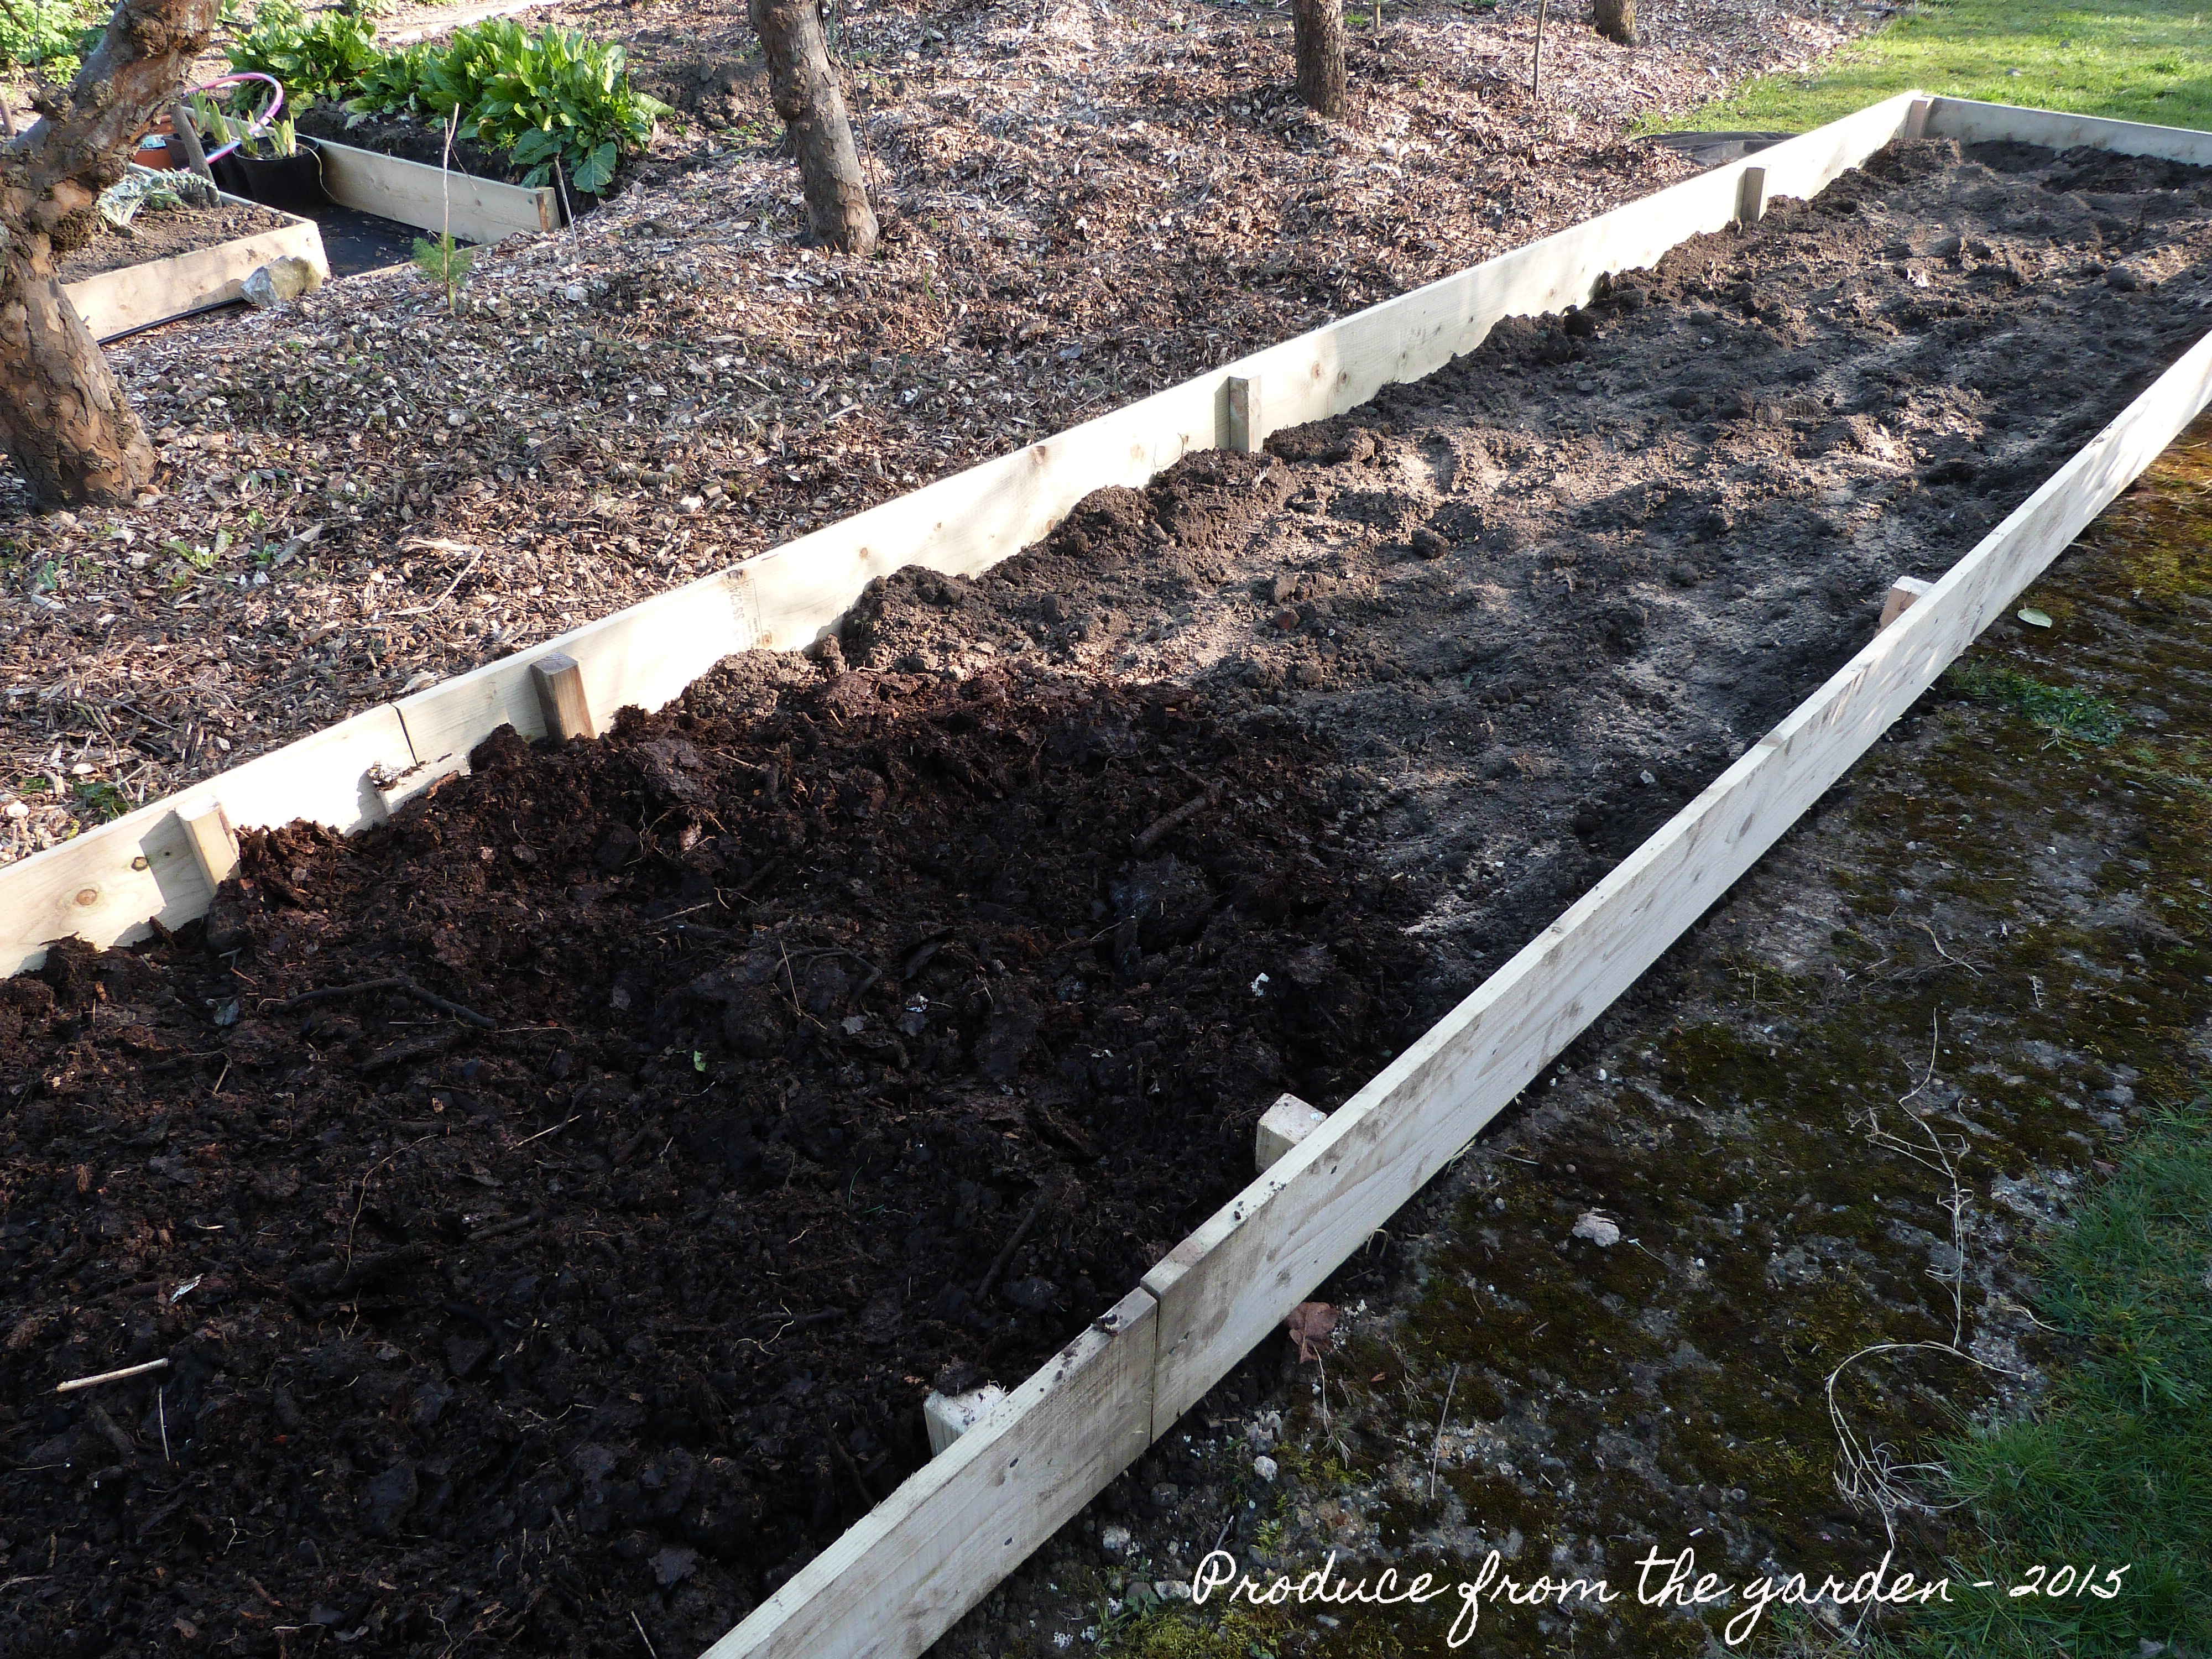
Top soil dusted with fish, blood and bone and the middle layer of garden compost

I have a theory behind this garden compost sandwich, in time the layers will mix together giving further enriched consistency to the soil, without the need to dig. I was keen to not mix in the garden compost on the top layer as it is quite course, I’m lucky to have well conditioned top soil which is the perfect structure for direct sowing hardy annual seeds. I’ll post completed pictures in the coming week.

Radish, Beetroot and Fences

Whenever I directly sow seed in March there is always doubt in my head whether they will appear. I was thrilled today to see the radish seedlings up in a clear row and some tiny purple shoots of the beetroot beginning to emerge. Baby seedlings are a reminder to sow further seeds to ensure a succesional crop.

Radish seedlingsRadish seedlings

I’ve been busy the last couple of days in another part of the garden planting a laurel hedge. We have a fence that has become very wobbly and is at the end of its days. I am not a great fan of fences unless made out of an interesting material like woven willow or hazel. To me they are dull and ugly, have a limited life span and can easily be flattened with a strong Winter wind. A hedge lasts a lifetime, looks fabulous, is a great backdrop for garden plants, clearly defines an area and the wildlife loves it. The only maintenance required is a quick clip once sometimes twice a year. The husband has shored up the fence, fingers crossed it will last long enough for the hedge to grow and securely replace it.

The Kitchen Garden in March

I have spent much of March digging, shovelling and then pushing a heavy wheel barrow filled with soil, compost and gravel from one area of the garden to another. I never expected to find this initial hard labour so gratifying, each time I work in the kitchen garden I see progress and my vision come closer to reality.

Writing this blog has highlighted to me what an amazing transition occurs in March. Winter ends and Spring does exactly as its name suggests. Daffodils, Violets, Muscari, Primulas, Crocus, are all giving bursts of colour. My Japanese Quince blossom looks exquisite. We’re still eating the perpetual spinach and kale, both solid mainstays of our winter kitchen garden with their cut and come again qualities. I have just sown purple sprouting broccoli (up there with asparagus as a vegetable delicacy) which hopefully we’ll get to enjoy next year in March.

Japanese Quince BlossomJapanese Quince Blossom


I have started to directly sow onions, beetroot, radish and turnips in the raised beds, then covering them with a cloche to keep the ground temperature up. The broad beans are coming on well and I’m looking forward to feasting on them with black pudding and mint in a month or so.

Early veg sown under a clocheThe Beetroot, Radish and Turnip directly sown, under a cloche

The tomatoes I planted in the greenhouse a week ago settled very quickly, I’m sure they’ve put on growth already. I have left space for my mini cucumber plants and basil which are not quite ready to leave their pots yet.

The wood has arrived for the cutting garden raised bed, I’ll start to build this in the next week and yet again get the wheel barrow out to fill it with soil and compost!

Muscari

Picked from the garden this afternoon. Very simple, a  favourite of mine during Spring. Muscari (Grape Hyacinth) and Daffodils tend to be my first cut flowers from the garden each year. From now on the house will look empty without vases of flowers scattered everywhere.Muscari or Grape Hyacinth

Tomato plants

All the tomato and tomatillo’s are planted in the green house. Garden twine tied and strung up, to give support as they grow. Just need to adjust the old watering system. The really good news is that now the tomato plants have moved out of the conservatory, I’ve freed up space for all the seedlings which are beginning to shoot through.

Tomato and Tomatillo plants
The Tomato and Tomatillo collection


Tomatoes and Tomitillo plants, planted inthe green house

I have a good feeling about the tomatoes this year, the plants seem to be growing fast, so fingers crossed for an early bumper crop. I should have a good variety of shapes and colours, they’ll look lovely in summer salads.

A Sunday Job

We have five Kentish cobnut trees which have been coppiced over the years, some much longer ago than others. My plan is to coppice one a year, after 5 years I should be ready to coppice again from the first one. I use hazel or chestnut stakes as bean poles, plant labels/markers, staking and supporting dahlias and the frame for netting in the cutting garden, supporting the stems. I far prefer the rustic look of coppiced hazel to bamboo canes, I banish them from my veg plot several years ago. So I was thrilled to have my own supply of hazel poles in the garden.

Coppicing needs to be carried out in February/March, before any new growth/leaves emerge. Each branch needs to be cut 5cm from the ground. I persuaded the husband that this would be a nice easy Sunday job to help me with. I choose the largest tree with the thickest branches.

Cobnut treeThe chosen Cobnut tree for coppicing

My initial enthusiasm for this job started to quash whilst sawing the branches. I counted 20 rings (20 years of growth) on one branch which was getting on for 10-15m high. All the branches seemed to be tangled at the top so once I’d sawn through, it was impossible to pull away from the tree, held firm by a web of branches up above. Many of the branches overhung the pond, I was in real danger of a soaking, not palatable for a Sunday morning in March! After 20 minutes I retreated to the house, looking for the husband who had agreed to help. As you can see he took over, mumbling under his breath that this was a job for a chain saw (our cheap chain saw has given up working and sits in a puddle of oil in the garage!). coppicing

Coppicing underway!

The husband successfully finished the not as easy as I first thought task, he managed to stay dry as well, bonus! Some of the stumps are a little taller than the suggested 5 cm, but it will just have to do. I look forward to seeing the first years growth emerge this year.

The coppiced cobnut

Coppicing complete

A productive mornings work resulted in poles and peas sticks for the kitchen garden, a good load of logs ready to be seasoned for next year and label stakes. I saw this clever labelling idea on Pinterest, it’s perfect as my small plastic labels would be redistributed around the garden by my darling children, I would never remember what I’ve sown and where. The new labelled stakes look great and fit in with the rest of the kitchen garden.

hazel stakesThe produce!

Stake labels The stake labels

For those of you who have been thinking about the lovely cobnut harvest we must get, sadly last year we failed and I fear that will always be the case, the squirrels get there first. I do love the idea of nuts from the garden on the table at Christmas.

Enlarging my dahlia bed

Landscaping the kitchen garden continues, veg beds 1-5 are built and the greenhouse ready. I still need to build veg beds 6-8 and the cutting garden borders. The wood is ready for the veg beds but I’m stalled. Currently the area is taken up as a nursery bed, containing the herbaceous plant collection I insisted on bringing from my old garden. It will be a month before their final home has finished being de-weeded, dug over and composted. I’m unable to get on with the cutting garden as I don’t have the wood; my Father is very kindly supplying this as my birthday present, although he did raise his eyebrows when he asked what I wanted. So in the meantime I am trying to complete all the smaller jobs, such as making gravel paths between the veg beds, clearing an area at the back of the garage for a log store, tidying up and enlarging the dahlia bed.

Dahlia bed before

As you can see in the picture, the dahlias are under the mounds of wood chip, I’ll be moving those in the next couple of weeks. The Dahlia bed extension started by removing the turf, I then dug over the compacted soil and added many wheel barrows of compost. The compost comes from the previous owner’s compost heap.

compost heap

Whilst digging out the compost I found many items of rusted iron, I presume these were put there on purpose to add iron to the compost.

Iron!

During this time my hairy gardening assistants attention was in a hedge, he was stood absolutely still with his tail wagging for over 15 minutes. No doubt he was intimidating some poor bird, so I put a stop to that game.

Spinone in Hedge

Border dug, I put in some wooden batons to edge the path, and eventually it will be gravel. I just need to finish weeding the rest of the dahlia bed, but that can wait for another day.

dahlia bed after

These tiny, delicate, pale daffodils have popped up under the plum tree; they brighten up a cloudy overcast day.

daffodil

Sowing Seeds

Seed sowing and potting on occurs in my conservatory attached to the house, a luxury as I can just nip in, sow a few seeds, water, or just check on progress, when I have a moment. My seedlings get far greater care and the resulting plants are stronger than when I used to trek to the greenhouse. My guilty pleasure is sitting at the potting table in my pyjamas on a Sunday morning!

ConservatoryConservatory, home to seedlings and precious plants

Potting tableMy potting table

In February I lay out all my old and new seed packets. The feeling takes me back to being a child, the excited anticipation of playing with a new toy. I then select the ‘must haves’ and ‘maybes’ (sadly, time and space prevent me from sowing them all). However, the ‘maybes’ always seem to become ‘must haves’! Over the years I have learnt a few techniques to compensate for this.

  • Unless you are a nursery, NEVER sow your seeds in a A4/A5 sized seed tray. You’ll end up using an excessive amount of seeds, hundreds of seedlings will appear, you’ll end up potting on far more than you need, taking up valuable space. Then you go through the tough bit, having to discard the superfluous seedlings on the compost heap. The SOLUTION, use a small plant pot and sow twice the number of seeds that you want. So if I want 8 cosmos plants I’ll sow 16 seeds, a few won’t germinate, a few plants will be given to friends and family and you’ll end up planting up 10 or so plants in the garden.
  • Pop your sown plant pots in a propagator. It really aids and speeds up germination, some seeds will be up in days. This all helps with the time pressure.

P1030161 (4)The propagator

  • Be ready to pot on your seedlings when leaves 3 & 4 the ‘true’ leaves start to form. This happens quite quickly and space is needed for the baby plants to thrive. A chopstick is essential equipment; firstly use it to make a hole in potted compost, ready for the seedling to be transferred into it. Then tip all the seedlings out of their original pot, hold onto their cotyledons (first leaves)and prise the seedlings apart with the chopstick, then dropping them into their new hole. Lightly firm in. Then all that’s required is watering until they’re ready to go out.

PropagatorBasil seedlings

If you’re interested my final (I promise myself) 2015 seed list is below. It’s split into veg, cut flowers and RHS seeds (although I’ve been a member for more than 15 years, this is the first time I’ve taken advantage of their seed offers to members). Some seeds will be direct sown helping with the space issue! More on what I’m growing in future posts.

Veg Seeds

Beetroot Boltardy                           Courgette Atena Polka

Courgette All Green Bush             Courgette Early Gem F1

Courgette San Pasquale                Cucumber Cucino F1

Winter Squash Butternut             Halloween pumpkin

Onion Long red Florence             Carrots

Chilli Ceyenne                                Chilli Ring of Fire

Chilli Serano                                  Radish French Breakfast

Tomatillo Verde                            Tomato Gardener’s Delight

Tomato Sungold F1                      Tomato Black Krim

Tomato Super Marmande          Tomato Balconi yellow

Tomato Money maker                 Dwarf French Bean Annabel

Dwarf French Bean Safari          Runner Bean Enorma

Broadbean Imperial green long  Broadbean Aquadulce Claudia

Borlotti Bean                                Mangetout

Broccoli red arrow                      Turnip

Swede                                            Kale – Cavolo Nero

Kale – Redbor                             Perpetual Spinach

Mizuna                                         Rocket

Large Lettuce                              Salad bowl red

Lettuce ‘Reine de glace              Garlic

Thai Basil                                     Basil

Dill                                                Flat leaf Parsley


Cut Flower Seeds

Antirrhinum White Admiral F1    Sunflower Earth Walker

Sunflower Red Sun                         Sweet William Auricula Eyed Mixed

Cosmos Purity                                   Cosmos Rubenia

White foxglove                                  Wall flower Vulcan

Viola Bowles Black                           Sweet william seed

Larkspar Dark Blue                          Bupleurum Rotundifolium

Bells of Ireland                                  Nigella white and pink and blue

Tithonia                                               Ammi

Zinnia Envy                                        Calendula Indian prince

Malope                                                 Black ball cornflower

RHS Seeds

Stchys Officinalis                              fritillaria meleagris

Gladiolus italicus                               Meconopsis napaulensis

Pulsatilla Vulgaris                             Allium Cristophii

Silene laciniata subsp. Greggii     primula sieboldii

Thalictrum delavayi                         camassia leichtlinii

agapanthus mixed                           crocus tommasinianus

Bird Boxes

During the February school half term, I spent a lovely afternoon with my three children and friends at Sissinghurst Castle, making bird boxes. We’ve put them up on trees in the garden with hope that we’ll have nesting birds this Spring. I’m not holding my breath! I adore the bird boxes, my children made them. But, they’re not quite the inviting bird sanctuary I thought they’d be. If any prospective parents are brave enough to take one on as their new home, I fear for their delinquent offspring.

It has even been suggested that if someone wonders into the garden by mistake they’ll leave quick thinking they’ve come across a weird religious cult.

Nest box 3

Nest box 2

Nest box 1


Dahlias

I love dahlias. I first came across them in the Dahlia Garden at Mendocino Coast Botanical Gardens, North California in 2005. My passion for them was instant, each flower a beautiful sculpture, the vast range of colour and shape just looked stunning en masse. It became the highlight of my California holiday, an enlightening moment. The Big Sur or El Capitan in Yosemite paled into insignificance. In the past I’d steered well clear of what I considered to be fuddy-duddy, complicated, troublesome, blowsy flowers. Now they are my slightly obsessive garden priority. How on earth can a girl live without dahlias!

Dahlias

With a little bit of love and attention a dahlia will pay you back 10 fold and more. I fill the house with them from June to the last frosts in November. I tend to leave my dahlia tubers in the ground over winter. After the first frost I cut them back and cover them with a 30cm mulch of leaf mould, compost, wood chip or whatever I’ve got to hand. At the end of March I’ll take off the mound of mulch, feed with fish, blood and bone, and allow the dahlias to shoot through in their own time. If you want to move dahlias or divide them, the tubers need to be dug up after the first frost, cleaned and left to dry for a couple of days in a greenhouse. Then cover with a dusting of compost and store in a dry shed or garage where they won’t freeze. Come March pot them up, and let them grow on in a greenhouse or conservatory, by May when there is no frost risk, plant them into the garden.

Most of the tubers I’ve dug up in the past have survived the winter, sadly my all time favourite ‘Thomas A Edison’ rotted to a mush when we moved. The husband, who must listen to some of my witterings, gave me replacement tubers for Christmas. A lovely friend who has a Brewery making the most amazing ale in South West France (www.brasserieduquercorb.com), treated me to Dahlia ‘Cafe au Lait’, a variety I’d coveted for some time. So I’ve been in my conservatory (home to all seed sowing and precious plants) potting up my new dahlias. I’m excited to see the blooms in a few months.

Dahlia tuberCafe au Lait tuber ready to be potted up.